


✏️Introduction
Learn how to create and manage Tribepad Manage user accounts, including configuring custom fields and assigning hierarchy permissions to ensure users have the appropriate access.
🔗 See our Creating & Editing an ATS User On Manage guide here.
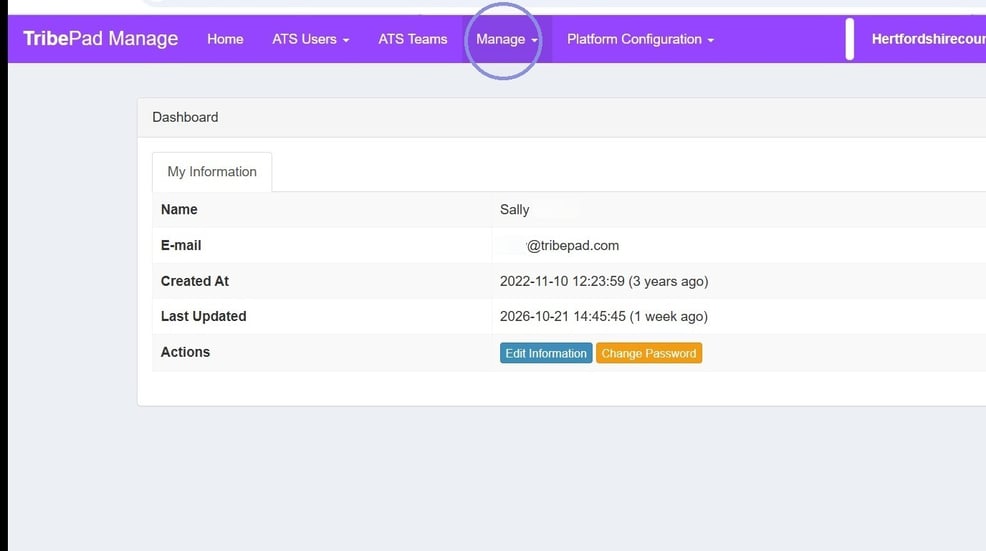
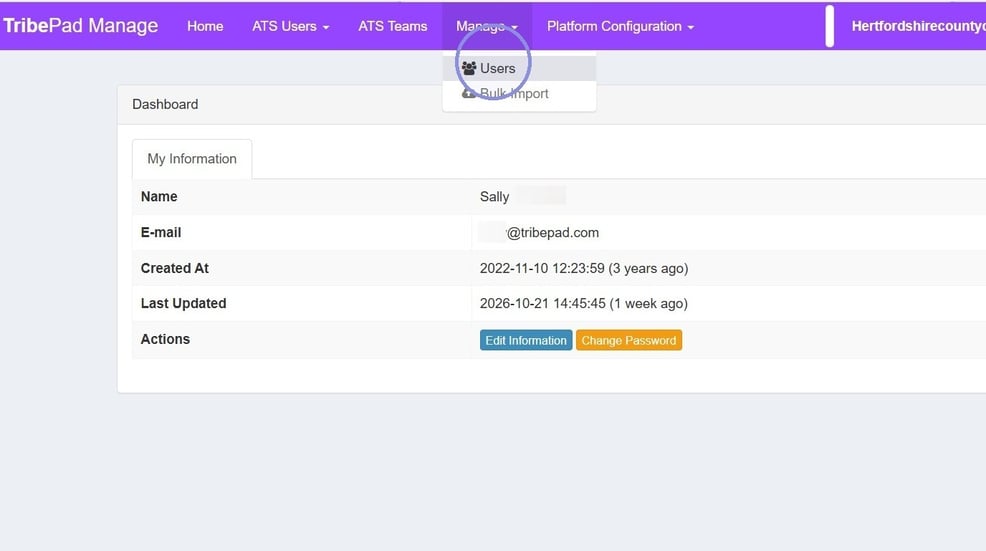
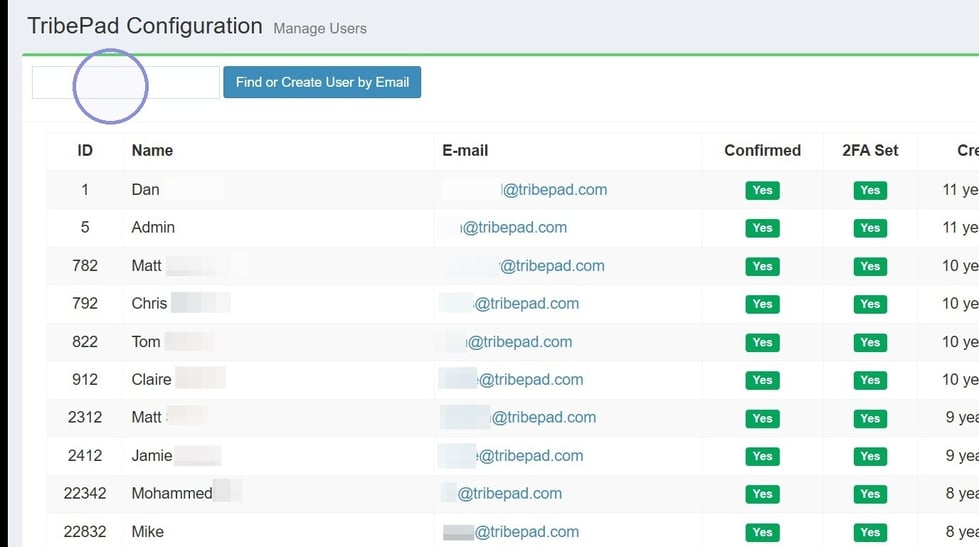
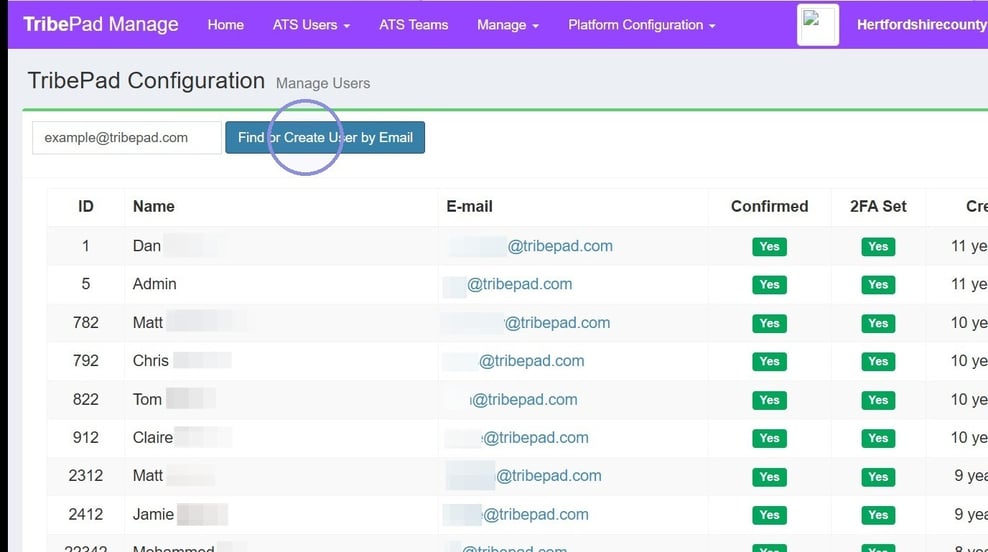
📝 User Details
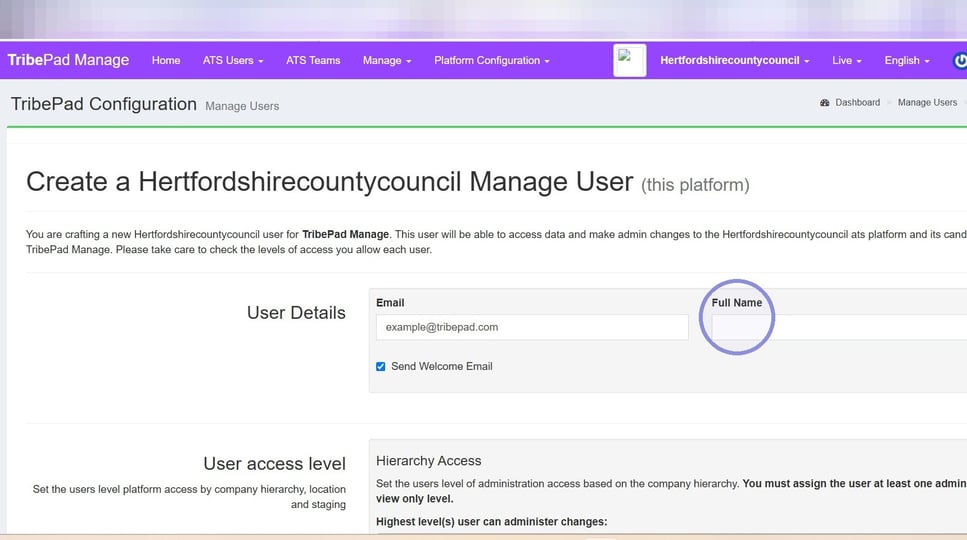
The email address you have just entered will now be pre-populated for you. Enter the user's full name on the right-hand side.
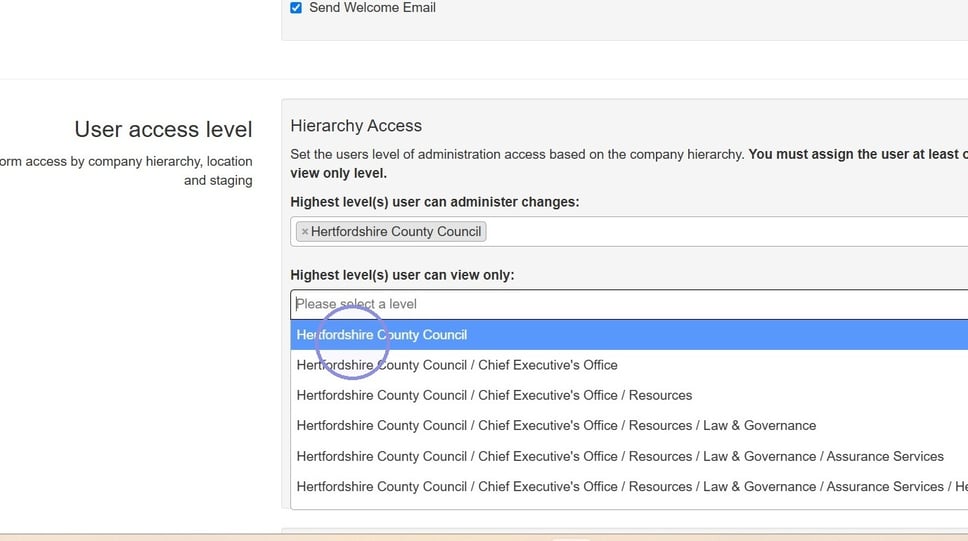
Now you will now need to select the relevant level of Hierarchy you would like your user to be able to access. (If your organisation uses hierarchy.)
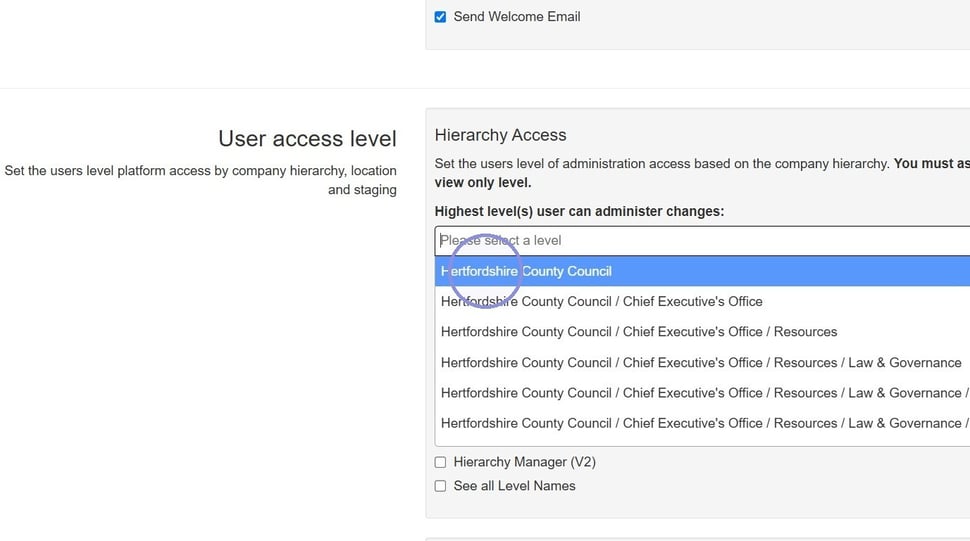
And the same for 'view-only' access (if relevant).
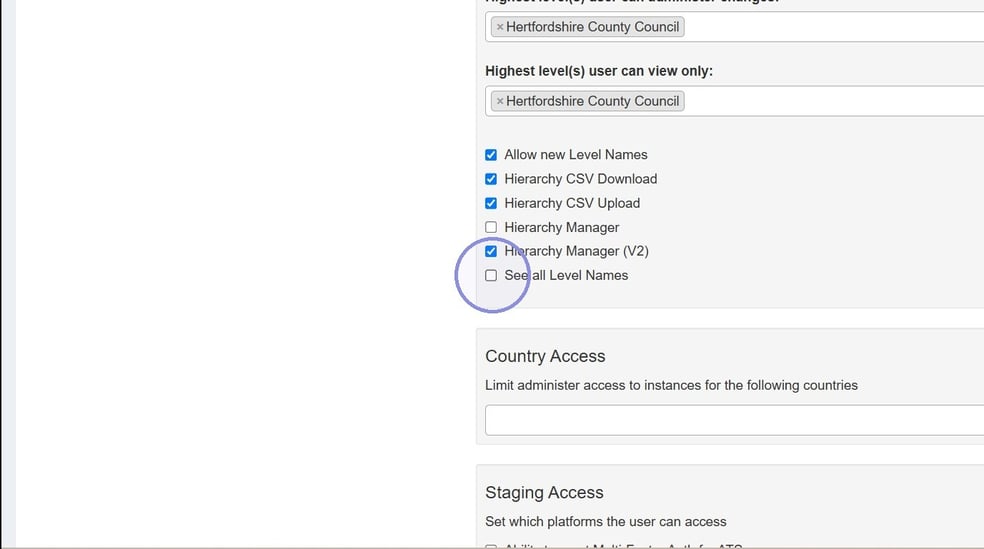
Select all options you would like your user to be able to complete.
(All options should be ticked here, apart from 'Hierarchy Manager'.)
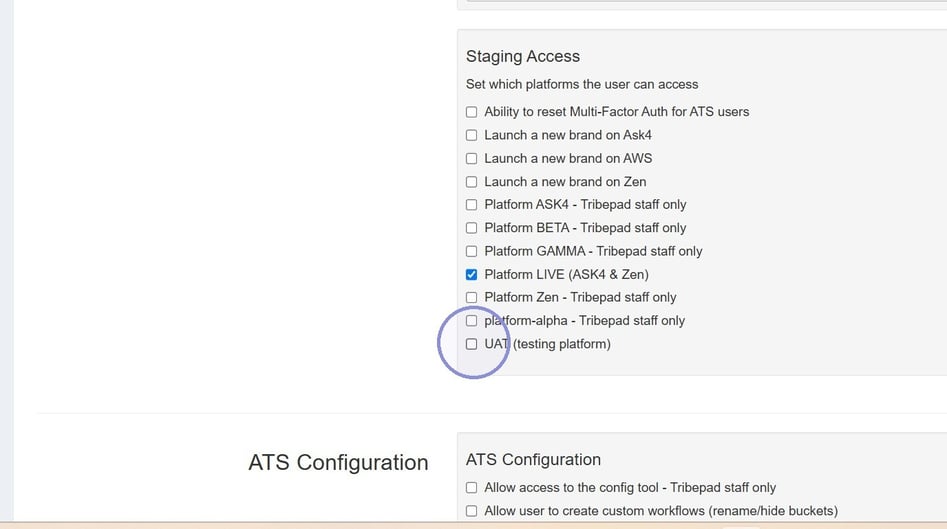
Select the platform versions the user requires access to.

No other platform versions need to be selected.

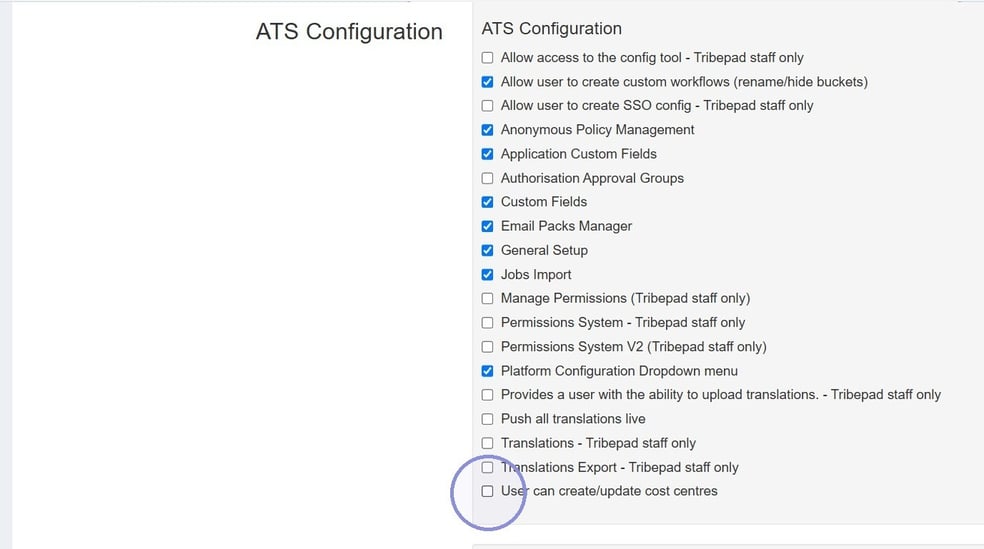
Under the 'ATS Configuration' section, you only need to select the following:
- Anonymous Policy Management
- Application Custom Fields
- Custom Fields
- Email Packs Manager
- GeneralSetup
- Jobs Import
- Platform Configuration Dropdown menu
- User can create / update cost centres
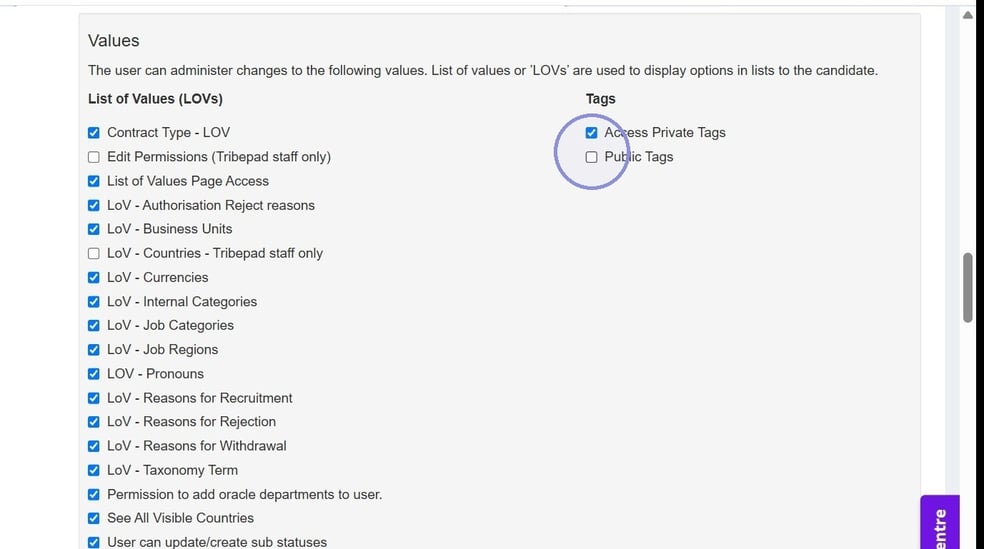
Under the 'Values' section, please select all options, apart from 'Tribepad staff only' options.
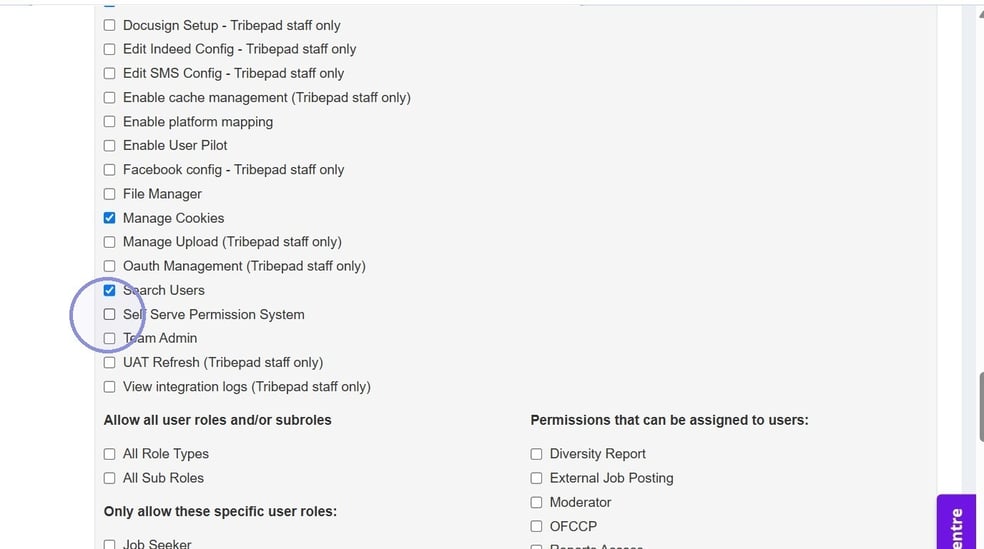
Under the 'ATS Users' section, you only need to select:
- ATS Users Dropdown menu
- Authorisation Reject Reason
- Cancel ATS Users Deletion
- Create Users
- Delete all hierarchy data
- Delete ATS Users
- Manage Cookies
- Search Users
- Self Serve Permission System
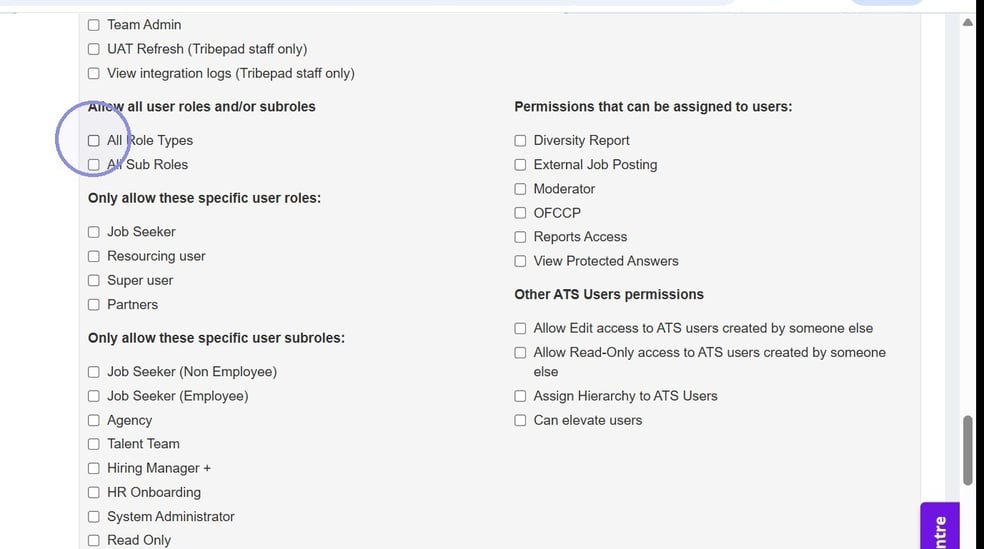
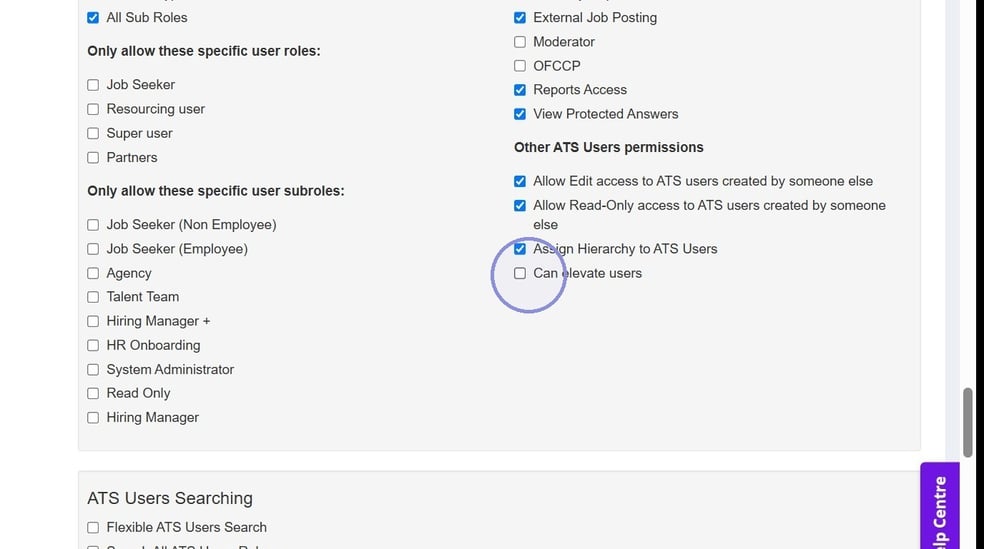
Select all roles and / or subroles you wish your user to have access to. You can select 'All' or choose the individual roles below if you prefer.
On the right-hand side, select the permissions that can be assigned to users. None of these are mandatory, so please choose what you require for the individual.
- Diversity report
- External Job Posting
- Reports Access
- View Protected Answers

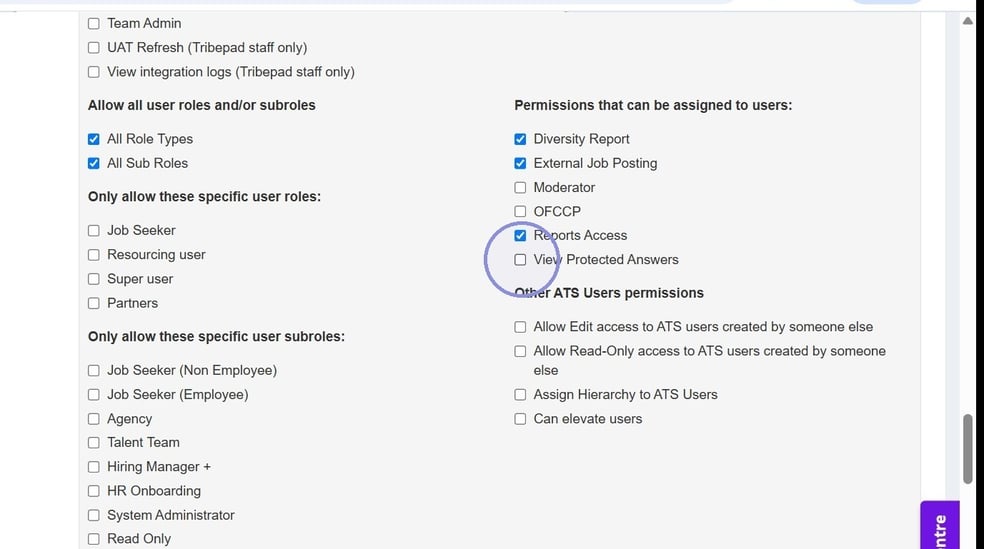
Further down, if you would like your user to have access to these permissions, please select as required.
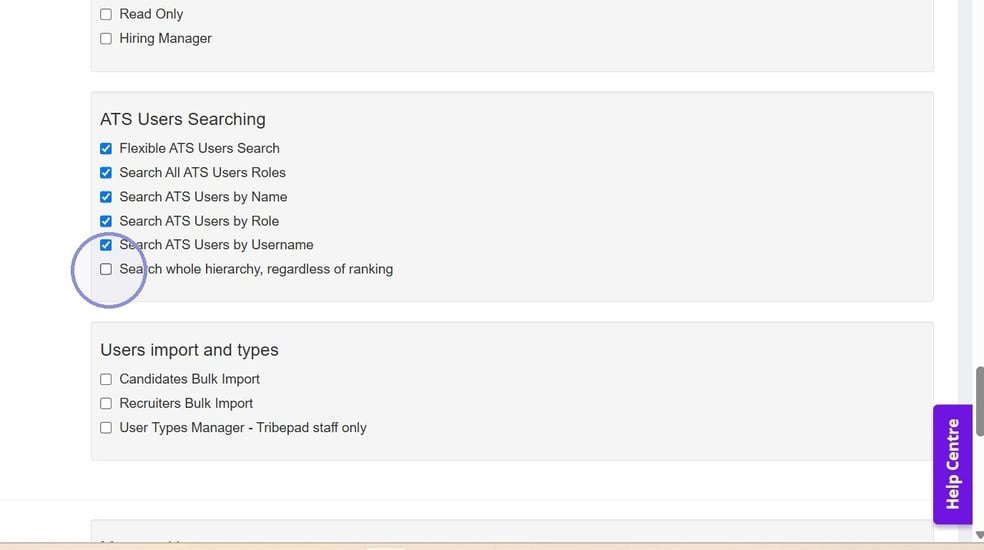
Select how you would like your user to be able to search for other users.
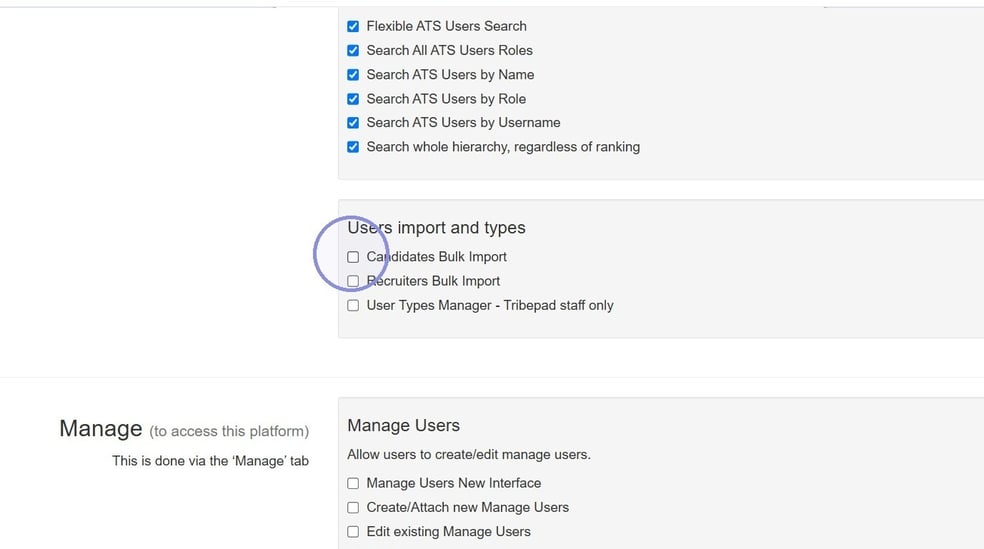
Under 'Users import and types', please only select
- Candidates Bulk Import
- Recruiters Bulk Import
🔑 Save & Verify
'Manage Users' gives your user the ability to add other Manage users.
Please only select these options if you would like your user to be able to add other people.
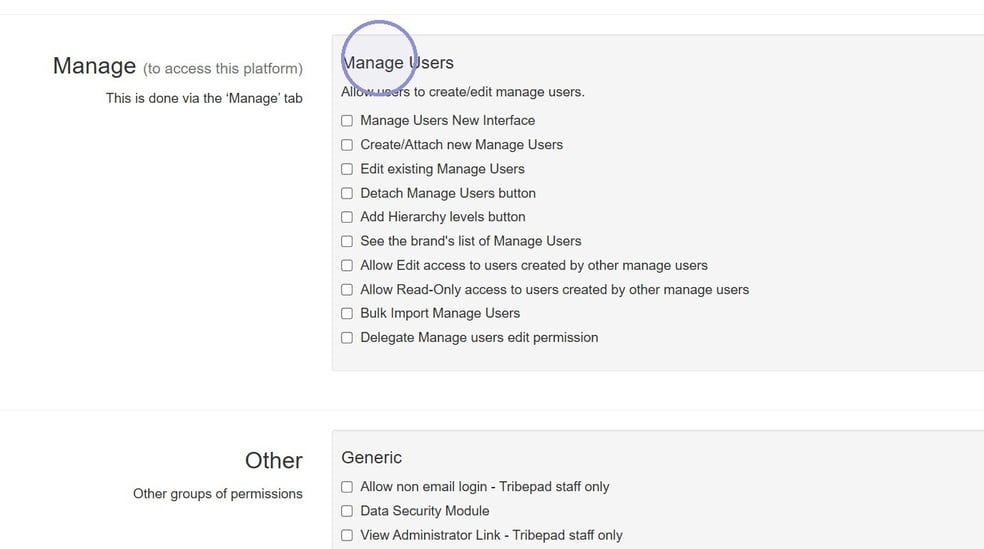
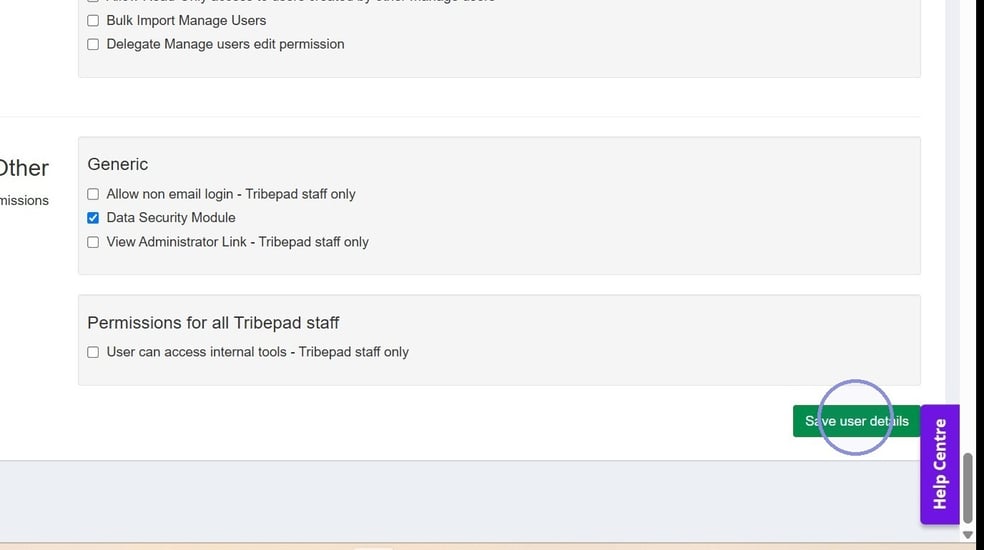
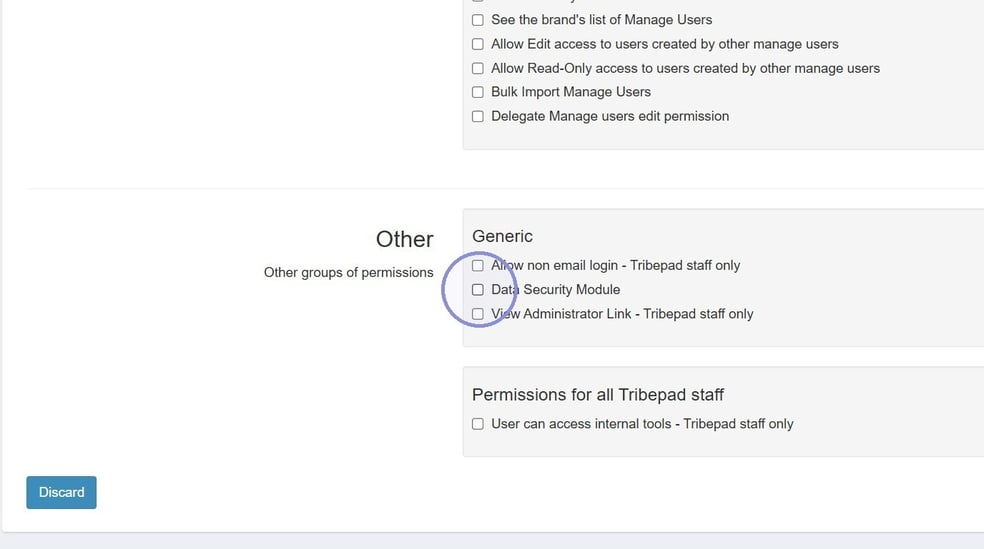
Under the 'Other' section, please only select the 'Data Security Module'.
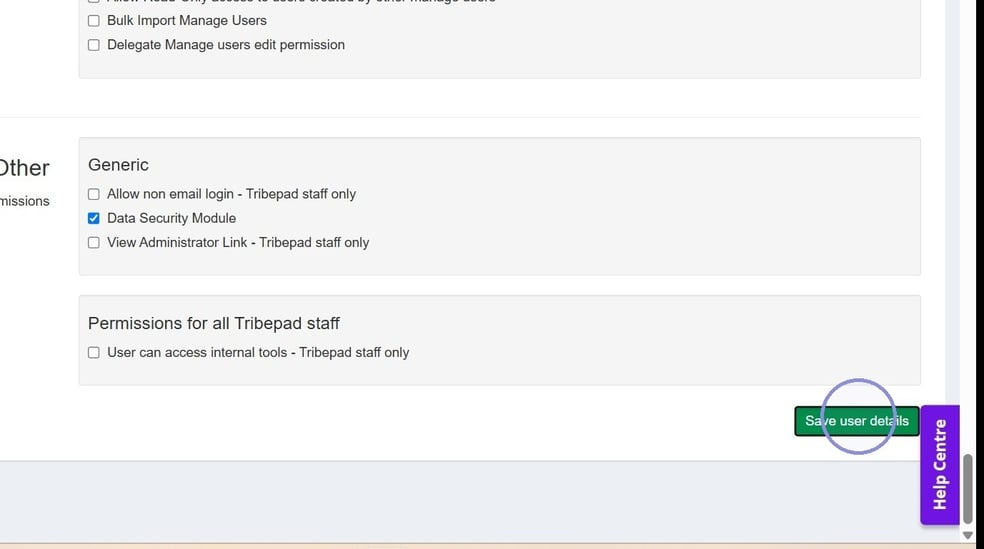
Once you are happy with all selections, please select 'Save User details'.
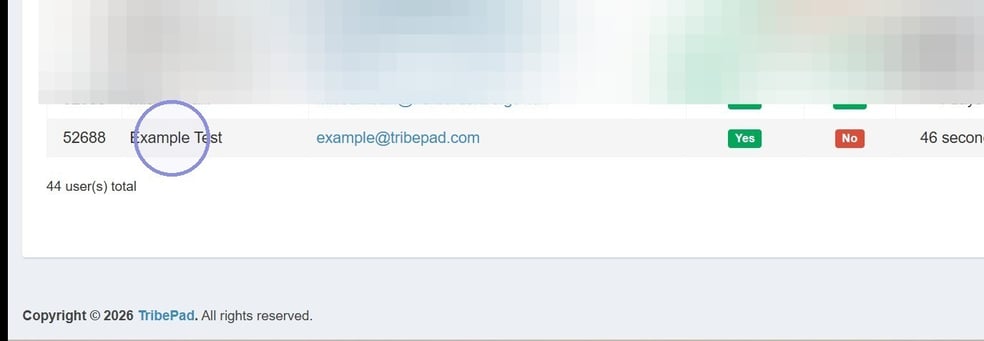
Your screen will refresh and you will see your new account has been created. (They will be added to the bottom of the list so you may need to select a different page number to see the new account.)
If you wish to edit the user's Manage account for whatever reason, select the edit icon for the user.
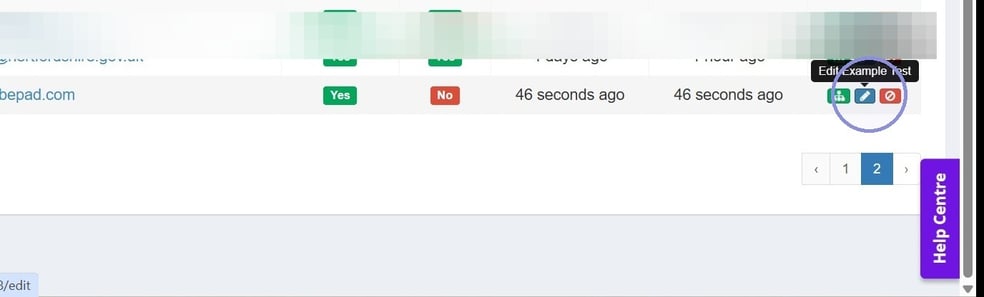
Once you have made the relevant changes and select 'Save user details' again at the bottom of the screen.