Find out how to use our new Cookie Management interface
Cookies are small text files that websites send to a user's device, which the browser stores and sends back to the server on subsequent visits. Their primary purpose is to remember information about the user, such as login status, preferences, and contents of shopping carts, enabling a more personalized and efficient web browsing experience.
Different types of cookies exist:
- 'Session' cookies - are temporary and deleted after the browser is closed
- 'Persistent' cookies - remain until they expire or are deleted by the user
- 'Required' cookies - essential for functionality of the ATS
Our new Cookie update allows you to specify which cookies will be presented to your candidates and ATS users, and allows them to consent to specific ones. This will not affect the required cookies set as they can be set without the user opting into them.
The new Cookie Interface is free of charge, but must be turned on by Tribepad if you wish to use it.
If this is something you are interested in, please speak to your Tribepad Account Manager.
Setting up Cookies on Manage
In order to set up bespoke Cookies, you will first need to create this in Manage.
Go to Platform Configuration > Select the ‘Manage Cookies’ option from the drop-down menu:
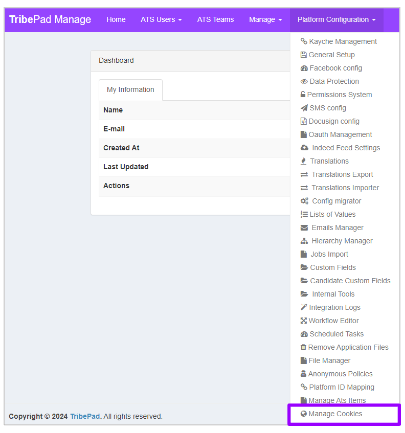
You will be presented with a screen like this:

- Select ‘Add cookie category’.
You will then be presented with a pop-up screen where you can create your cookie category:
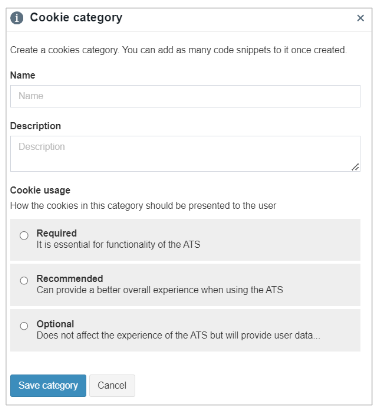
- Give it a name
- Add a description
- Choose how the cookies should be presented to the ATS user:
- Are they 'Required'?
- Should they be 'Recommended'?
- Are they 'Optional'?
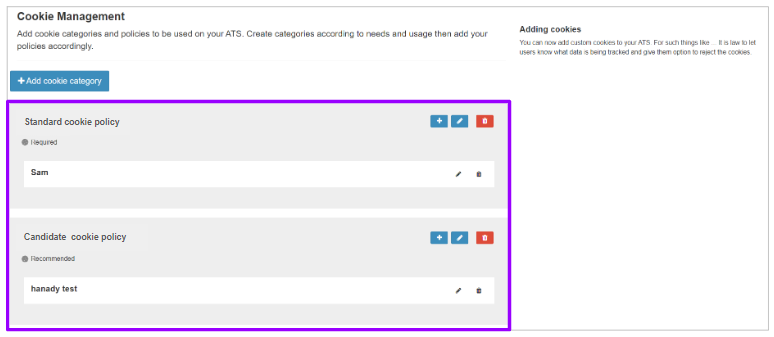
Once you have saved your category, your screen will refresh and you will see something like this:
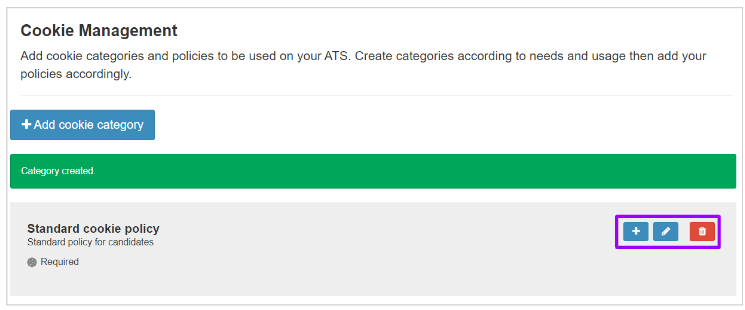
- From here, you can add a policy to the category, edit the specific category and also delete it, using the icons on the right-hand side.
When you choose to add a policy to the category (using the ‘+’ symbol), you will be presented with another pop-up on screen:
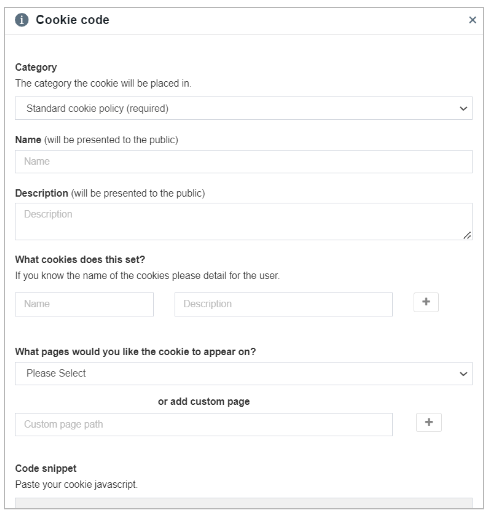
From this page you can:
- Add new services under the cookie categories
- Define which pages to show your snippet on
- Define which cookies a snippet loads
- Add one javascript snippet to the code section.
The initial Label will be populated from the previous category page, but you can then add a Name, which is displayed to the public, and a description of the cookie:

You can also add in which cookies will be set by this policy, if you know the name of them, and also select where the cookie policy will appear on the ATS:
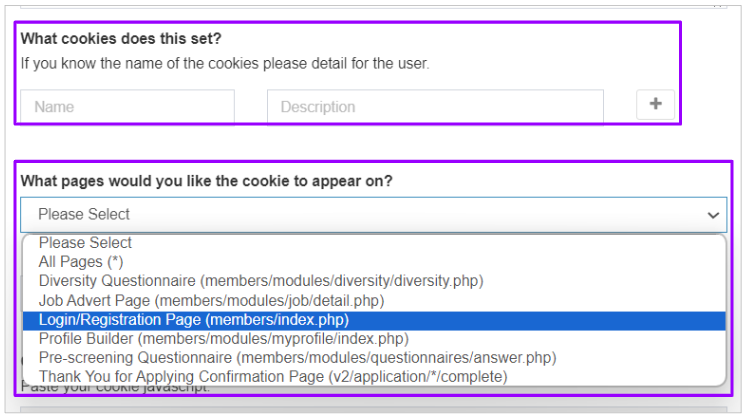
- For this example, we have chosen that the cookie will appear on the Login/Registration page.
Once you have selected a page, the screen will refresh and you will see this:
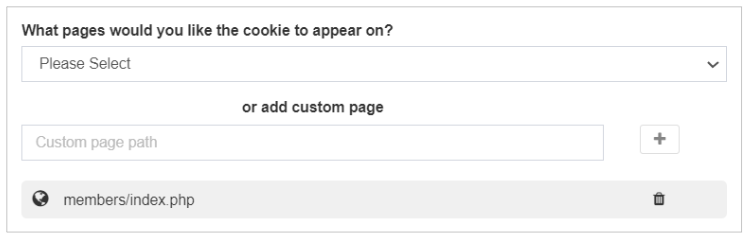
- You can choose to add additional pages at this point if you wish, or even add a custom page if not featured in the drop-down list.
Finally, you can enter any javascript code for the cookie.
- You will be able to get this from your IT team
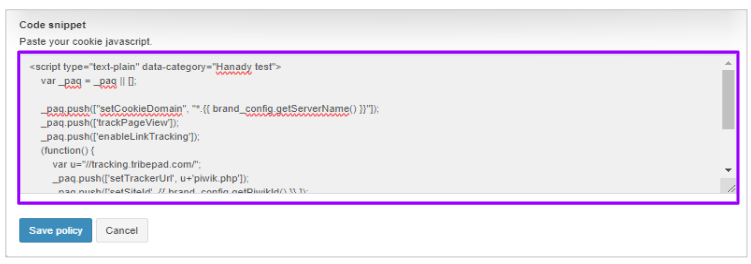
- Click ‘Save policy’ once you have added in the necessary information.
Once saved, your screen will refresh and you will see the different policies saved on the left-hand side:
Viewing the Cookies on the ATS
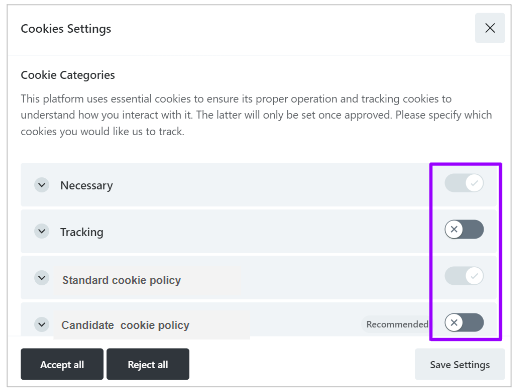
When the relevant Cookies have been applied to wherever you require in the ATS, you will see something that looks like this:
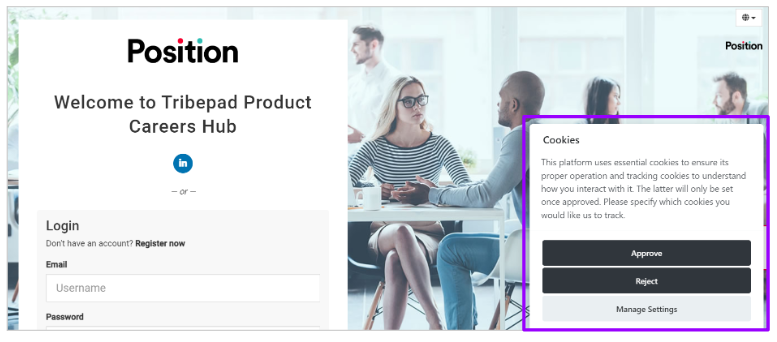
- As per our previous example, we chose for the Cookies to be available to manage on the Log in / Registration page.
Here, a candidate or ATS user can opt into or out of the cookies that they would like, and the rest do not get set unless marked as required.
By selecting ‘Manage Settings’, the user can select which ones they would like, or not, as required: