Find out how to manage your Custom Fields in the Manage Tool.
Check out this video on Custom Fields, or read on for a step-by-step guide:
What is a 'Custom Field'?
A Custom Field is a reportable field within the ATS that allows you to include information for specific processes within your organisation.
We cannot determine what these specific processes may be, so we have provided the tool to create your own fields to capture that information.
How do I access 'Custom Fields'?
Once you have logged int the Manage tool, select the 'Platform Configuration' menu and choose 'Custom Fields' from the drop-down menu:
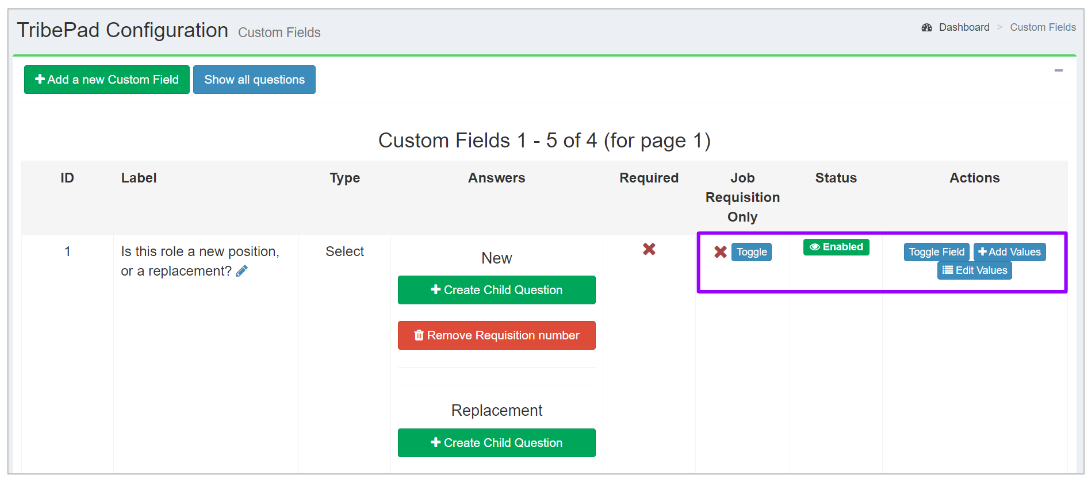
You will be presented with a screen similar to this:
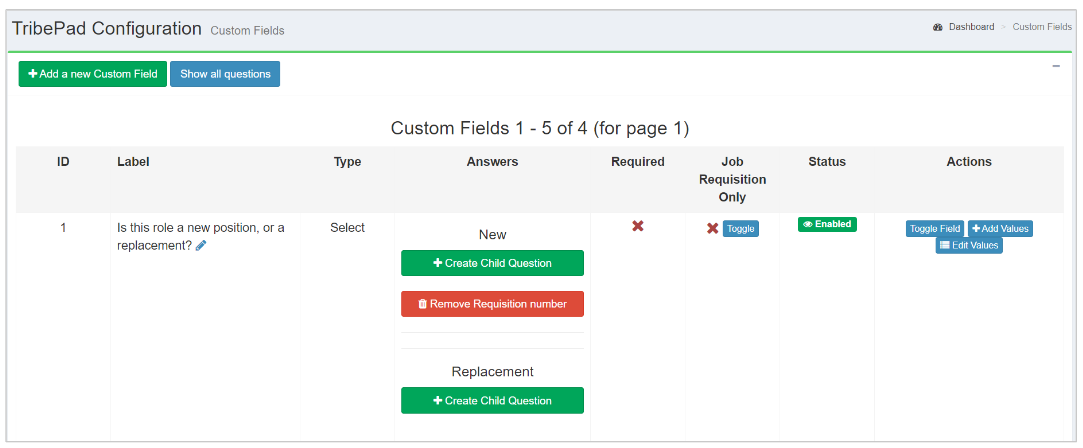
The headers at the top of the page show the following:
- The ID of the field - each field is given a unique identifier
- The label / name of the field
- The field type - you will see either 'Select' if multiple options are available for this question, or 'Text' if it is a free-text field
- The selectable answers (if applicable)
- If the field is mandatory ('Required')
- If the field is related to Job Requisition only
(Please note - this column will only show data if you have Job Requisition activated within your ATS) - The field's current status - you will see 'Enabled' (visible) or 'Disabled' (hidden) here
More on editing a Custom Field further down the page.
Adding a new Custom Field
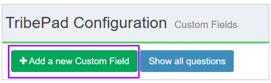
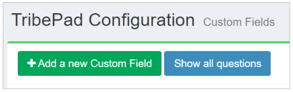
To add a new Custom Field, click the green button at the top of the left-hand side of the page - 'Add a new Custom Field'
This will open a pop-up window to create your new field:
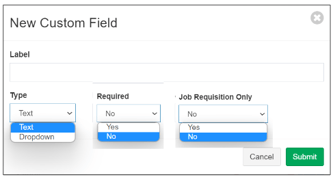
- Give your field a 'label' or name.
- Choose what type of field it will be - would you like it to be free text or a drop-down option
- Choose if this field is 'Required' (i.e. mandatory) - this refers to the Job Create process
Please note - this is the only time that you are able to determine if a Custom Field should be mandatory or not.
If you mark this incorrectly or need to amend later on, you will need to delete the incorrect field and add in a new one with this option enabled.
- Select if this field relates to Job Requisition only
(This option only requires completing if you have Job Requisition activated on your ATS.)
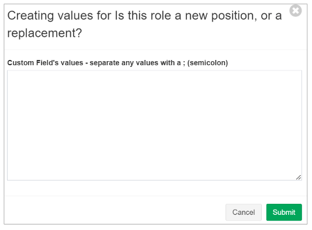
When creating a drop-down style field, you will be presented with an additional field to add your drop-down values. Values must be separated using a semicolon.
For example: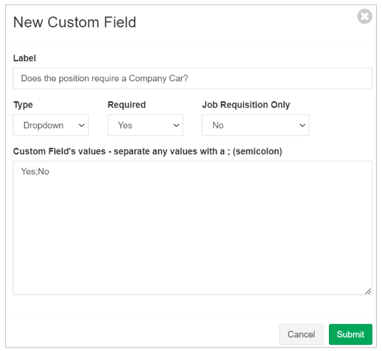
Once you are happy with your new field click 'Submit'. This will add your field to your field bank at the bottom of the page:
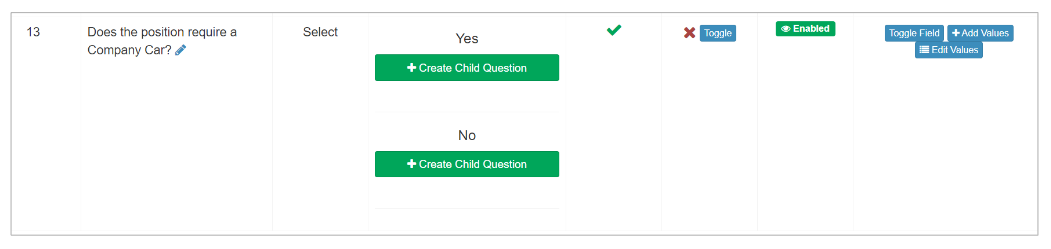
From here, you can create 'Child Questions' if required:
![]()
A 'Child Question' allows you to gain more information regarding the answer that has been selected.
For example, for the question asked above, "Does the position require a Company Car?", a child question stemming from the answer 'Yes', might be
"Please confirm level of car required"
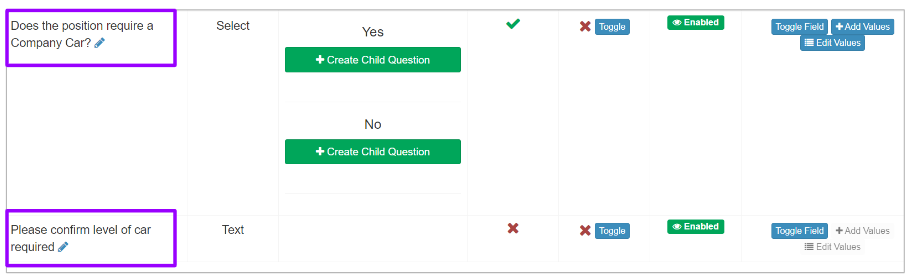
- You might wish this to be a free-text field rather than a drop-down option.
When you are creating a Child question, the answer that will be linked to it, must also be included in the Custom Field bank.
For example, both the question posed above - 'Does the position require a Company Car' - and the answer that you wish to link to that question - 'Please confirm level of car required' - must both be included in the Custom Field bank:
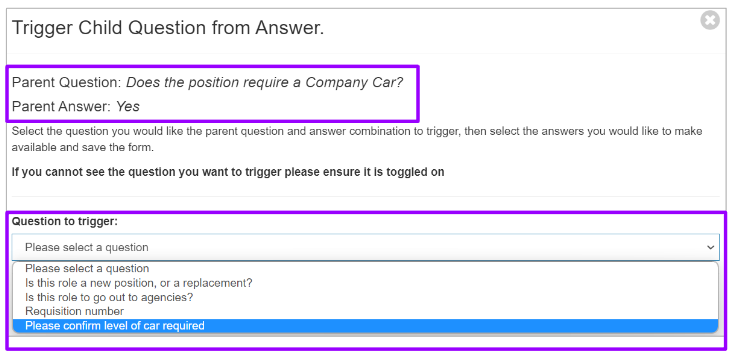
From here, if you select the 'Create Child Question' option, you can choose which question is to be triggered from the previous answer
- In this example, the previous (or 'Parent') answer would be 'Yes'
- The question to be triggered from this answer would be 'Please confirm level of car required':
In the example above, there are no drop-down values linked to the secondary question, but if there were, you are also able to determine which answers should be visible from that question.
For example:

- You should select all that you require from the list.
Once happy with your selection, click 'Save' in the bottom right-hand corner:
![]()
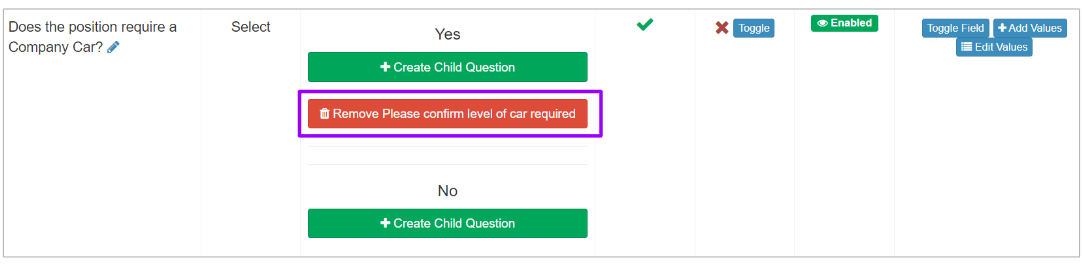
Once saved, you are able to manage the Child question from the Parent field:
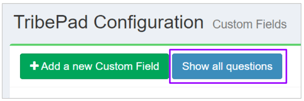
By default, the Custom Fields page will only show the active or 'Enabled' fields (i.e. fields that have been toggled 'on'):
If you wish to hide your Custom Field or 'Disable' it, simply select the 'Toggle field' option on the right-hand side of the page.
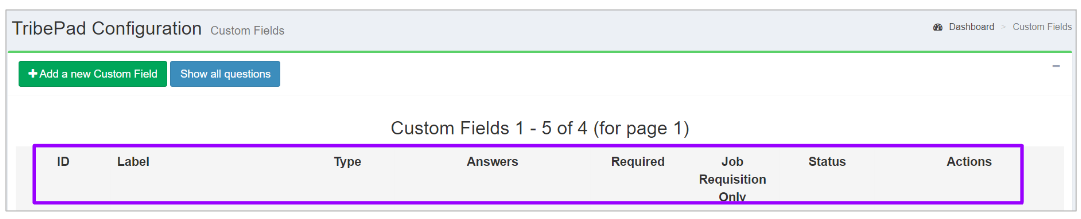
You can view all fields by clicking 'Show all questions' at the top of the page.
Editing an existing Custom Field
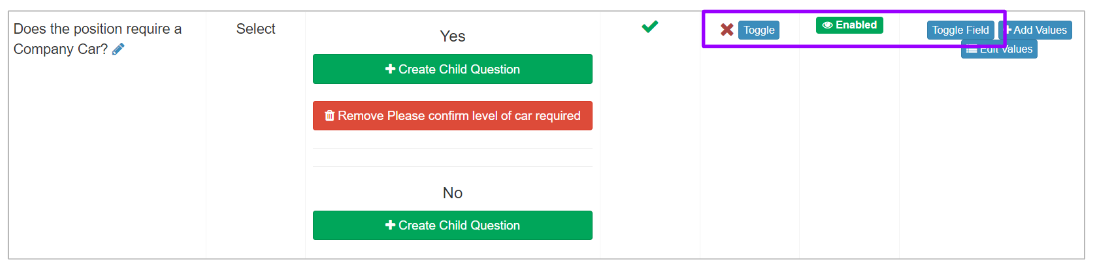
If you need to edit an existing Custom Field, you should locate the relevant Custom Field from your list and select one of the icons on the right-hand side:
If you are unable to locate the field you wish to edit, you may need to include all 'Disabled' fields as well. To access these, select this button at the top of the page:
Actions that you can perform on an existing Custom Field include:
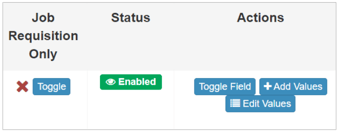
- Toggle Field
- This makes the field visible and available to be selected in the ATS
- Clicking this will change the status of your field
- Add Values
- This allows you to add new answers to your drop-down field
- You can add multiple values by separating them with a semicolon
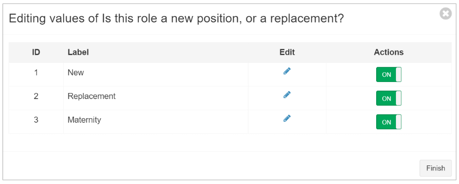
- Edit Values
- Edit the existing values on your drop-down field
- Click the pencil icon against a value you wish to change the label name
- Remove or add any existing values using the action toggle.