Learn how to create an onboarding template ready to incorporate into your recruitment process.
🎓Feature
Onboarding is an additional piece of software that can be included as part of your ATS.
If you are interested in using onboarding please speak to the main ATS lead within your organisation or your Account Manager at Tribepad.
Overview
A template is much like a filing system, it is created to house all of the different content that makes up your onboarding process.
How to create a template
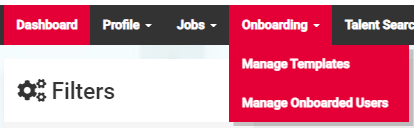
- Select Onboarding from the top navigation menu.
- Select Manage Templates.
You will be presented with the following page:
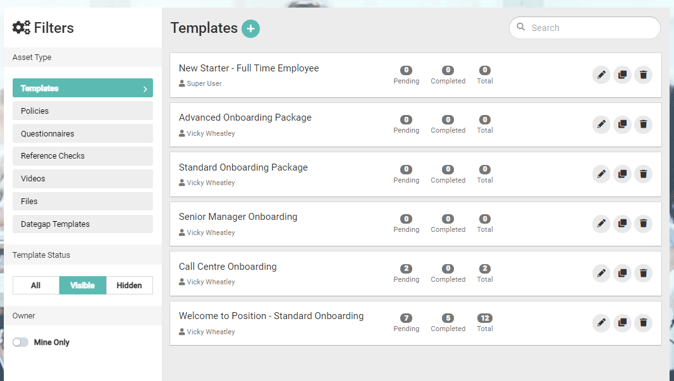
On the left-hand side of the page, you will see a set of filters.
By default, you will land on the Templates filter.
- Select the plus icon next to the text Templates on the right-hand side of the page.
You will be presented with a pop-up similar to the image below:
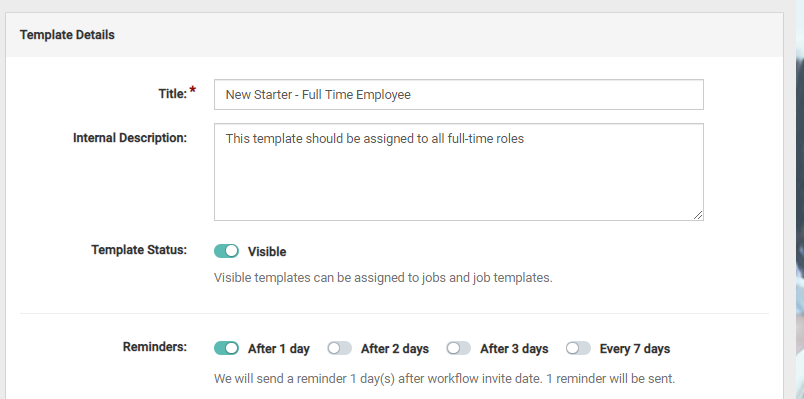
- Title
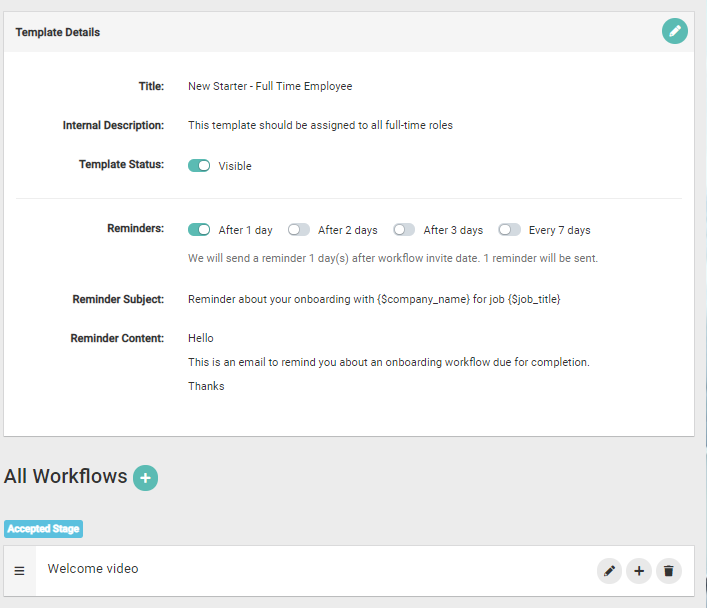
Give your template a name (e.g. New Starter - Full-Time Employee). The title will not be visible to a candidate.
- Internal description
This content box could be used to help your colleagues to understand the roles the template should be assigned to. It will not be visible to a candidate. - Template Status
This allows you to make the template visible or hidden from anyone but you.
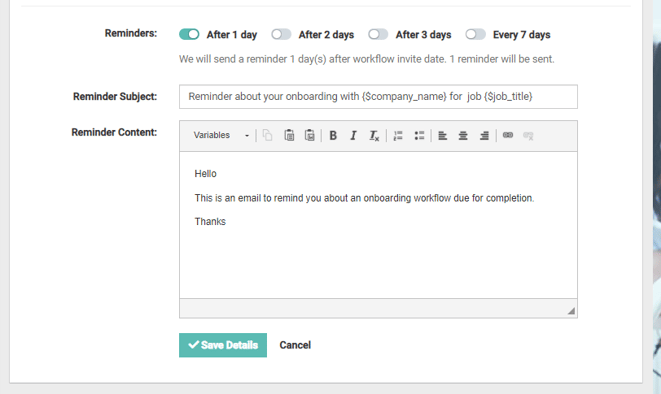
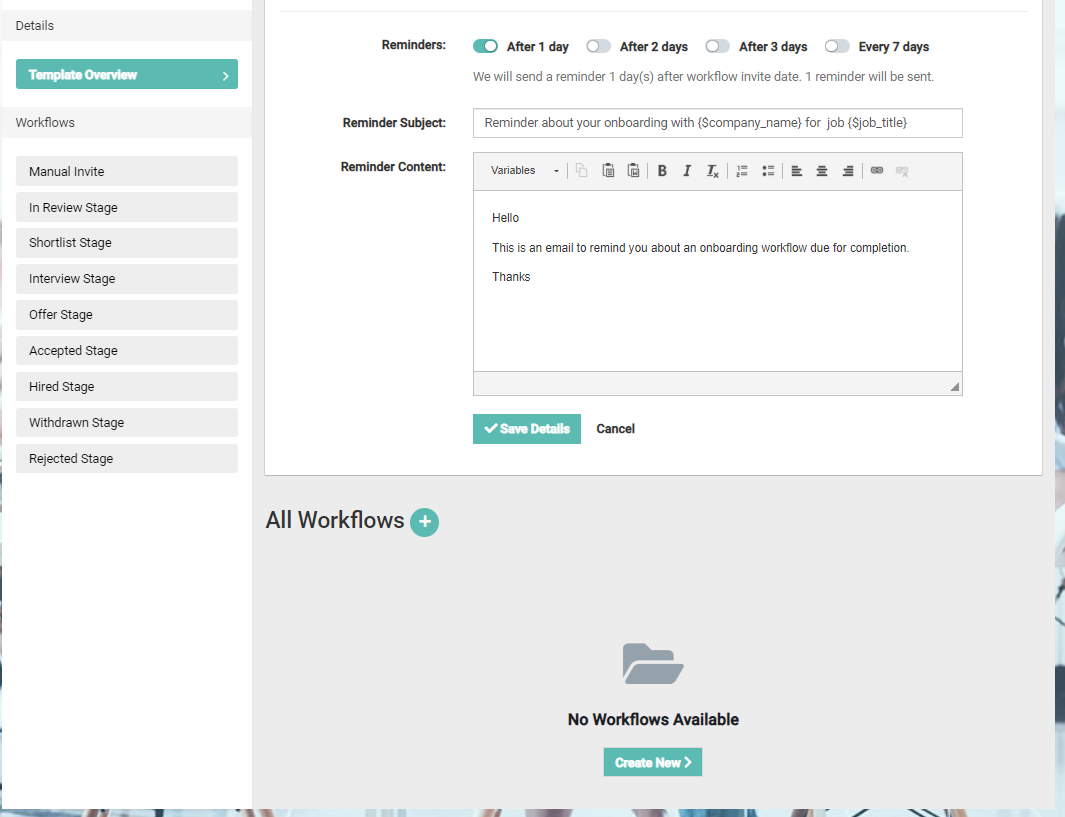
Hiding a template is useful when in creation mode. - Reminders
Select a toggle to send automated email reminders to candidates' if they haven’t yet completed the onboarding workflow you have sent to them.
Useful tips about Reminders:
- If any user, other than the candidate is assigned a workflow, they will receive a notification straight away followed by a weekly reminder on a Monday to complete the workflow item.
- If you Reject or Withdraw a candidate the reminders will stop.
- When you close a job, reminders will stop.
- You cannot set a reminder retrospectively - you can however edit the template notifications for future onboarding invites.
If you select to generate a reminder, you will be presented with an email template so that you can add some content:
- Select Save Details once you are happy with the content.
Creating & adding workflows
A workflow contains a progression of tasks (known as Workflow Items) that need to be completed by specific individuals (candidates & perhaps colleagues') to complete the onboarding process.
A workflow can be assigned to any stage of the recruitment process and you can create one or multiple workflows.
- Select the plus icon or the Create New button as shown in the image below.
You will be presented with a pop-up.
In the below example the Workflow will contain a welcome video for the candidate to watch.
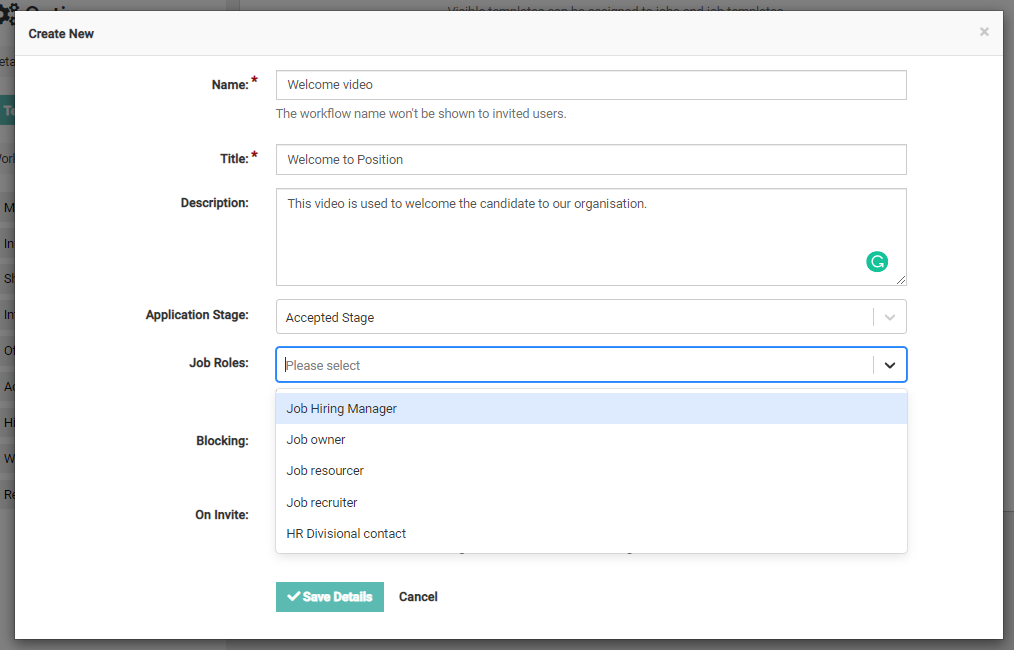
- Name
Give the workflow a name (e.g. Welcome video). - Title
The title will be displayed to the recipient. - Description
This will be visible to the recipient. - Application Stage
When do you want that workflow to be sent (e.g. Offer stage, Accepted etc). - Job Roles
If the workflow needs to be completed by anyone aligned to the job such as the Job Hiring Manager or the Job Owner, select the relevant role/s from the drop-down menu. - Blocking
If this part of the onboarding process is a requirement, you may want to choose the blocking option to ensure it is completed before being able to progress the candidate any further in the recruitment process. - On Invite
If you select the Preselect toggle, it means that the workflow will be preselected at the onboarding invitation stage.- If you select the Required toggle it means that the workflow is a required workflow, it must be completed.

- Select Save Details to retain your workflow.
Creating & adding workflow items
Workflow items are generally a task, something that requires an action from the employer side or candidate side for example;
-
- Candidate action
Reading and acknowledging a policy. - Employer action
Completing an onboarding checklist.
- Candidate action
Now that your workflow is retained, you can add the Workflow Item.
- Select the plus icon or the Create New button.
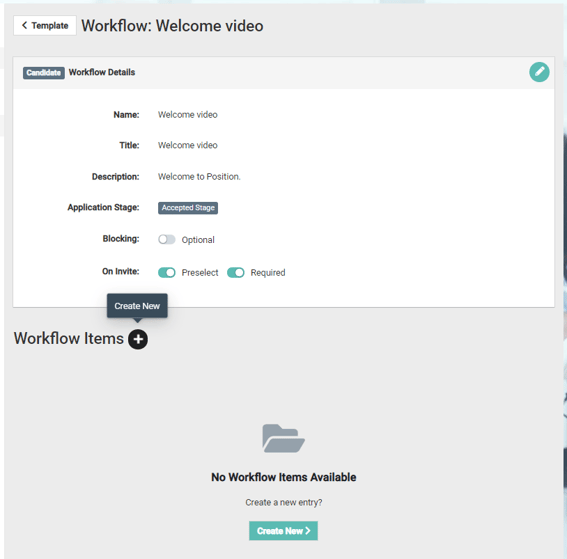
You will be presented with a pop-up.
Following the same theme as the example Workflow shown above, we now need to add the Welcome video as the workflow item.
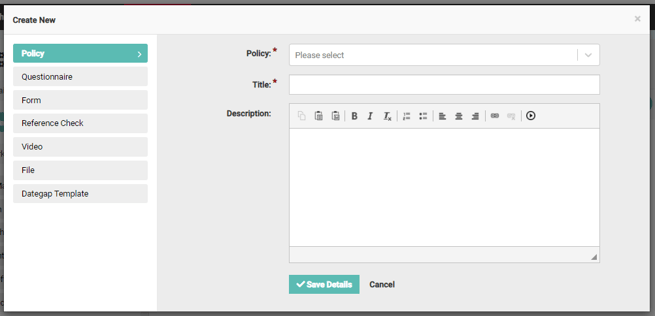
To the left-hand side of the pop-up, you will see the same filters that were presented to you on the main onboarding page.
- Select Video & the image on the right-hand side slightly changes.
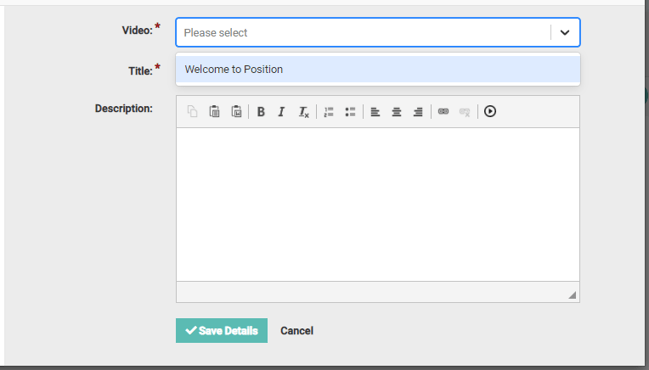
- Select the drop-down menu next to the Video field.
A list of available videos will appear:
- Select the relevant video from the list of options.
- Add a title, the title will be visible for the recipient.
- Add a description, the description will be visible to the recipient.
- Select, Save Details.
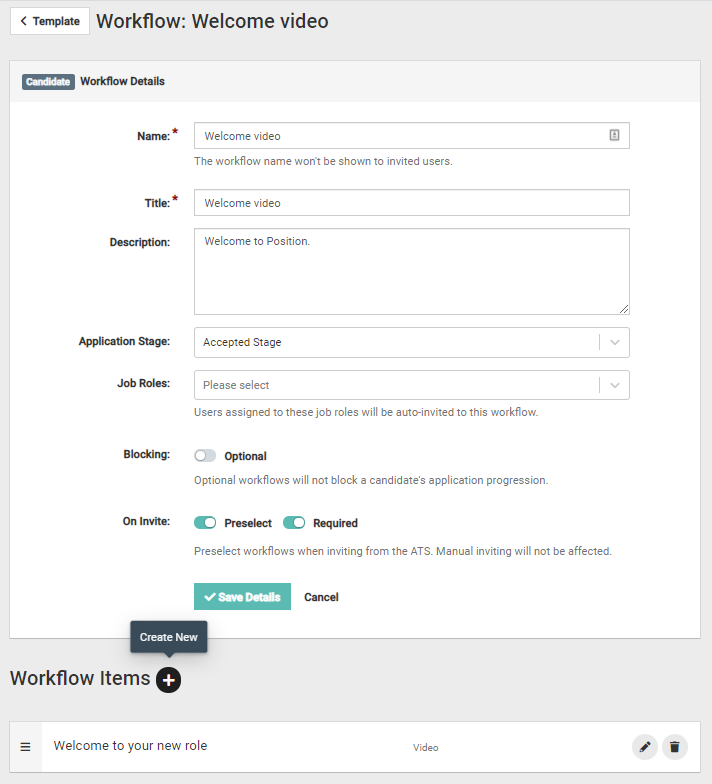
You will that the Workflow now contains the workflow item.
At this point, you can choose to add more workflow items to the same workflow or you can navigate back to the main template.
If you choose to go back to the main template, you can choose to add a new workflow.
The workflow can be added to the same stage of the recruitment process or a different one.
If you add more workflows to the same recruitment stage, this provides a nice carousel effect for the recipient.
You can follow the same process to add different types of workflow items to your workflows.