Find out more about Lists of Values and how to create Tags in the Manage tool
Within the ATS, you are able to customise any dropdown list or collection of phrases ('Tags'), to suit your own requirements.
These are known as 'Lists of Values' and can cover anything from your business units and countries you may operate in, to job categories and cost centres you may use.
Check out this video for on Lists of Values, or read on for a step-by-step guide:
How do I find the Lists of Values?
Once you have logged into the Manage Tool, select the 'Lists of Values' option from the Platform Configuration drop-down.

You will be presented with the Lists of Values (or 'LoV') page:
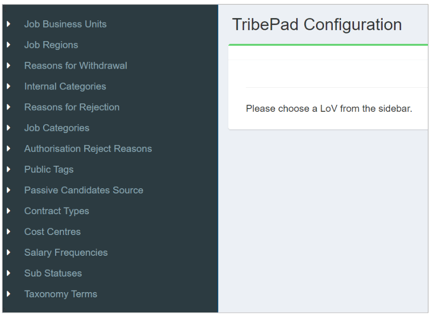
The options down the left-hand side are all different dropdown lists within the ATS. You can select one to reveal the contents included in that category.
For example, if you select the 'Job Business Units' option, you will be presented (on the right-hand side) with a list of all options in that category:

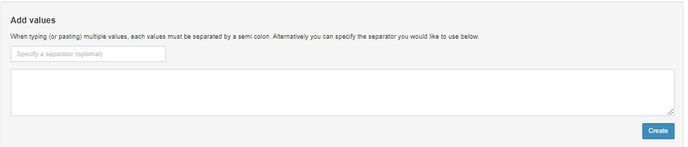
How to add new values
To add new values, simply add the name of the new value in the main text box and click 'Create'. You can add multiple values in one go by separating each value with a semicolon. If you do not want to use a semicolon, you can specify the separator in the first text field.
How to edit or remove values
Once you have selected a list, you will see the existing values on the right-hand side of the page:

From here you can edit a value by clicking on the Pencil Icon against the value.
If you would like to remove a value from the ATS, you will need to switch the visibility toggle to 'no'.
You can also see a record of previous edits by clicking the 'Logs' button.
Please be aware that changes to values in the Manage Tool can take up to a couple of hours to be reflected in the ATS
Countries & Currencies
By default we provide a list of all countries and currencies.
These can be edited by selecting the pencil icon against the relevant value.
You can select which countries and currencies are displayed in the ATS by toggling the visibility between 'Yes' and 'No'.

Salary Frequencies
By default we also provide a list salary frequencies.
These can be edited by selecting the pencil icon against the relevant value.
You can select which frequencies are displayed in the ATS by toggling the visibility between 'Yes' and 'No'.

Public Tags
In 'Talent Search' in the ATS (or 'CV Search', depending on your configuration), you have the ability to 'tag' candidates with specific phrases, keywords or qualifications - whatever your requirements may be.
When tagging a candidate, you are presented with different tags which you can assign to a candidate:

The tags on the left-hand side (highlighted above) are called 'Public' tags. These are created in Manage so that all recruiting users are able to assign them to a candidate, if required.
While they do not work in the same way as a typical List of Values does, they are held in the same place in Manage:

By default, the tags that are displayed are only the 'Public' tags that everyone can see. If you would like to see any private tags that users have created, you can click the ![]() button at the top of the page.
button at the top of the page.
To add new tags, click the ![]() button in the top right-hand corner. You can edit or delete the tags using the buttons on the right-hand side of the page.
button in the top right-hand corner. You can edit or delete the tags using the buttons on the right-hand side of the page.
When you are creating a new tag, you will see a pop-up screen like this:

- You should put the name of the tag in the 'Tag label' field.
The 'At Risk' tick box underneath relates to whether your candidate is at risk of redundancy. If you tick the tick box and apply the tag to a candidate on the ATS, the ![]() icon will be applied to the candidate's profile on the ATS.
icon will be applied to the candidate's profile on the ATS.
- This gives you a noticeable icon to spot when you are processing your candidates:

Cost Centres
Although cost centres are a standard list of values in the ATS, these can be restricted based on hierarchy, if this is something you use.
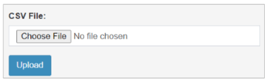
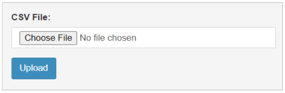
With cost centres, you can either add new values by uploading a CSV file, or values can be added individually.

To upload a new CSV, simply click the 'Choose File' button, to select the CSV you would like to upload, then click 'Upload' to submit the changes.
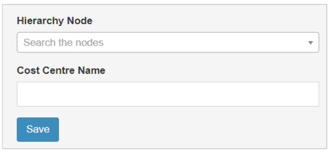
You can add a new value using the form on the right-hand side of the page.
The hierarchy node is optional, and only needs adding if you need to restrict the Cost Centre to a certain hierarchy node.
You can edit existing Cost Centres by clicking on the Cost Centre name.
You can add or remove hierarchy restrictions on existing Cost Centres by clicking into the hierarchy box.
To remove visibility of a Cost Centre in the ATS, simply toggle the Enabled toggle to 'No'.

Sub Statuses
A sub-status is really useful within the ATS when you want your hiring managers to be able to request actions relating to a candidate, for example moving them to interview stage or rejecting them from the process.
The way in which sub-statuses are added to the system is very much like cost centres.
You have the option to either upload a CSV or you can add the statuses manually.
Again, when uploading a CSV, click the 'Choose File' button, select the relevant CSV and click 'Upload' to submit the changes.
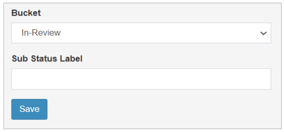
For CSV upload or manual entry, you must state which bucket (i.e. stage of the application process) the sub-status can be used in. You can select one bucket per label:
To edit an existing label, simply click into the text box for the relevant label, make your changes, and click out of the field. As the text above the existing labels states, 'The form below will update when a change is made and you click off the field'.

You can also choose to have the sub-status enabled or not by changing the toggle between 'Yes' and 'No'.