This article will cover how the quick add feature works on the video interviewing platform
Please note - the Live VI functionality is no longer available as a feature to upgrade to.
If you already have this functionality, you will still be able to use the feature and Tribepad will still support you if you encounter any issues. If you need any support, please reach out to us in the usual way.
Our standard VI functionality is unaffected and will still operate in the same way.
The Quick Add feature is a very useful way of quickly adding a one-way interview, position or live interview.
To access the quick add option login to your video interviewing platform and select the Quick Add option from your dashboard, this is the green plus icon on the left-hand side menu bar.

Once you have selected this, you will be presented with the Quick Add page, where you have the option to add a new interview, a new position or a live interview.
The only time you will need to create a position is if you are using the video interviewing software on a stand-alone basis.
If you are using video interviewing as an integration with the ATS, a position will be created as part of an automated process as soon as you assign a video interview to a job in the ATS.
Create a new Interview
To quickly add a new interview, select 'Interview'
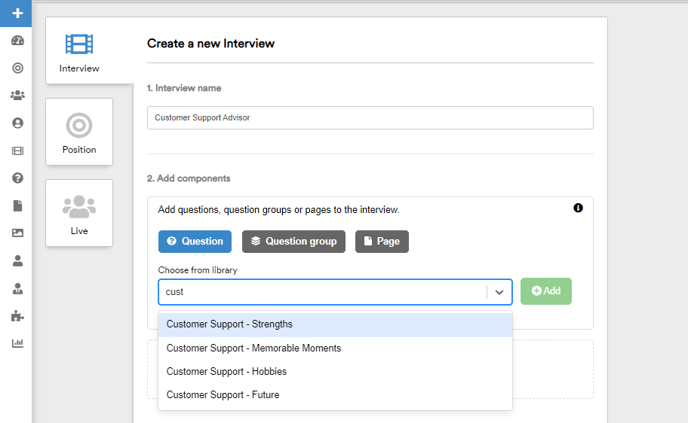
Firstly you will need to give your interview a name. Once you have done this you can start adding questions, questions groups and pages to your video interview.
If you want to include question groups and pages in your interview, these must already exist in the library.
Select which item you want to add to your interview and then simply select the question, question group or page from the library, you can search by the title name too. Once you have found the item you want to add, select it and click 'Add'
If your question does not yet exist in the question library, you can simply type the question in the search bar and add it by clicking create, this will add your question to the question bank and to your interview with one click.
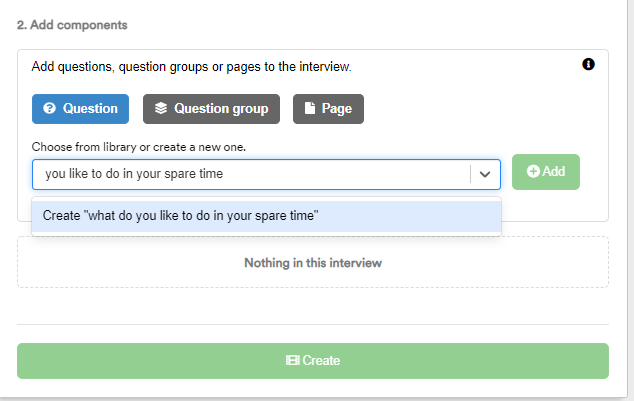
You can see all the items that have been added to your interview under the library selector. It doesn't matter what order the components are added, as you can simply click and drag each component to the desired spot on the interview.
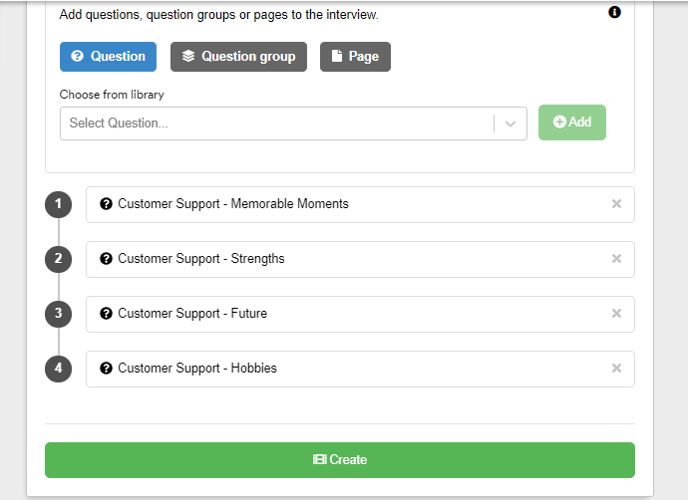
When you are happy with the order of your interview, click 'Create' and your video interview will be created.
All interviews can be located via the Interview menu on the left-hand side of the screen.
Create a new Position
A position is created to house all of the candidate interviews for the job that you are recruiting for.
If you use video interviewing on a stand-alone basis you can use this feature to quickly add a new position on the video interviewing platform.
Once the quick add page has loaded, select the 'Position' tab.
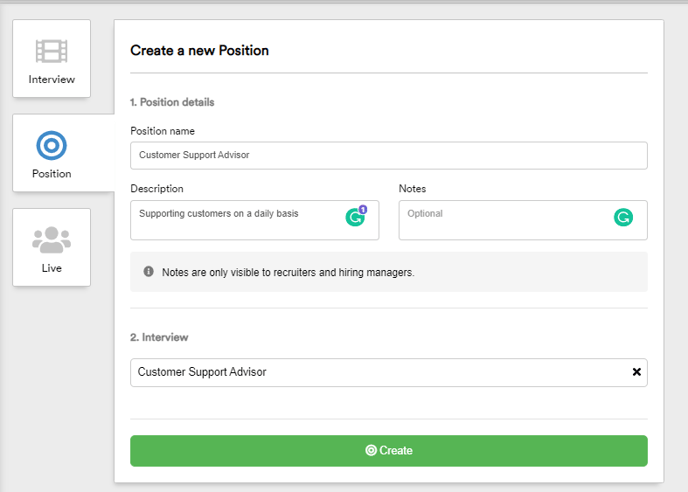
You will need to give your position a name, the description and notes are optional. Then simply select which interview needs to be added to the position. Once this has been selected, click 'Create' and this will add your position to your position list (located in the menu on the left-hand side of the screen).
You will be given the option to view your position once it has been created if you would like to make any further changes to its set up.
You can now start to invite candidates to your interview.
Create a new Live Interview
Please note - the Live VI functionality is no longer available as a feature to upgrade to.
If you already have this functionality, you will still be able to use the feature and Tribepad will still support you if you encounter any issues. If you need any support, please reach out to us in the usual way.
Our standard VI functionality is unaffected and will still operate in the same way.
If you are using the Live Interview feature you can quickly add an interview using the quick add function.
Once the Quick Add page has loaded, select the 'Live' tab.

You will need to start by giving your interview a name. Then you can move on to the Attendees section, where you will need to provide the candidate details, as well as the interviewer's details, only interviewers listed on the interview will be able to join the interview.
After the attendee's section has been completed, you can move on to schedule the interview by setting the date, time and duration, or you have the option to 'Join Now' which allows you to start an interview straight away.
You can only join Live Interviews if you have been listed as an attendee.
There is a limit of 4 attendees' per Live Interview, this includes the candidate.