
✏️ How To Create A Campaign
Once enabled in your platform, to create a Campaign go to the "Campaigns" menu and select "Manage Campaigns":

From here you will be redirected to a screen that looks like this:
To add a new Campaign, select the “+” symbol.

You will then see a screen that looks like this:

First, you should give your Campaign a name.
You also need to choose if you would like it to be ‘Active’ or ‘Inactive’ by clicking the toggle - this means the same as ‘Visible’ or ‘Hidden’
If needed, you also have the option to choose any collaborators to have access to the Campaign, i.e. who can edit it and have visibility of the candidates that are linked to it:

🌐 How To Create A Campaign Landing Page
You have two options when creating a landing page:
- You can create a Landing Page as part of the Campaign set up process
- You can create a Standalone Landing Page which you can link to a campaign at a later date or use as a template for future landing page
➡️ Creating A Landing Page Linked To A Campaign
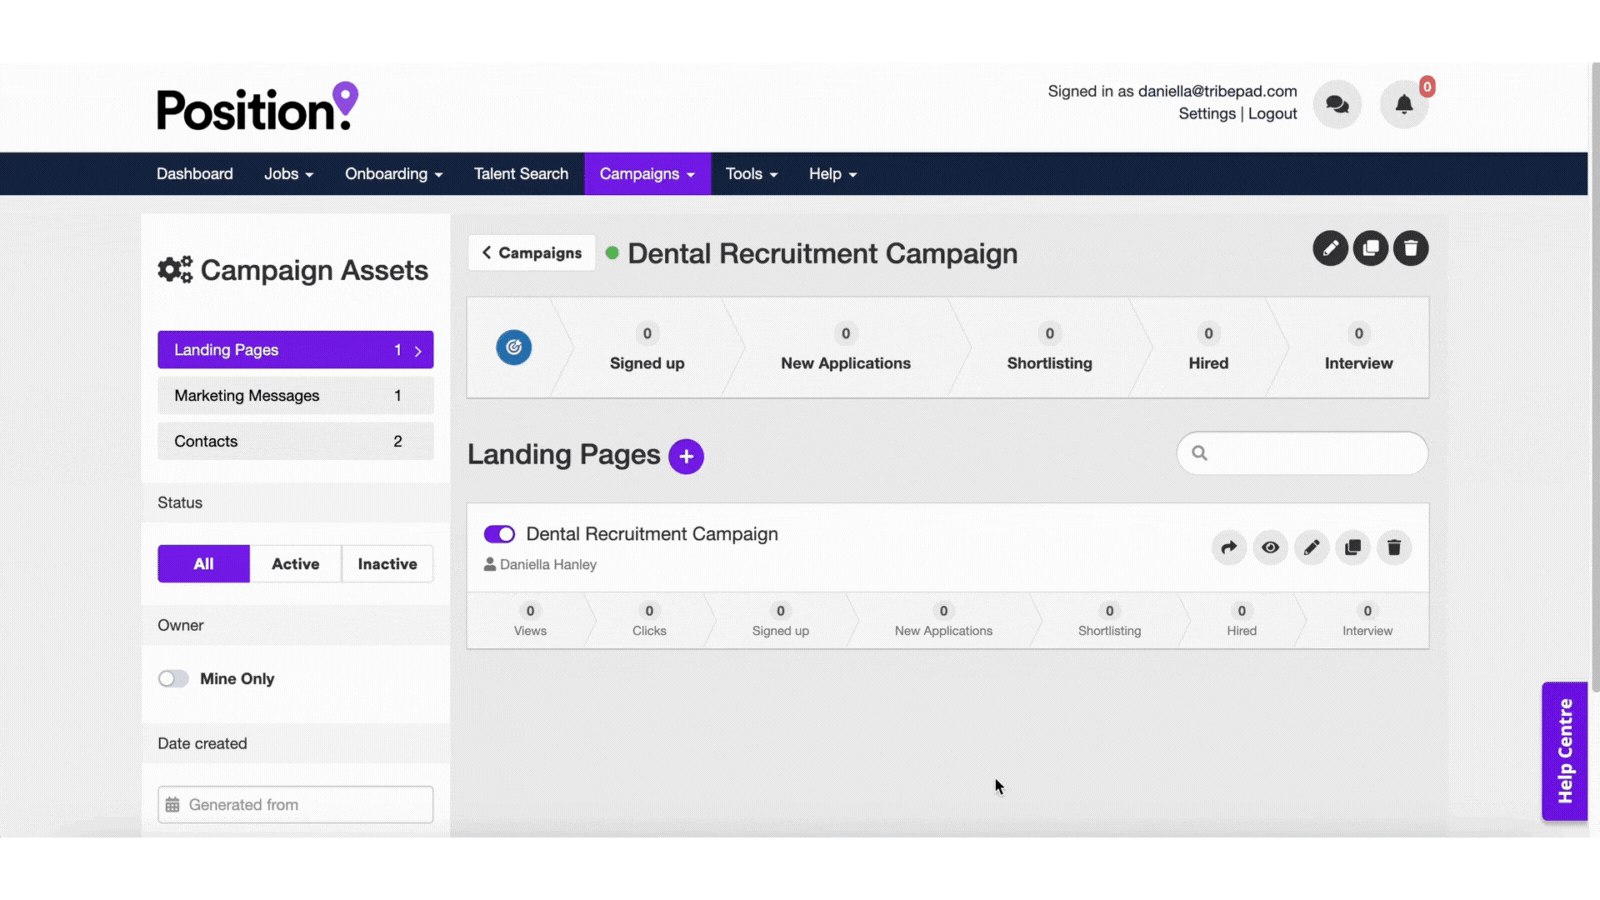
In order to create a landing page that is linked to a Campaign, select the Campaign you would like to link it to by simply clicking anywhere on it:

Once selected you will be taken to a screen that looks like the one below, you should click the ‘+’ symbol to add a landing page which will take you to a screen where you will be given the option to either attach a previously created Landing Page or to create a new one:


“Froala” refers to the old editor that has been used on Campaigns since it was first launched on Tribepad. This has been included in this new iteration of Campaigns to provide consistency if you have created campaigns using the old tool before.
Editing any existing landing pages that has been previously created using “Froala” (the old editor) will not incorporate “Content Box” the new editor, as such editing existing content will bring up the old editor which will look like the image below:


Clicking the ‘+’ symbol on a new landing page will bring up a screen that looks like this:

Select “from scratch” to create a new Landing Page (if you would like to use a previously created one - select the relevant one from the list).
From here, you can fill in the details of your landing page:

- First make sure to toggle the “Editor Type” to “Content Box”
- Give your Landing Page a title
- Give your page a description (if needed)
- Select your Goal Type - What would you like to achieve with it?
- Add any tags (if needed)
- Set a PIN (if needed - as this will only allow people with the pin to view)
- Press Save & Continue to go to the Landing Page Site Editor
➡️ Creating A Standalone Landing Page
In order to create a Standalone Landing Page that you would like to link to a Campaign at a later date or clone, first head to “Campaigns”, and “Landing Page Templates”.

Next you will need to hover over the “+” icon in order to create a new page.

You will then be taken to the following page where you can set up your landing page:

Follow these steps to finish setting up your landing page:
- First make sure to toggle the “Editor Type” to “Content Box”
- Give your Landing Page a title
- Give your page a description (if needed)
- Select your Goal Type - What would you like to achieve with it?
- Add any tags (if needed)
- Set a PIN (if needed - as this will only allow people with the pin to view)
- Press Save & Continue to go to the Landing Page Site Editor
From here you will be able to edit your landing page:

For steps on how to add and edit content to your page 🖱️ click here.
➡️ Linking Standalone Landing Page To Previously Created Campaign
In order to link your page to a campaign, head to “Campaigns” and “Manage Campaigns”:

You then need to click anywhere on the campaign you would like to link:

You will be taken to your Campaign Page options, from here click on the “+” icon to add a Landing Page.
Once clicked, you will see any previously created Landing Pages on the left hand side, select the one you would like to link and press Save & Continue to complete the process.

➡️ Goal Types In More Detail
For more context, giving your landing page a goal will give it a purpose:

When selected, each goal type will do something different in the ATS:
➡️‘None’ - A landing page with no goal (1) can be created to give information only and doesn’t need the candidate to do anything.
When selecting this option, there are no further fields to fill in (2).

➡️‘Login/Register’ - The purpose of this type of landing page is to get candidates to login or register on your ATS (1).

🟣 Tags - If needed you can add in Tags (ones that have been set up already in your ATS):


🟣Questionnaires - If needed, you can link a questionnaire to your landing page - candidates that are invited to the campaign will then be asked to complete this.


For more information about Questionnaires, 🖱️click here.
You are able to view any results via the candidate(s) profile.
To do this, whilst on the Candidate profile, head to activity from the left hand menu (1), once on this page you will see your Campaign Questionnaire, click “view” to see the results (2):

You will now be taken to the following screen, where you can view your Candidates questionnaire results:

🟣 Mark Candidate As Internal - If needed, you can mark your candidates as Internal once they access the ATS:

🟣 Redirect URL - You may need to redirect your candidates to another URL away from the ATS. To do that, simply paste your URL into this box here:

➡️ ‘Apply’ - The purpose of this Landing Page is to link to a specific Active role on your ATS, which candidates will be able to directly apply to.

🟣Job - In order to link an active job role to your Landing, click on the drop down menu and select the relevant one:

If needed, you can also add Tags or mark your candidates as Internal as detailed above.
➡️ ‘Apply Through Job Search’ - The purpose of this Landing Page is to allow you to guide candidates towards specific roles through the presence of keywords, country, location etc.

🟣 As above, you can add Tags here and make your candidate internal.
🟣You can also include Internal jobs and show jobs that are marked ‘visible to no-one’ on the ATS.
🟣You can then add keywords and other filters to narrow down the jobs that are presented to candidates on the landing page.
🟣And finally, you can also add a PIN to a landing page if you wish, as well as a Linked message:

The Linked message refers to Marketing messages - these are set up separately and can be linked to a specific page --> More on this further down in the guide.
Once you are happy with your setup of the landing page, click ‘Save and Continue’.
🎨 Adding Content To Your Landing Page
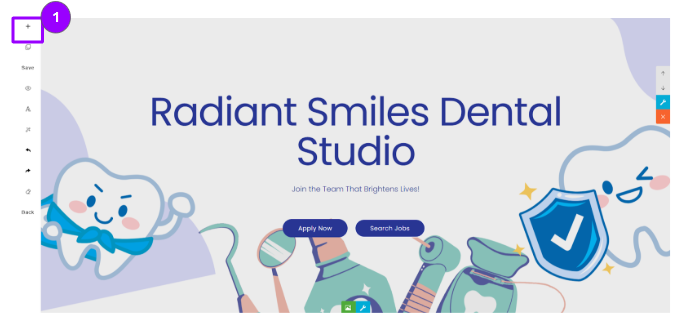
Once you have set up and saved the previous information, you will be redirected to the Campaigns editor:

In order to start editing your Landing Page, you have several options running down the left-hand side of the page:

➡️ Sections
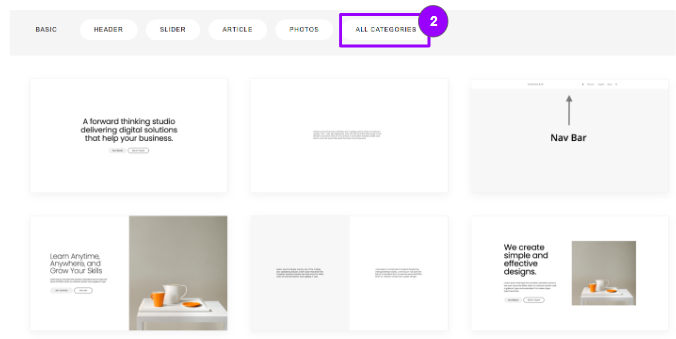
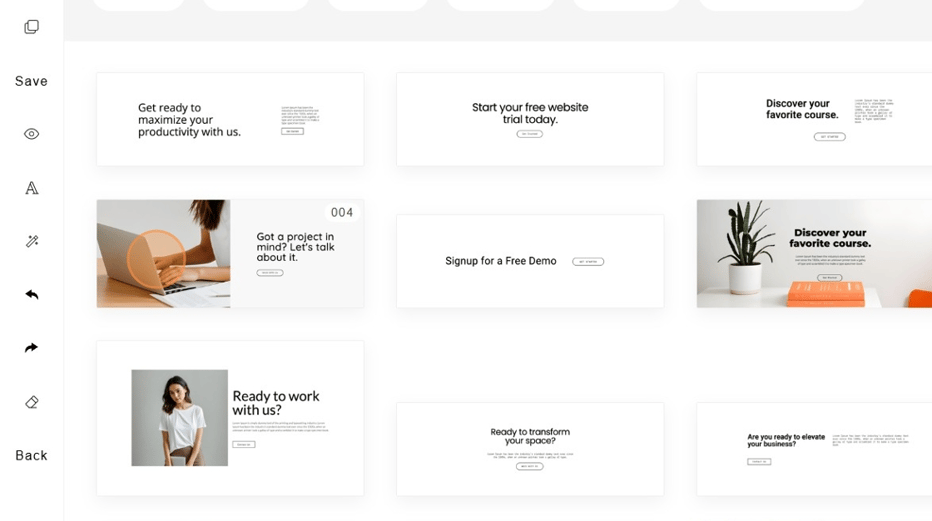
In order to start adding content blocks to your landing page, click on the + icon in the left hand options bar. You will then see a pop out, that looks like the image below.
From here you can browse through all of the sections listed at the top, and options of content blocks available to add.


To add a specific Content Block, simply click on the relevant Sections you require, and they will be inserted into the main screen:


When adding a content box with a button or call to action a # will appear - leave this # if you would like this to redirect to your pre-set campaign link or this can be deleted and a URL can be pasted in here.

➡️Adding A Call To Action
If you have chosen a goal type of 'Apply' or 'Apply Through Job Search' when creating your landing page, you will need to add a 'Call to Action' section.
Click on the '+' symbol on the left-hand side of your screen to add in a Content Block.
Click "All Categories"
Click "Call to Action"
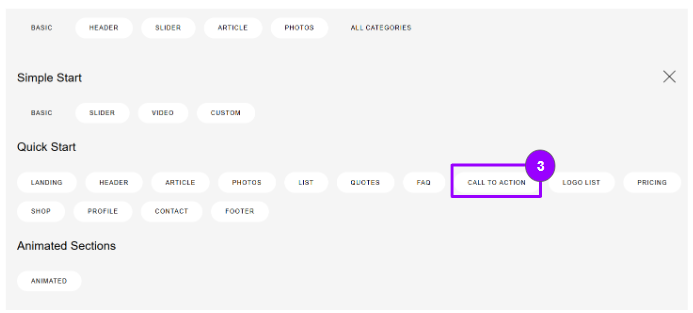
Choose which block you'd like to include in your Landing Page.
Once the block has been inserted, you can edit the content as usual. Click on the button to amend what is shown to your candidates.
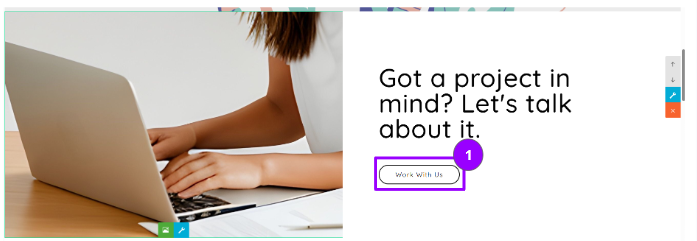
Click on the 'link' icon to amend the button.
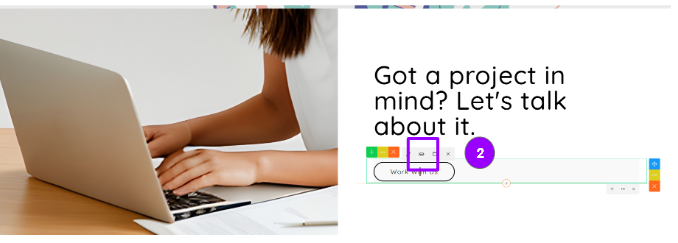
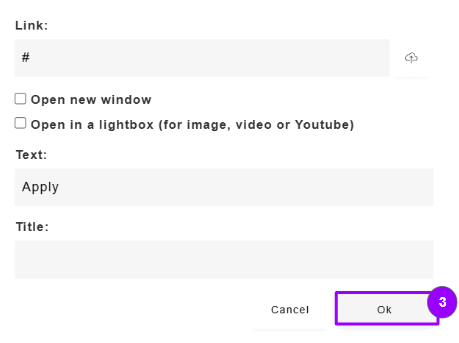
Where you see a # symbol in the link field, PLEASE DO NOT AMEND THIS.

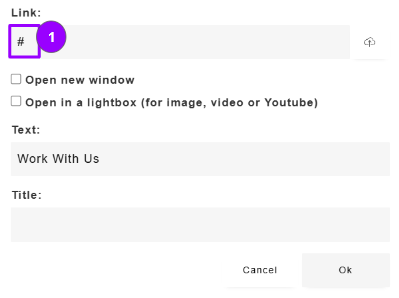
If you wish to change the wording that is presented on the button, click into the Text field and make any necessary changes.
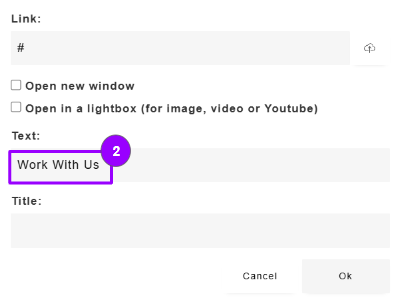
Click "Ok" when you are happy with your changes.
After adding a content box, you may need to move this up or down on your page. In order to do this simply click the either the grey up or down arrow found on the right hand side of the screen:

To edit the text or image on a section, you will need to click onto the relevant part you wish to change, and you can alter as appropriate:

If you need to edit your section even further, you have more options as follows:

Clicking on these icons 
The + symbol allows you to add additional content.

The Three Dots “…” symbol allows you to change the look and feel of the section.

The X symbol removes blocks of content.

Clicking on these icons 
The Compass symbol allows you to move the image. You can do this by dragging the icon around as required.

The Three Dots “…” symbol allows you to change the look and feel of the image:

The X symbol allows you to remove the image completely.

Once you are happy with the content of your Section, you can edit it further by hovering over it to reveal these icons:

The icons on the right-hand side of the page 
Once in the Settings, you will see multiple options where you can make edits such as move the section around (if you have selected multiple Sections), adjust the height or adjust the spacing of the section and so on.

>Background Image & Colour
If you need to change the background colour or image, you simply need to click on the section itself. By doing this you will see more options as follows:

Clicking on the ‘Background Colour’ option presents a further pop-up where you can choose from a pre-set colour or enter the RGB values at the bottom of the screen to enter a custom colour:

>Visibility
You may want to change the ‘Visibility’ of your content. To do this, make sure that you are in the options settings, scroll down and click on “Responsive”. From here you will see the following options:

These options will allow you to decide whether your content is visible or hidden on a range of devices:
To change this, simply click between the symbols (1) to select the device and then visible or hidden (2) to decide if your content will be visible on:
- A desktop
- A laptop/tablet (Landscape)
- A tablet (Portrait)
- A mobile
- Selecting the ‘1 box per line’ option puts the boxes underneath each other
- ‘Reversing’ the boxes flips the boxes over to the different side.
>Animation
The “Animation” header allows you to amend any animations you may have included in your pages:

>Scroll
The ‘Scroll’ header allows you to choose the style of scroll button that is placed on your pages:

For example option “4” looks like this:

But option “8” looks like this:

>More
Finally, the ‘More’ header allows you to add a Section ID and CSS Classes.
To add a Section ID, simply add a number or text to the “Add Section ID” box (1) it will then be added to the top left corner of the section you are editing (2).
“CSS Classes” are attributes used to define HTML elements and apply styling to those elements.

>To Edit The Whole Box
If you would like to edit the whole box rather than individual parts within that section simply click on the icons at the bottom of your section (1):

By clicking these icons you will see various edit options which allow you to do different things such as:
- Change the size and position of the content
- Add background images
- Add effects to Images
- Add in links to different elements of your section
>Adding Links
You have the option to add links into your landing page, this allows you to enter any URL. For example, you may want to link your Job Search page onto the landing page.
Once entered, your URL will show with v2/job/search at the end, don't worry, we will help you find this.
➡️ Content Blocks
Content Blocks are generally used as connecting sections between Sections when creating pages.

To add them, they should be dragged into the relevant position on the right-hand side.
They are edited and amended in the same way as Sections, using the icons on the right side of the block:

➡️ Typography
The Typography option can be used to adapt the look and feel of your pages further, by changing the font and style of the Sections/ Content blocks that you have inserted.
Simply select the relevant one from the list to change as required.


➡️ Animations
The “Animations” option allows you to apply and edit animations to your page:

➡️ Preview
In order to Preview your Landing Page before publishing it, simply click on the eye icon found in the lefthand tool bar. This will then open up a preview of your full Landing Page in a new window:

➡️ Save
Once you are happy with your content, you should click the ‘Save’ button on the left hand side of the screen:

Once saved, you will be returned to the ATS and will see your new landing page sitting under your Campaign:

🛠️ Landing Page Options
Once you have completed your Campaign Landing Page you may need to re-access it to make further changes.
Whilst on the “Landing Pages” home page you will see various symbols to the right of your landing page title:

These symbols allow you to:
- Preview your landing page = Eye Symbol
- Edit it = The Pencil Symbol
- Clone it = The Two Squares Symbol
- Delete it = The Bin Symbol

👫 Inviting Candidates To Your Landing Page
Once you have created your landing page, you are able to invite candidates to it.
To do this, you should hover over the ‘Share’ icon on the right-hand side (1):

You will then see three options (2):
- Open in new tab
- Copy link
- Invite from CV Search
The two main ones you are likely to use are ‘Copy link’ and ‘Invite from CV Search’.
If you copy the link, you can share this in email communications with relevant candidates.
If you select ‘Invite candidates from CV Search’, this will open up the “Candidate Search” section of your ATS.


From here, you can use the 🖱️ Talent Search function as you would do normally in your ATS:
- You can filter using the options on the left-hand side
- You can search for candidates with certain skills or keywords at the top of the page
- You can look for specific names using the toggle at the top of the page
Once you have located the relevant candidates, tick the tick boxes next to their names (1) and then select ‘Invite’ above the candidate names (2):

The screen will refresh and you will see a pop-up screen:

This email will need to be edited here before you send the invitation to the candidate(s).

If needed, this email can be populated as a template, in order to do this you will need to create one under your ‘Ad Hoc Email templates’ section in your ATS. and select the relevant one at the top of this screen:

Alternatively, you can simply use the free text email body to write your message:

Once your email has been sent to your candidate(s), the screen will refresh and you will see a pop up saying “Completed Successfully” to confirm that the action has been completed:

To exit this screen, click on the ‘X’ in the upper right corner.
From there, you will be returned to the Landing Pages page in the ATS:

To see which candidates have been invited to view a landing page, click into the landing page itself.
The screen will refresh and you will see a page that looks like this:

Initially you will not see any views or clicks as you have only just invited your candidates.
However, as time goes on, the section at the top of the page will eventually show you how many views, clicks, sign-ups etc. you have had as a result of your campaign:

To see the candidates that you have invited to view your campaign, scroll down to the bottom of the page:

If you want to invite more candidates to the campaign, simply select the share icon at the top of this section and repeat the sharing process (1):

💬 Creating Marketing Messages For Campaigns
If needed, you have the option to add Marketing messages to your Campaigns.
To create a Marketing message, whilst within your Campaign options, click on the “Marketing messages” tab found in the top left of the page:

The screen will refresh and you will see a page that looks like this.
To create a new message, click either the ‘+’ symbol (1) or the ‘Create New’ button (2).

After clicking to create a new message, you will see the following screen. Allowing you to perform different actions:

🟣 You will need to give your message a name - this could be as simple as ‘First message to new candidates’
🟣 You can choose the status - ‘Active’ or ‘Inactive’ (the equivalent of ‘Visible’ and ‘Hidden’)
🟣 You can then give your message a goal - this links into the goal that you have already chosen for your Campaign Landing Page
- None
- Login/ Register
- Apply
- Apply through Job Search
🟣 You can then give your email message a subject (1) which will be shown to the candidate(s), and create some content using the free text field (2):


🟣 You can also add in the candidate’s first name, surname and salutation if you wish, using the buttons shown above.
Finally, you can choose when and how you would like your marketing message to be sent:

If you want to send when the recipient is added to the campaign, choose the first toggle.
If you would like to send a message on a specific date, choose the second toggle. This will then allow you to choose which date you prefer:

If you would prefer to send your message after a delay, select the third toggle. You can then choose how many days after the candidate was added to the campaign, that this message will go out:

You can then choose to send the marketing message via email or SMS.


Once you have saved the details of your message, the screen will refresh and you will see something that looks like this:

As highlighted above, you can see when the message will be sent out, and how.
You then have the ability to send follow-up messages to this first one, if you wish.
To create these, click on the ‘+’ symbol on the right-hand side of the page:

The screen will refresh and you will see another pop-up. Here you can create the details of the follow-up message.
You will notice that these initial actions are largely the same as the last ones:

If you scroll down the page though, you will see an additional set of toggles:

Here you can choose whether to send the message to everyone, or only if previous goals have not been achieved:
- ‘Unconverted’ - the message will be sent if the candidates have not completed the goal from the previous message
- ‘Unopened’ - the message will be sent if the previous message has not been read by the candidate
- ‘Clicked but not converted’ - the message will be sent if the candidate has read the message, has clicked onto the ATS, but has not completed the requested action
- ‘Converted’ - the message will be sent if the previous goal has been completed.
Once saved, the screen will refresh and you will see your new follow-up message shown underneath your original marketing message:

Once you have created a message, if you want to link it to your campaign, i.e. ensure that all candidates who are invited receive an initial message, you can go back into your landing page, edit it and add in a Linked message: