Find out how to specify how much it has cost to hire a single candidate, for future reporting purposes.
Currently an organisation cannot easily attach a cost of hire to an application.
This new functionality allows for recruiters to specify, when moving a candidate to Hired, the cost of hiring that candidate on a per application basis. This can then be used for capturing the advertising spend or agency cost so it is easy to report on.
Specifying Cost of Hire Against a Candidate
Once the permissions have been enabled, you will be able to add in the Cost of Hire of a specific candidate, as you move them to the Hired stage in the application journey.
Please note - this functionality is only shown when moving a candidate to ‘Hired’.
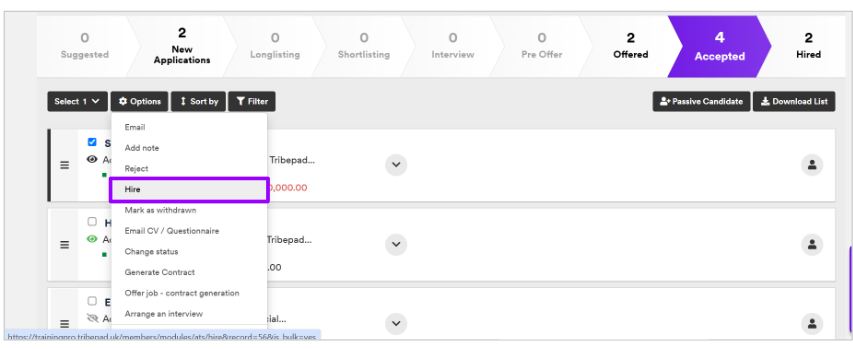
Once you have selected ‘Hire’ from the options menu (as above), you will be presented with a new screen:
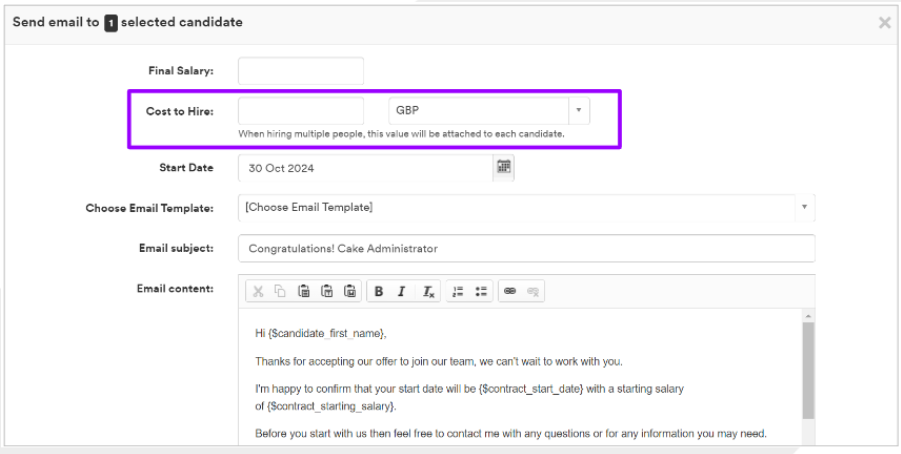
- Here you can see a new field to complete at the top of the page:

You should enter a value in the first field, and then choose the currency from the second drop-down box:

Please note - if you are moving multiple candidates to ‘Hired’ at the same time, whatever cost you attach to your candidates here will be applied to all of the candidates.
Once you move your candidate(s) to Hired, you will see the value that you previously entered, displayed against the candidate profile:

If you hover over this field, you can see the amount in more detail:

If you return to your Jobs List page, you will be able to see the candidates against the job, and how much it has cost to hire them:

If you hover over this field, you can see details of the individual candidates and how much it has cost to hire each of them:

- If you have specified amounts for multiple candidates, you will see a running total of cost here.
Reporting on Cost of Hire
If you wish to report on the Cost of Hire that has been added to individual candidates, you will need to create a Custom Report within Insights.
Please note - for more information on creating Custom Reports in Insights, please click here.
When you are creating a Custom Report, you will need to go to Report Manager on the left-hand side, and select Report Manager > Report Templates >Template Builder:

When creating your report, you need to give it either an Applications or Job focus:

Under ‘Optional Columns’, you will need to add in the ‘Application Hire Cost Columns’:
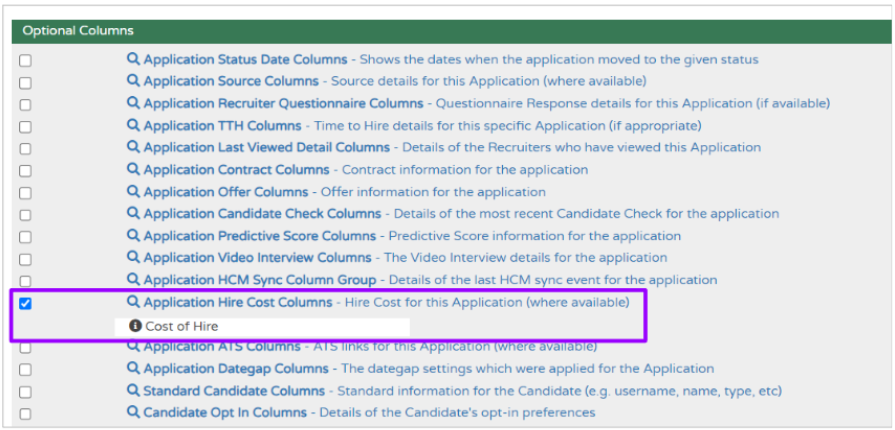
- As is normal functionality, you can also add in as many other column groups as you like:
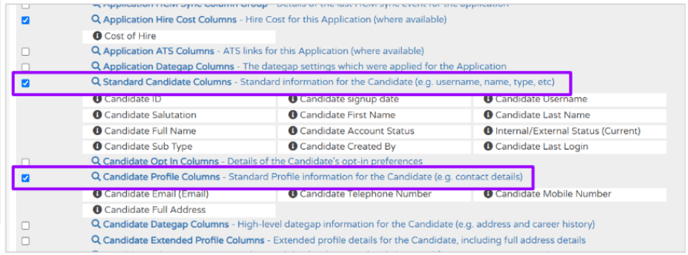
Once you are happy with your column group selections, scroll down the page and select ‘Extended Report Configuration’:

The section will expand and you will see a screen that looks like this:
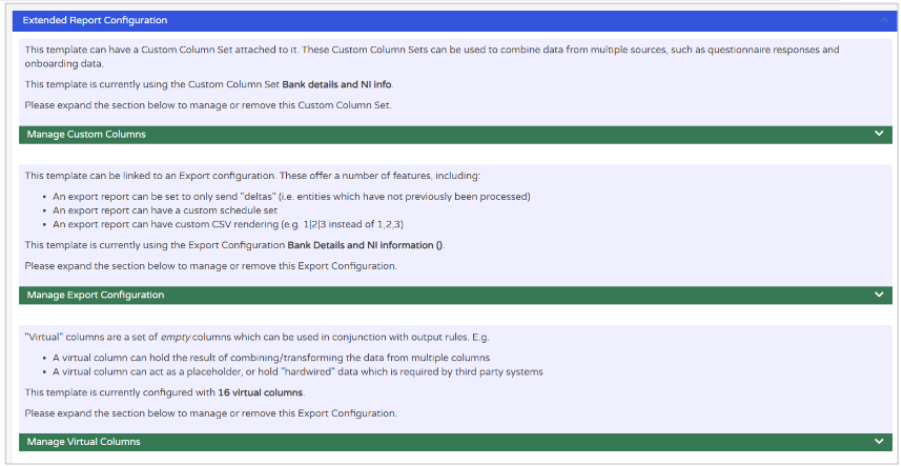
Scroll to the bottom of the section and select ‘Column Configurator’:

The section will expand and you will see something that looks like this:

- Select ‘Launch Column Configurator’:
The screen will refresh and you will see a pop-up that looks like this:
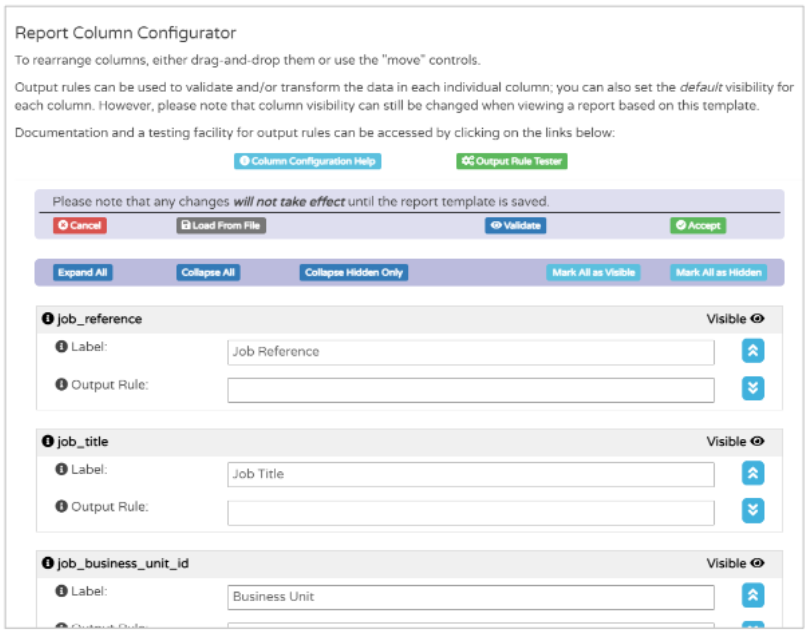
Depending on if this is a new report template that you are creating, or if you are editing an existing report template to bring these extra columns in, you may need to select ‘Validate’ at the top of the screen:

Please note - you only need to select ‘Validate’ if you are editing an existing report template
- If you are creating a new template, your columns will simply be presented to you and you can arrange and customise the view as you would do normally.
- For more information on this, click here.
If you select ‘Validate’, your screen will refresh and you will see this error message:

- This is totally normal, please don’t panic!
If you select ‘Sync’, the screen will refresh and you will see this message:

The new column will have been brought into the report at the bottom of the screen:

From here you can make the column visible and send them up to the top of the screen using the icons on the right-hand side:

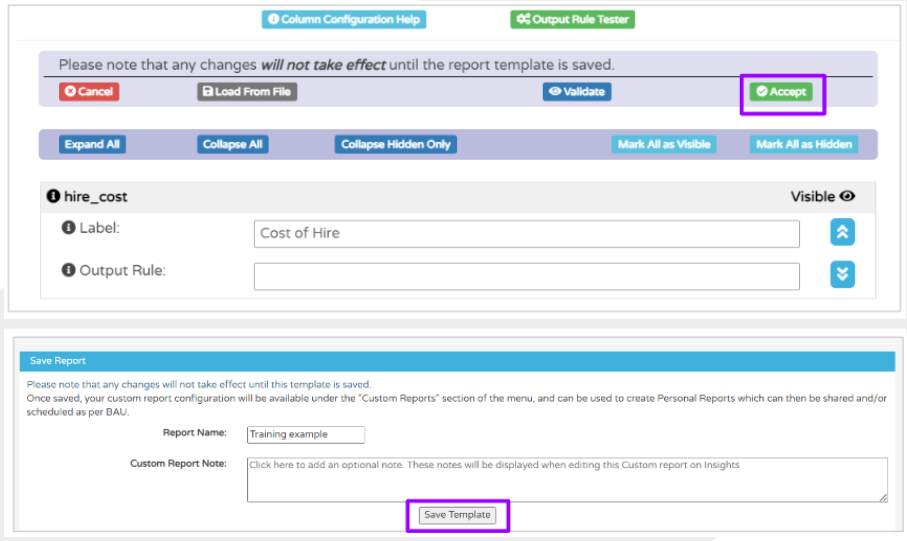
Once you are happy with your column placement either on an existing template or a new one, select ‘Accept’ and then save your template:
The screen will refresh and you will then be able to see the Template Output at the top of the screen:

Clicking into Template Output will show you your report template and the positioning of your new column:

From here you can Save or Schedule your report as you would do normally, using the button in the top right-hand corner of the screen:
![]()
Please note - for more information on saving or scheduling reports, please click here.