Find out how to use the new and improved DateGap functionality on a job and in the application process.
We have updated the DateGap functionality to give you 3 improved features:
- Ability to ignore history gaps
- Improved Dategap referencing
- Residential history
Sometimes a candidate might take a couple of weeks off between jobs and don’t want to mark it as unemployed.
- The new functionality allows for you to customise the length of gaps allowed between entries.
If you want to ask for reference details as part of the application process, the current Tribepad standard only allows a candidate to give you 2 referee details.
- The new functionality allows you to customise the number of references requested and/or specify an amount of years you need references for.
If you want to ask for Residential history as part of the application process, you only have the ability to ask for a set number of years and links up with the education and employment history.
- The new functionality allows you to specify requirements for Residential history as a stand-alone request.
Ability to ignore history gaps
This functionality can be used within Job templates or within the Job Create process
- New and existing jobs can be edited to include this functionality.
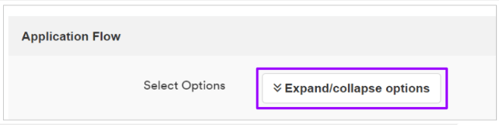
Within the Job Template or Job Create process, go to the ‘Application Flow’ section and click ‘Expand/collapse options’:
Scroll down to the ‘Questionnaires’ section and you will see a changed DateGap section:
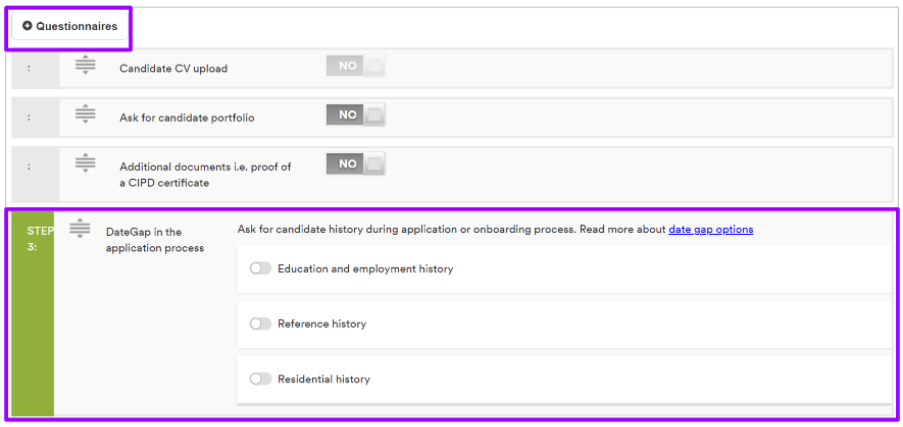
From here, you are able to select the section within DateGap you wish to amend:

- Select the relevant toggle - in this instance it will be ‘Education and employment history’.
Once selected, the section will expand and you can see 3 additional fields:
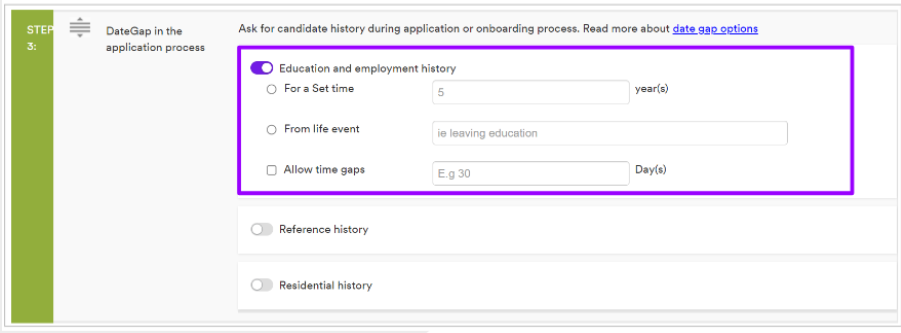
First, you need to specify how long of a period you are wanting the candidate to complete their education and employment history for:

- This can either be a set number of years OR from a life event, e.g. from when the candidate left secondary school.
Please note - you cannot specify both options within the request to a candidate.
Next, to allow time gaps within a candidate’s education and employment history, tick the tick-box next to ‘Allow time gaps’:
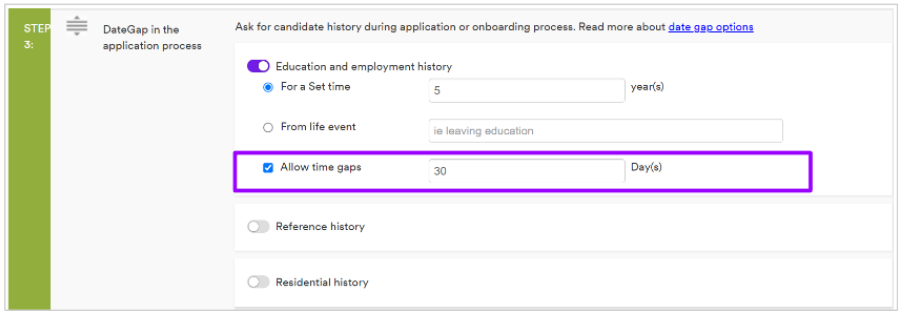
- Specify how long of a time gap you would like the candidate to be able to ignore.
Once you are happy with your input, make sure you save your changes at the bottom of the Job Create / Job Template page:

Candidate view
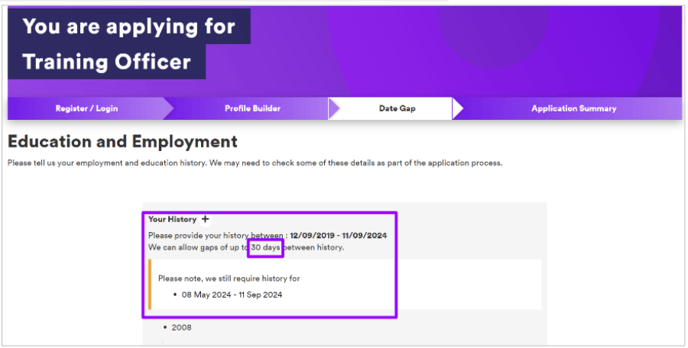
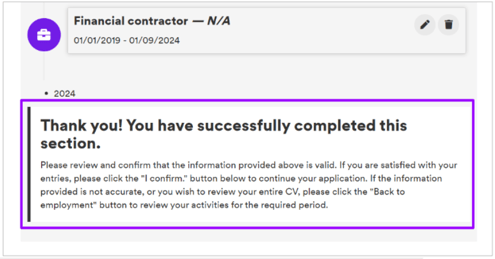
Once the time gaps have been attached to the education and employment history, a candidate will see this message if they have any gaps, when they are completing their application:
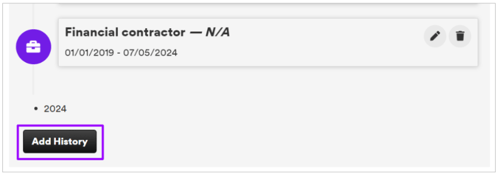
To add more employment or education history, the candidate will need to scroll to the bottom of the page and select ‘Add History’:
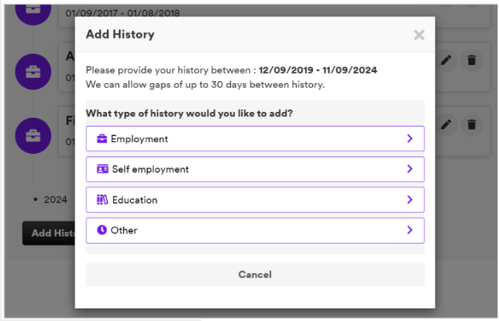
The candidate will then see a pop-up screen where they can choose the type of history they are including, and can add as appropriate:
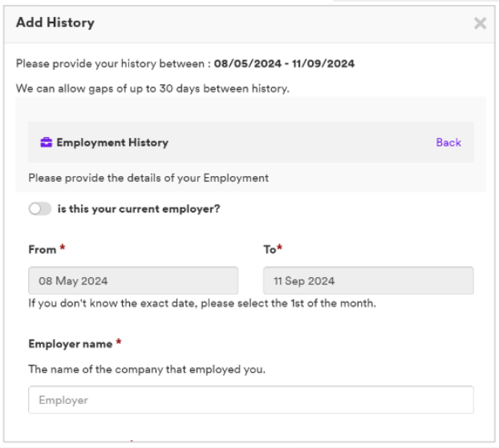
The candidate can work their way through the pop-up screen and enter more history to cover the required date period as necessary:
Once happy with their input, the candidate should select either ‘Save History’ at the bottom of the screen to exit the ‘Add History’ section, or they can select ‘Save and add more history’ to continue filling in the gaps in their CV:

Once the candidate has completed the necessary employment and education history, they will see a message that looks like this:
Internal view
Once the DateGap information has been collected, you are able to download the relevant information in the ATS.
This is done through the candidate’s mini profile on a job:
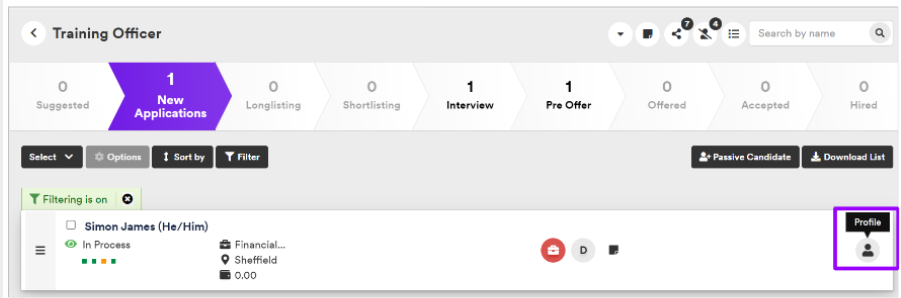
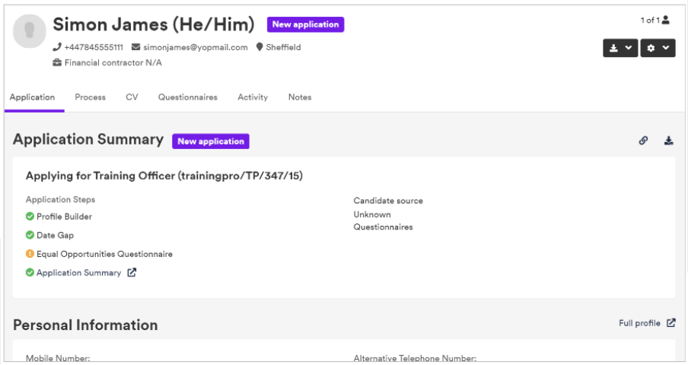
Opening up the mini profile for a candidate will show you a screen that looks like this:
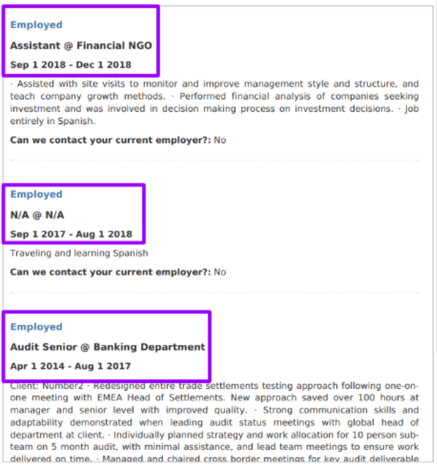
To see the whole date history of the candidate, you will need to download a Tribepad generated CV.
- Do this by selecting the icon in the top right-hand corner:

This will download as a PDF, and then you can see the date history detailed as something similar to this:
Improved DateGap Referencing
Like with the option to ignore certain time periods (as detailed above), this functionality can be used within Job templates or within the Job Create process
- New and existing jobs can be edited to include this functionality.
Within the Job Template or Job Create process, go to the ‘Application Flow’ section and click ‘Expand/collapse options’:

Scroll down to the ‘Questionnaires’ section and you will see a changed DateGap section:

In this instance, you will select the ‘Reference history’ toggle and will see the screen refresh to show this:

Here, you can choose how long of a time period you would like the candidate to cover with their references, OR how many you would like them to provide:
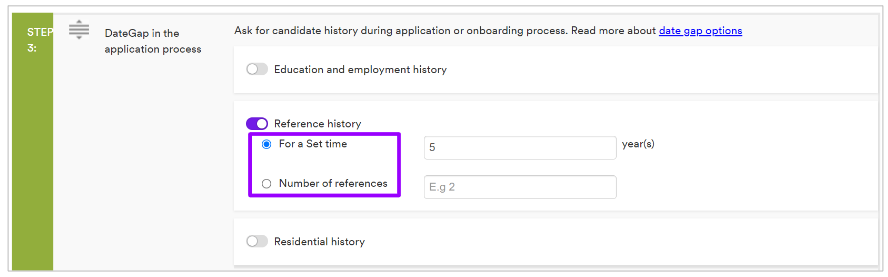
Please note - you are only able to select 1 option here - set time period or number of references.
Once you are happy with your input, make sure you save your changes at the bottom of the Job Create / Job Template page:

Candidate view
When referencing is added to the application process, the candidate will see a screen that looks like this:

- You can see the number of years or life event required for the candidate to provide details for (highlighted above)
- To add referencing details, the candidate should select the ‘Add Your History’ button
The candidate will then see a pop-up screen like this:
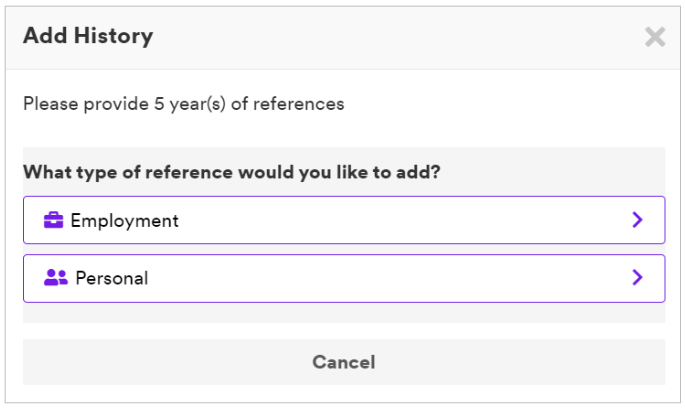
- Here the candidate can select which type of reference they would like to provide.
The candidate should complete the relevant information on the screen:


Once the candidate has completed the relevant information relating to the time period requested or number of referees to be provided, they will see a page that looks like this:

The candidate can then complete the rest of their application as usual.
Internal view
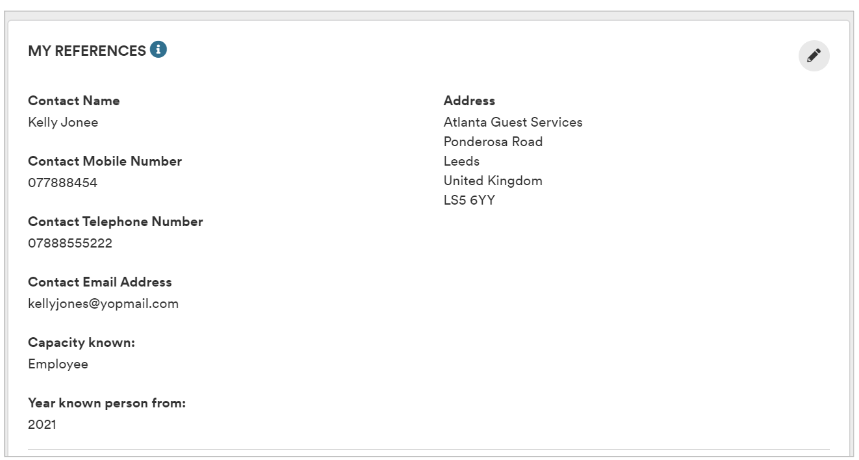
Once a candidate has completed their reference details as part of the application, they are visible from within their profile.
To access this, select their name when you are in the job:

You will then see a screen that looks like this:

From here, scroll down the main Personal Information page to the ‘My References’ section:
Please note - These references do not link to the Onboarding Reference check functionality.
- If you want to take out these references with the referee, you will need to manually contact the referee outside of Tribepad.
Residential history
Like with the options above, this functionality can be used within Job templates or within the Job Create process
- New and existing jobs can be edited to include this functionality.
Within the Job Template or Job Create process, go to the ‘Application Flow’ section and click ‘Expand/collapse options’:
Scroll down to the ‘Questionnaires’ section and you will see a changed DateGap section:
Select the ‘Residential history’ toggle and you will see two more options:

- You can then choose if you would like your candidates to provide residential history covering a certain period of time, OR just to give their current address.
Please note - you can only select one of these options.
Once you are happy with your input, make sure you save your changes at the bottom of the Job Create / Job Template page:
Candidate view
If Residential history is included as part of the application process, the candidate will see a screen that looks like this:

With this example, a set period of time was requested on the job, and so the candidate can edit their current address to fulfill the date requirements, or they can add more address history if needed.
Clicking the edit button will show a pop-up screen that looks like this:


- The candidate can edit the date that they moved into the address if necessary.
Clicking the ‘Add History’ button will show the candidate a screen that looks like this:


Once the candidate has provided the necessary information, they will see a confirmation message that looks like this:

Internal view
Once the candidate has submitted their application, you are able to see their Residential history detailed in their profile.
To access this, select their name when you are in the job:
You will then see a screen that looks like this:
You should scroll down the Personal Information page to the ‘Address’ section:

- As default, you will see the candidate’s current address
- If you wish to see more of their residential history, select the ‘View residential history’ button at the top of the section
You will then see any other addresses that have been added by the candidate:
