Please watch the video and read the information below to help you understand how to save and schedule your reports.
If you need to produce a set of the same/similar reports on a regular basis, you can use the Save/Schedule Report function.

This button is available on most reports and is situated in the top right-hand corner of the screen, next to your quick-date filters.
When you select it, a pop up will appear allowing you to select the options that are most relevant to you:
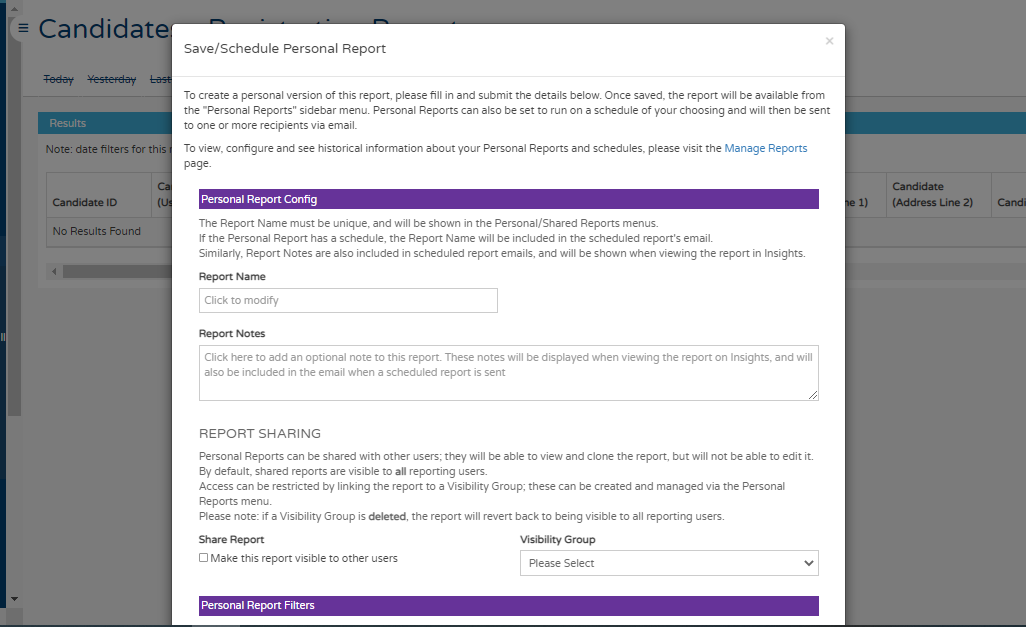
- First off, give your report a name. You can also add notes in here for any recipients that may need additional context.

- Do you want to share the report? If you select the tickbox,
 other users will be able to see the report when they log in to Insights
- A section will become available on the lower left-hand side of the screen underneath the list of other reports, titled 'Shared Reports'.
- Other users will be able to run and clone the report, but they will not be able to edit the original report. - If you would only like certain people to be able to view this report, you can add them into a 'Visibility Group'
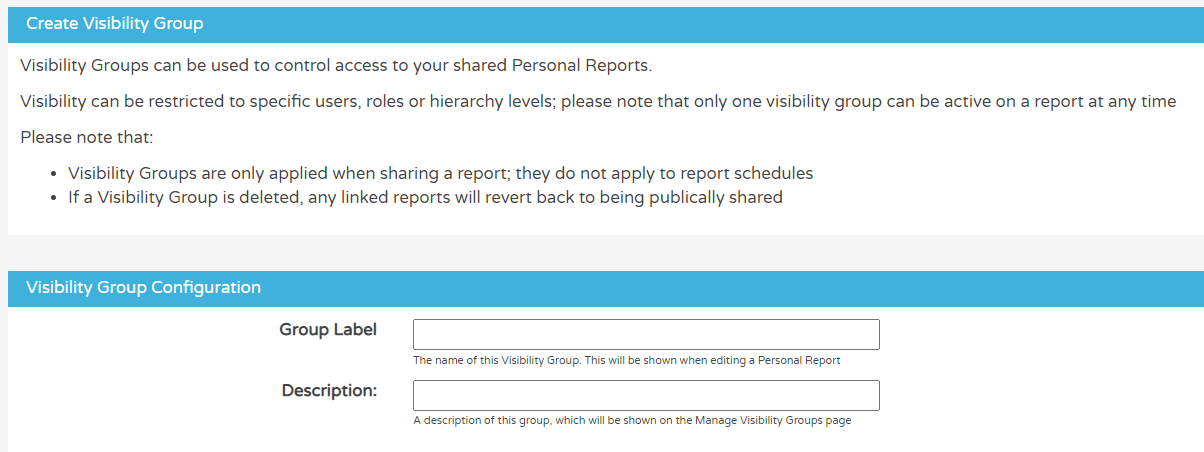
- To create a Visibility Group, go to the 'Personal Reports' section on the lower left-hand side of the screen
- Select 'Manage' and 'Create Visibility Group'
- Here, you can give your group a label and a description and choose whether certain user roles or specific named users will have access
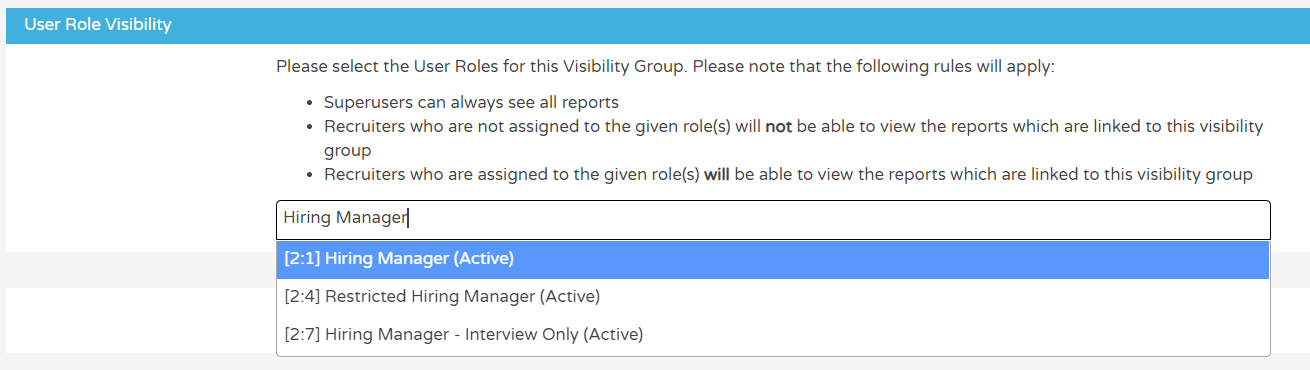
- If you choose 'user roles', simply type the user type and select from the options:
- If you choose 'users', simply type their email address into the text box:

- Once you have set up a Visibility Group, you can choose the relevant one from the drop down, back in the 'Save/Schedule Report' section:

- A section will become available on the lower left-hand side of the screen underneath the list of other reports, titled 'Shared Reports'.
- Next up, you can select any filters that are apparent for the specific report:

- Once you have selected the relevant filters, you can also choose which columns you would like to be visible in your report
- Tick or untick each column as required or 'Disable all columns' or 'Enable all columns' underneath the list:


- Tick or untick each column as required or 'Disable all columns' or 'Enable all columns' underneath the list:
- If you would like to schedule your report to run at a specific time of day or on a specific day of the week, you need to 'enable scheduling':
- Select the 'Enable Report scheduling' option (the system defaults to 'Disable Report Scheduling)
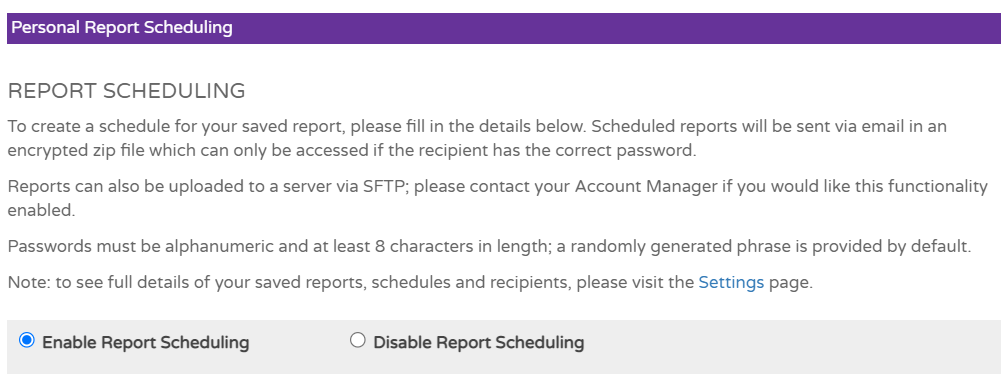
- Select the 'Enable Report scheduling' option (the system defaults to 'Disable Report Scheduling)
- If you would like to send the report to anyone, including yourself, enter their name and email address below and select 'Add new Recipient' on the right-hand side
- If you enter your own email address here, the report will be sent to you at the specific time you decide (further down the screen)
- If you choose not to include yourself, you can access the report from the 'Personal Report' section in Insights (lower left-hand side) whenever you like

- Scheduled reports will be sent via email in an encrypted zip file which can only be accessed if the recipient has the correct password
- The system generates a default password which you can use if you wish, or you can overwrite this with your own
- Passwords must be alphanumeric and at least 8 characters in length
- You can choose what encrypted format you would prefer the report to be sent in
- The system will default to 'Standard Zip encryption but you can change this if you wish

- The system will default to 'Standard Zip encryption but you can change this if you wish
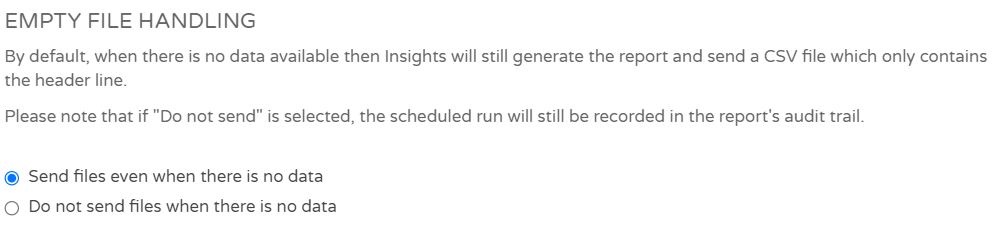
- You can choose if you would still like to receive a version of the report if there is no data to report on, i.e. is an 'empty file'
- Finally, decide when you would like the report to be generated - daily, weekly, monthly - whichever option suits you best:

- Once you are happy with your report, select ‘Create Personal Report’:

We always recommend testing this function to make sure you retrieve the information that you would like.
There is no harm in creating reports, even if you later delete them from your Personal Reports.