Find out how to utilise Integrations at the Onboarding stage of a candidate's journey
Integrations within Tribepad can be seriously helpful to your organisation.
Previously, we've only been able to enable them at a Job or Candidate level, but we can now enable them at the Onboarding stage of a candidate's journey as well.
Integrations need enabling in Tribepad before you are able to activate them for a candidate.
If you would like to know more about Integrations and how they might work best for you, please speak to your Tribepad Account Manager.
Setting up instances
Once your Integration has been enabled by Tribepad, you are able to create an 'Instance' for it.
Instances are a set of rules that are created to show how the integration will appear on the candidate’s profile, and also allow it to be triggered at Onboarding stage.
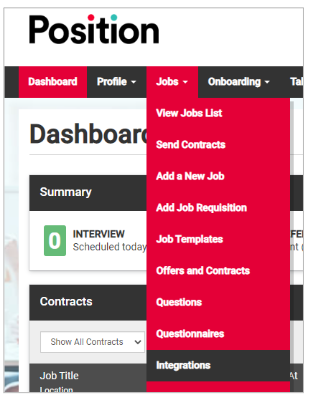
To create an instance, go to your ‘Jobs’ menu (or your ‘Tools’ menu if you have this on your platform):
From the integration list, select the relevant integration you wish to create an Instance for (on the left-hand side):

Next choose the ‘Onboarding’ option:

- Job - assigns the integration instance to a job, so is application specific
- Candidate - this assigns the instance to the candidate so the details will only need to be collected once and will stay with the candidates profile and subsequent applications
- Onboarding - this can be added to the onboarding workflow so it can be triggered to the candidate during the onboarding process.
You will be presented with a screen that looks like this:
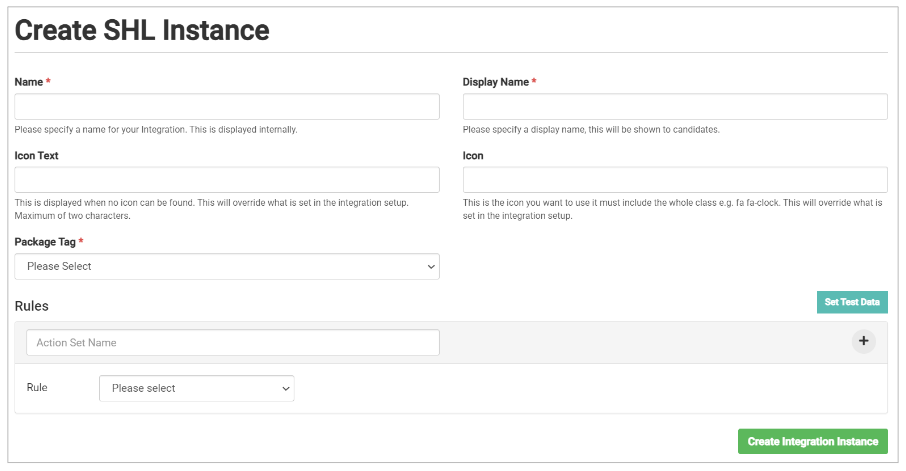
Complete the following fields:
- Name - internal name
- Display name - this will be shown on the candidate dashboard
- Icon Text - Maximum of two characters
- Icon - This is the icon you want to use
- Package tag - choose from dropdown list
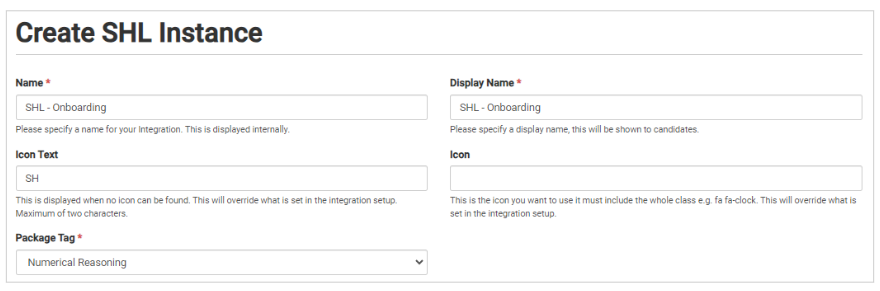
Give the rule a name, for example ‘Complete’:

- Rules work by determining an action - a rule either ‘equals’ or ‘not equals’ a specific status
- For example, to be notified of a completed reference the rules would be
Status > Equals > Completed
Multiple rules can be used for a single name, so you could have
Status > Equals > Completed
Status > Not equals > Not started
Once you have set the rule, clicking on the Green + will allow you to add in a tag, Reverse data mapper, Block application and set a colour.
- There may be other options, depending on the Integration


- Add candidate tag - this allows you to auto tag a candidate when the rule is met.
Please note - the tag must already exist in the ATS as a public tag.
For information on how to create tags in Manage, click here.
- Block application - Block the application from progressing
- Label colour will change the label (2 characters set up in the initial integration set up) colour when the rule is met
- Reverse data mapper - Allows integration data to be saved into fields elsewhere in the ATS
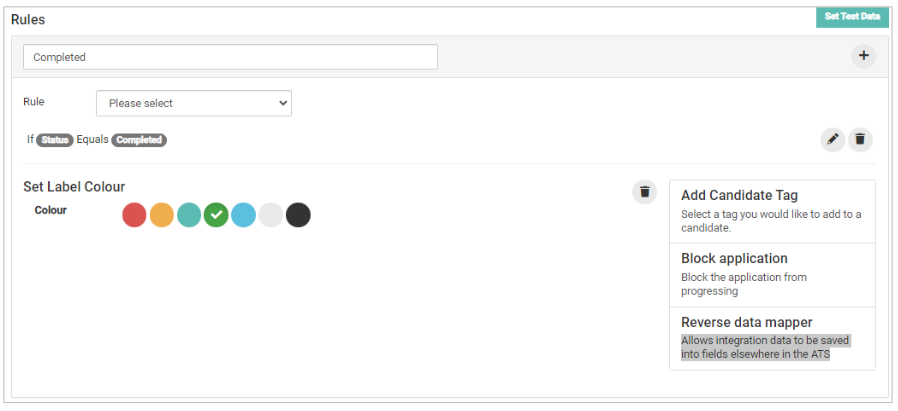
- In the above example when the candidate’s assessment is complete, the tag created will go green and the candidate will be tagged with a tag of Ref completed.
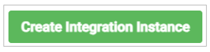
Once all required rules have been set up, you can create the integration instance by clicking on the green ‘Create Integration Instance’ button:
Adding the integration to an Onboarding workflow
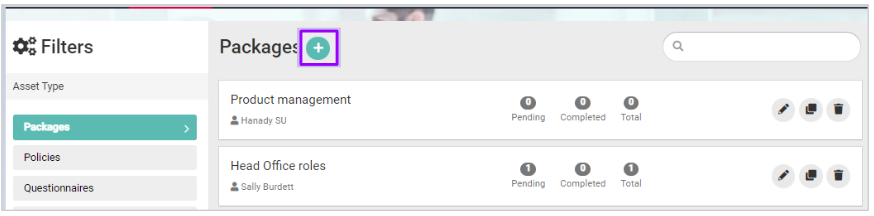
Once you have created an Instance, you can add it to an Onboarding package.
From the ‘Onboarding’ menu, click on ‘Manage Packages’: 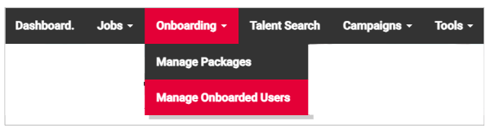
Click on the ‘+’ icon if you want to add the instance to a new package:
You can also click on the edit button if you want to add the instance into an existing package as below: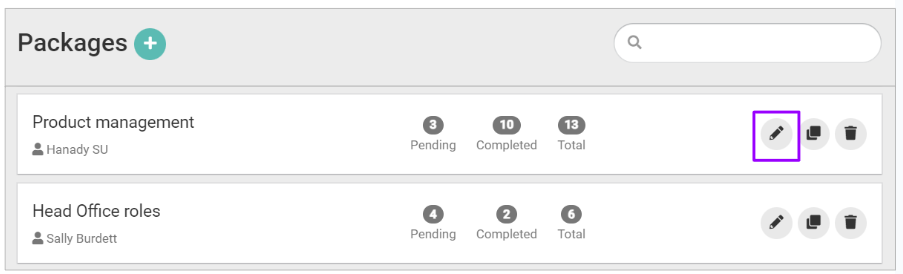
Next, add a new workflow by clicking on the + icon: 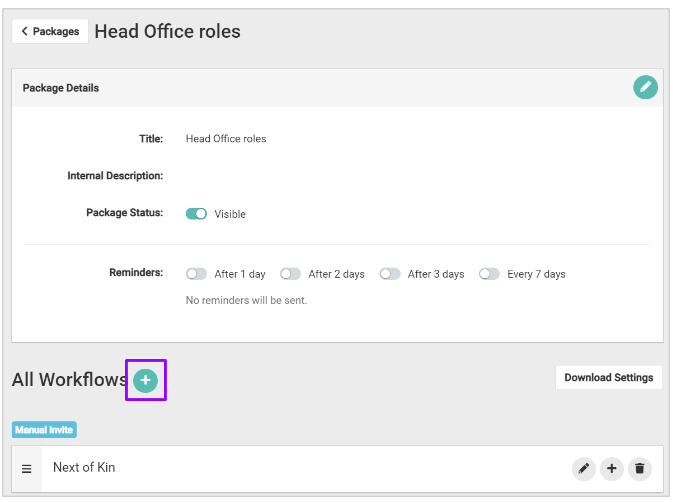
Complete the relevant details in the workflow: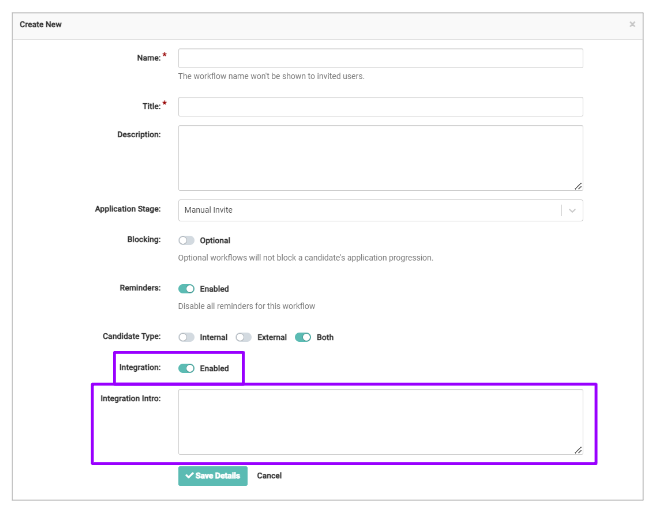
There are now some new additions to the workflow creation field:
- Integration - ensure this is 'Enabled' to allow the integration to be used in Onboarding
- Integration Intro - you can include information on the integration for the benfit of the candidate, if you choose.
Once happy with the workflow, click ‘Save Details’

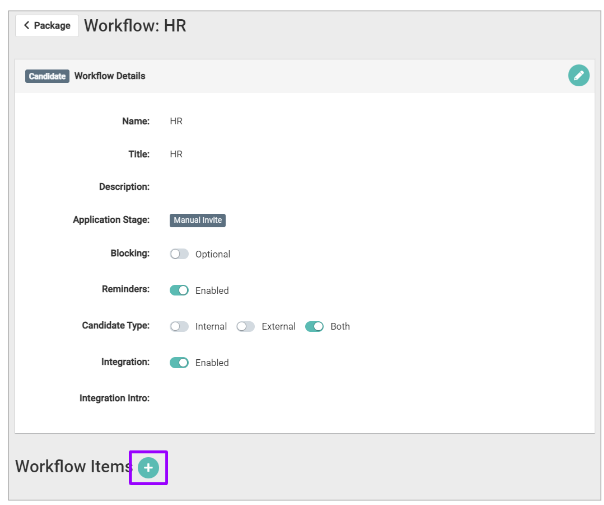
You will notice that your new workflow item is now labelled ‘Integration’ on the left-hand side:

- You will need to choose your relevant Integration from the drop-down list on the right-hand side
- Complete all other details as normal on a workflow item
- If you have our ‘Onboarding checklist’ functionality turned on, you will be able to add your Integration to a checklist and also decide if it will require approval and by who.
Please note - The Checklist functionality is not essential for the Integrations with Onboarding, but it might make your job easier!
Once you are happy with the workflow item, click ‘Save Details’
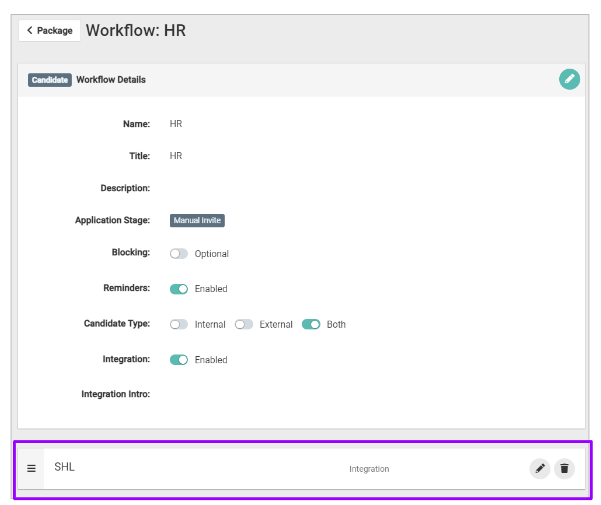
You will see the Integration Onboarding workflow item has been added to the workflow:
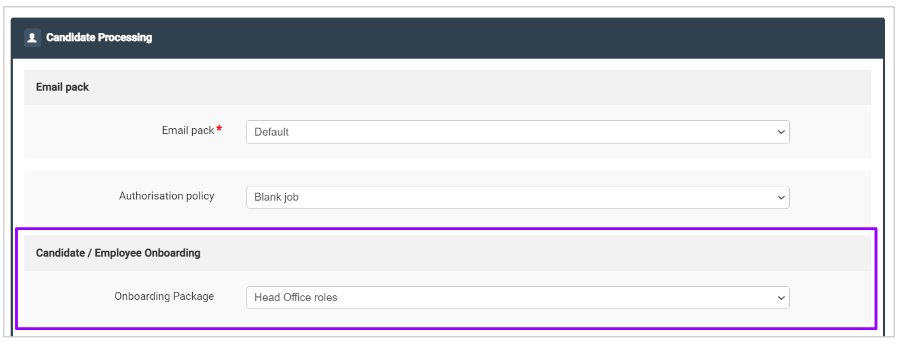
- Job Details > Candidate Processing > Candidate / Employee Onboarding > Onboarding Package (Select from drop-down list)
Triggering the integration
If the workflow was set up to be triggered at a certain stage it will automatically be triggered at that stage.
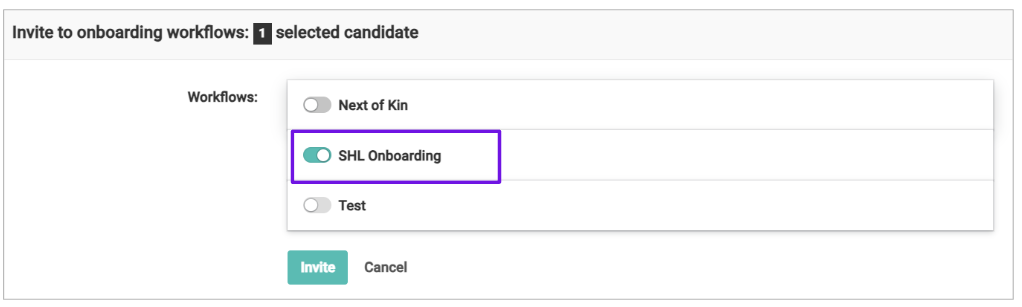
If the workflow was set up to be triggered manually, you will need to invite the candidate to Onboarding
- Select the relevant job
- Select the relevant candidate to open up the Options menu
- Select ‘Other Options’ > ‘Invite to Onboarding

Select the relevant workflow to be triggered:

- The Integration icon will remain grey until it is completed by the candidate.
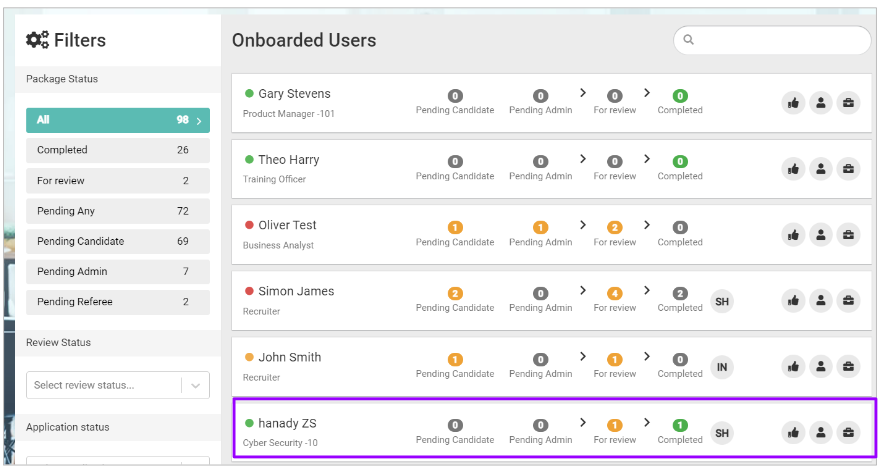
If you hover over the Onboarding icon , you can see the candidate’s progress in the workflow and when it was sent to them:

Clicking on the Onboarding icon takes you to the candidate’s Onboarding profile to show you more detail on their progress:
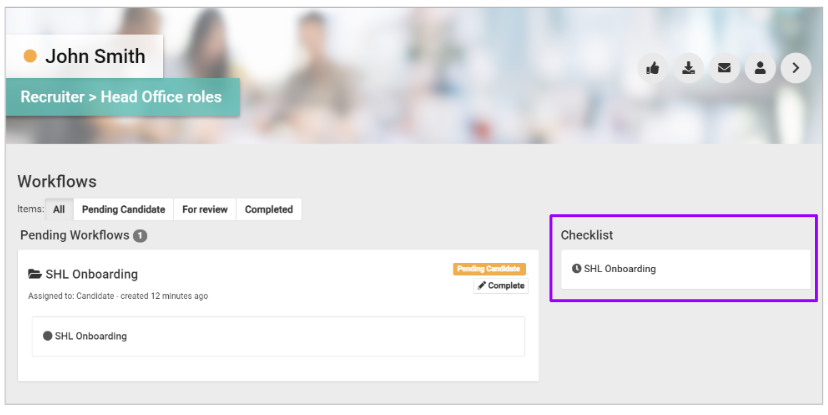
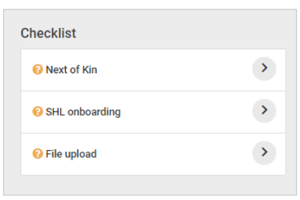
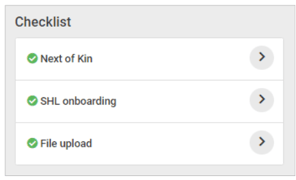
- If the Checklist functionality has been used, you can see progress through the checklist on the right-hand side of the screen.
For more information on the Onboarding Checklist, please click here.
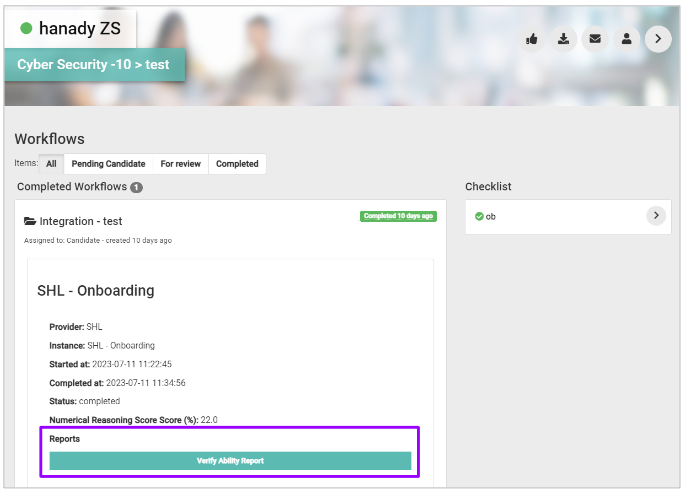
Once a candidate has completed the integration, the icon on their profile will change colour
- What colour, depends on what has been selected when the Integration Instance was created:
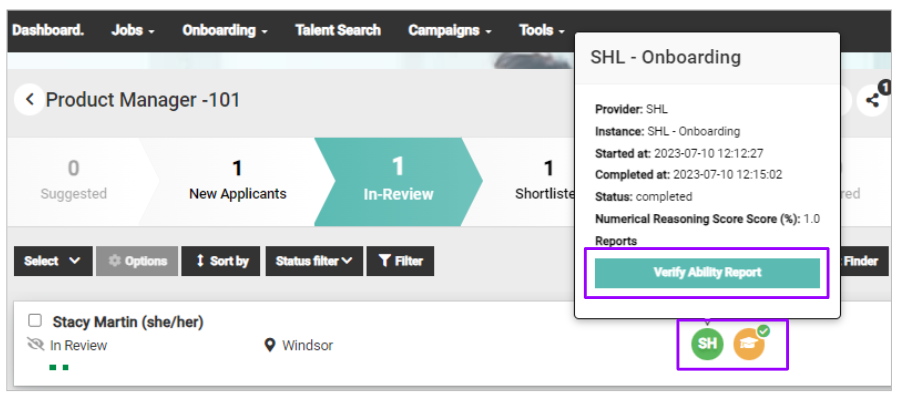
- If you hover over the Integration icon, you will be able to download the report by clicking on the ‘Verify Ability Report’ button.
You can also download the report by clicking on the Onboarding icon and going to the Candidate’s Onboarding profile:
If you are using the Checklist functionality within the Onboarding module, once the Integration has been completed, if it has been previously marked to require approval, you will see an amber question mark next to the workflow item:
- Click on the arrow to the right of the workflow item to view the content
If required, you can request changes: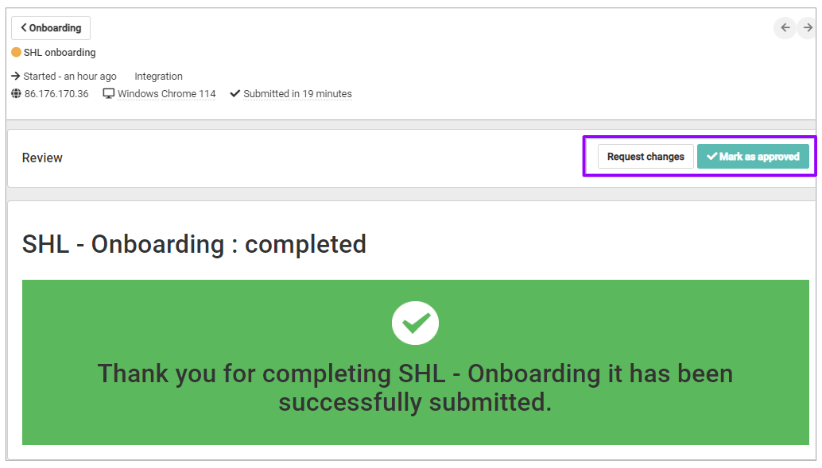
- Some integrations will allow the candidate to re-complete and re-submit their application / test / details
- Some will not - this will depend on the integration itself
- Approval can also be given as appropriate.
Once everything has been approved, the workflow items will show with a green tick in the checklist:
Please remember - the Checklist functionality is not required when using Integrations with Onboarding, but it might just help you out a little.