This article explains how you can schedule and invite candidates to book their own interview from the dates and times you provide.
-
- Select the candidate/s that you would like to invite to book an interview.
You can do this by selecting the check box next to the candidates name or anywhere within the outlined box that surrounds the candidates details.
- Select the candidate/s that you would like to invite to book an interview.
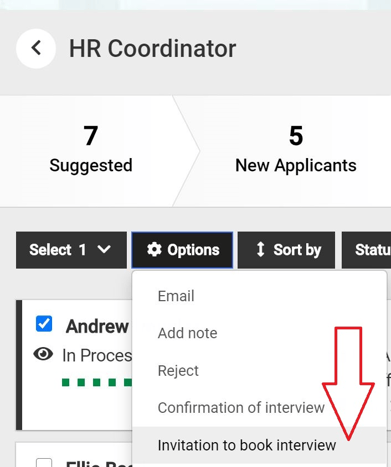
A pop up will appear.

Across the top of the pop up you will see;
- A heading that confirms how many candidates have been selected.
In the above example 3 candidates have been selected. - The different type of interviews that you can invite a candidate to.
All of the different interviews shown in the above example make up 1 'Interview Workflow'.
🎓Feature
Interview Workflows
An interview workflow can contain up to 5 different types of interview (see example above) depending upon your internal interview process.
You can create a set of different interview workflows ready to assign to specific jobs.
To understand more select;
-
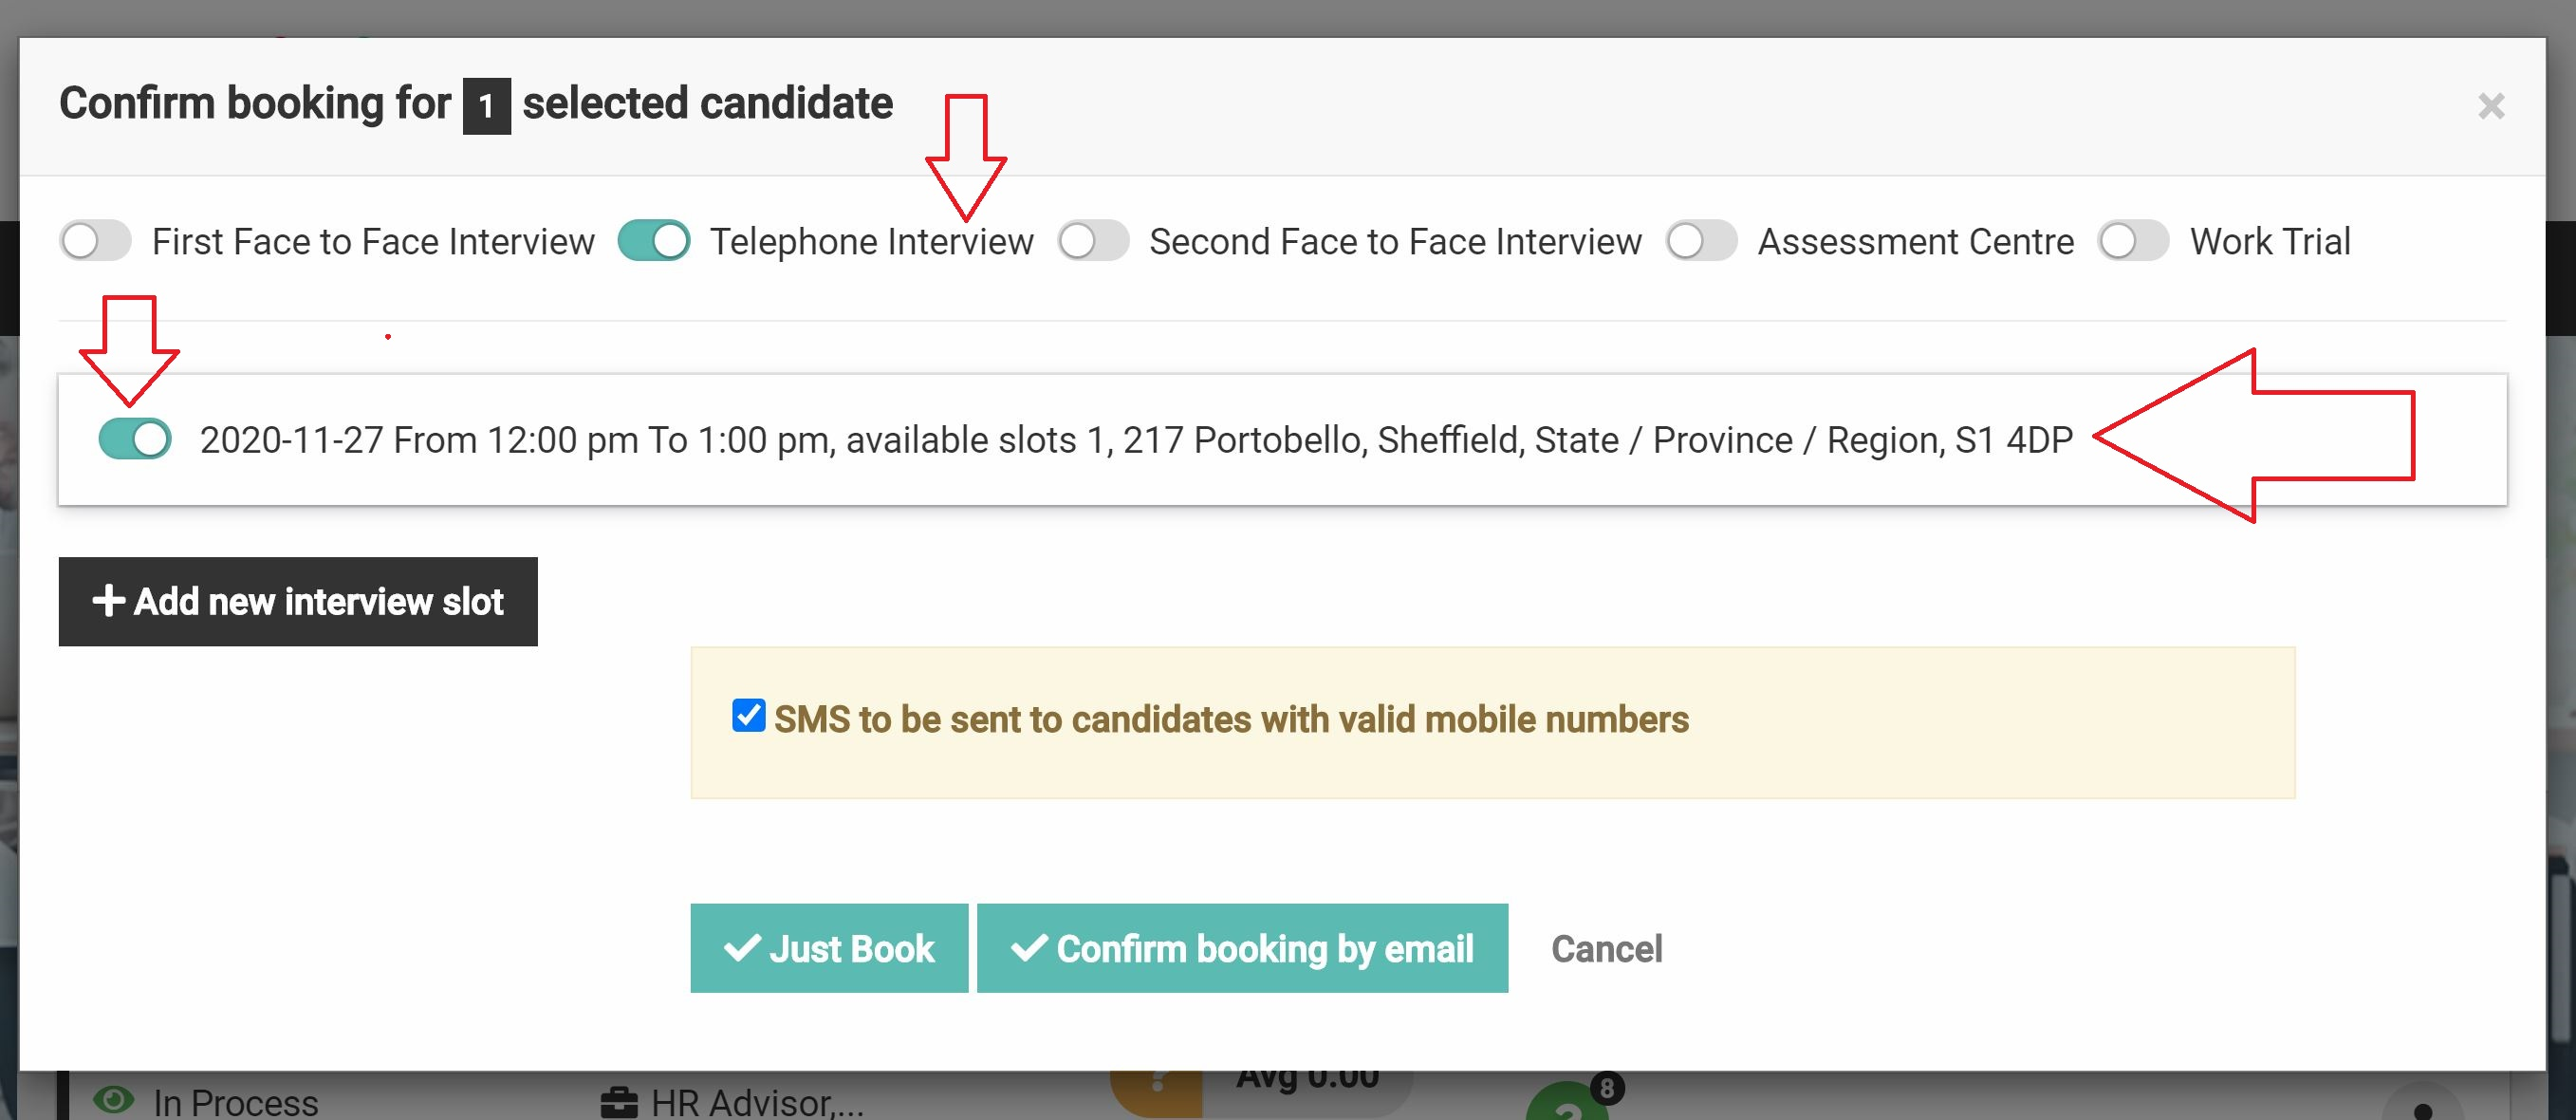
- Select the toggle against the relevant interview.
In the below example 'Telephone Interview' has been selected and you can see that an interview slot has been scheduled in advance and is still available to select.
-
- Select the toggle against the interview that is available if it is relevant.
If you haven't yet scheduled any interview slots or you want to add some more, you can do that now.
-
- Select 'Create more interview slots'.
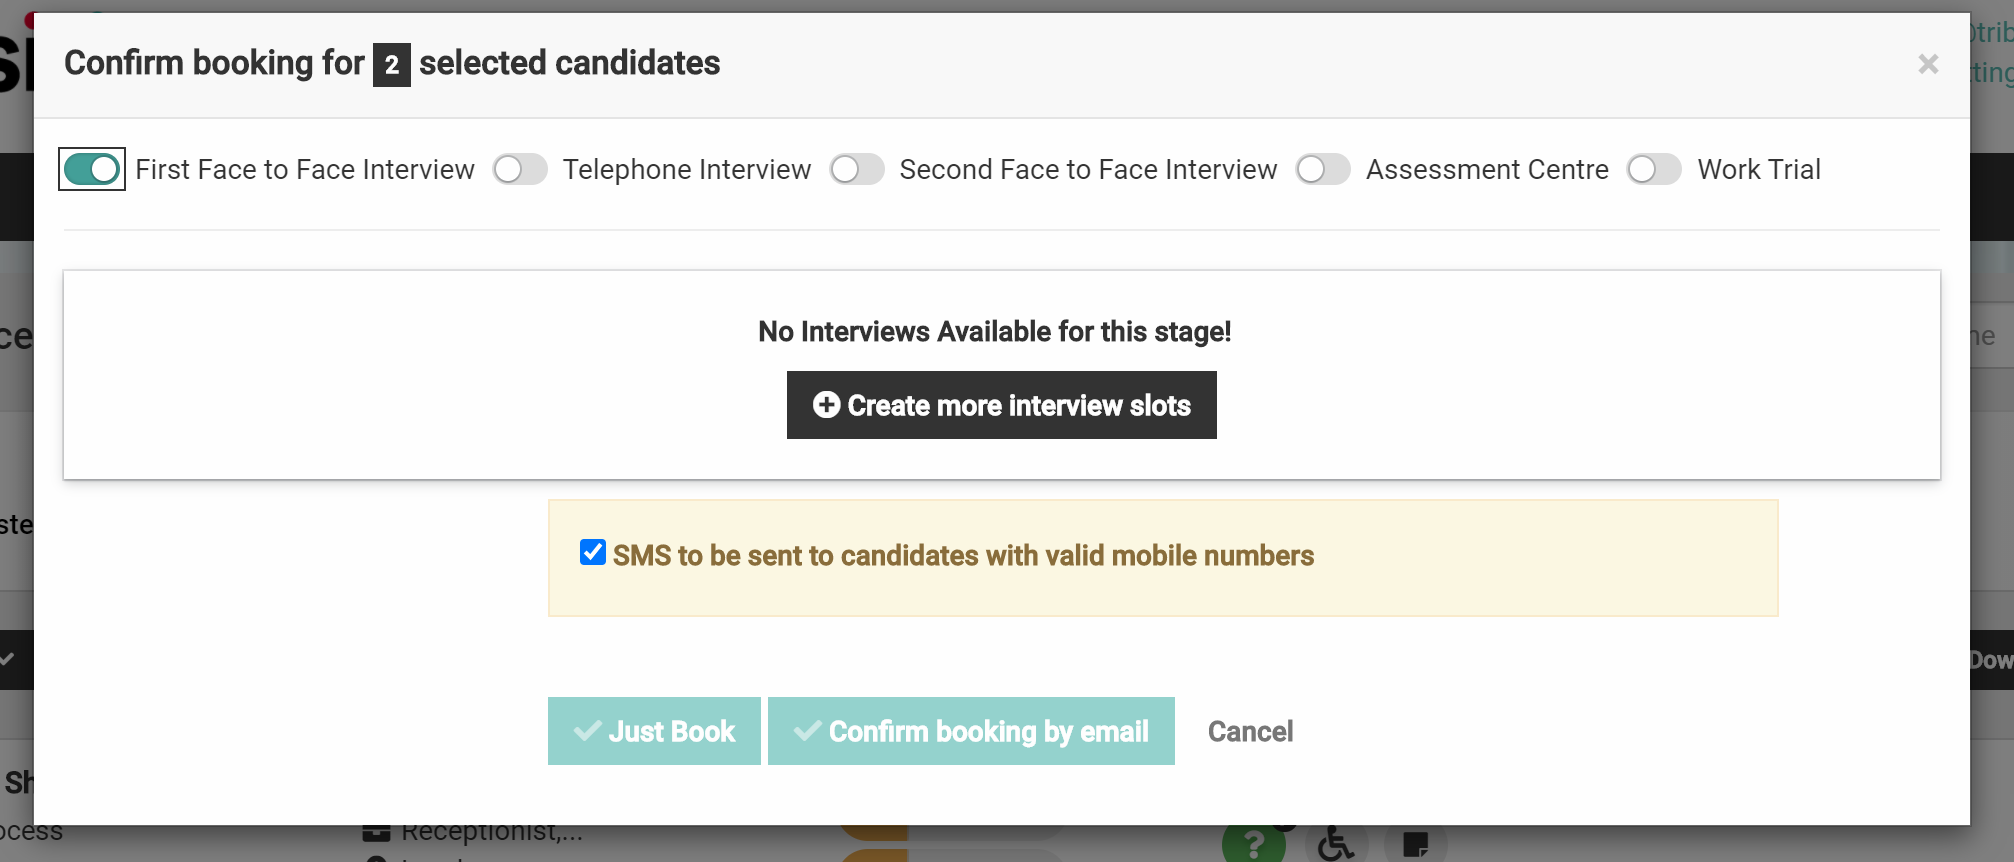
If you have selected more than 1 candidate and you have already scheduled a number of interview slots in advance you will be able to see the total number of interview times available.
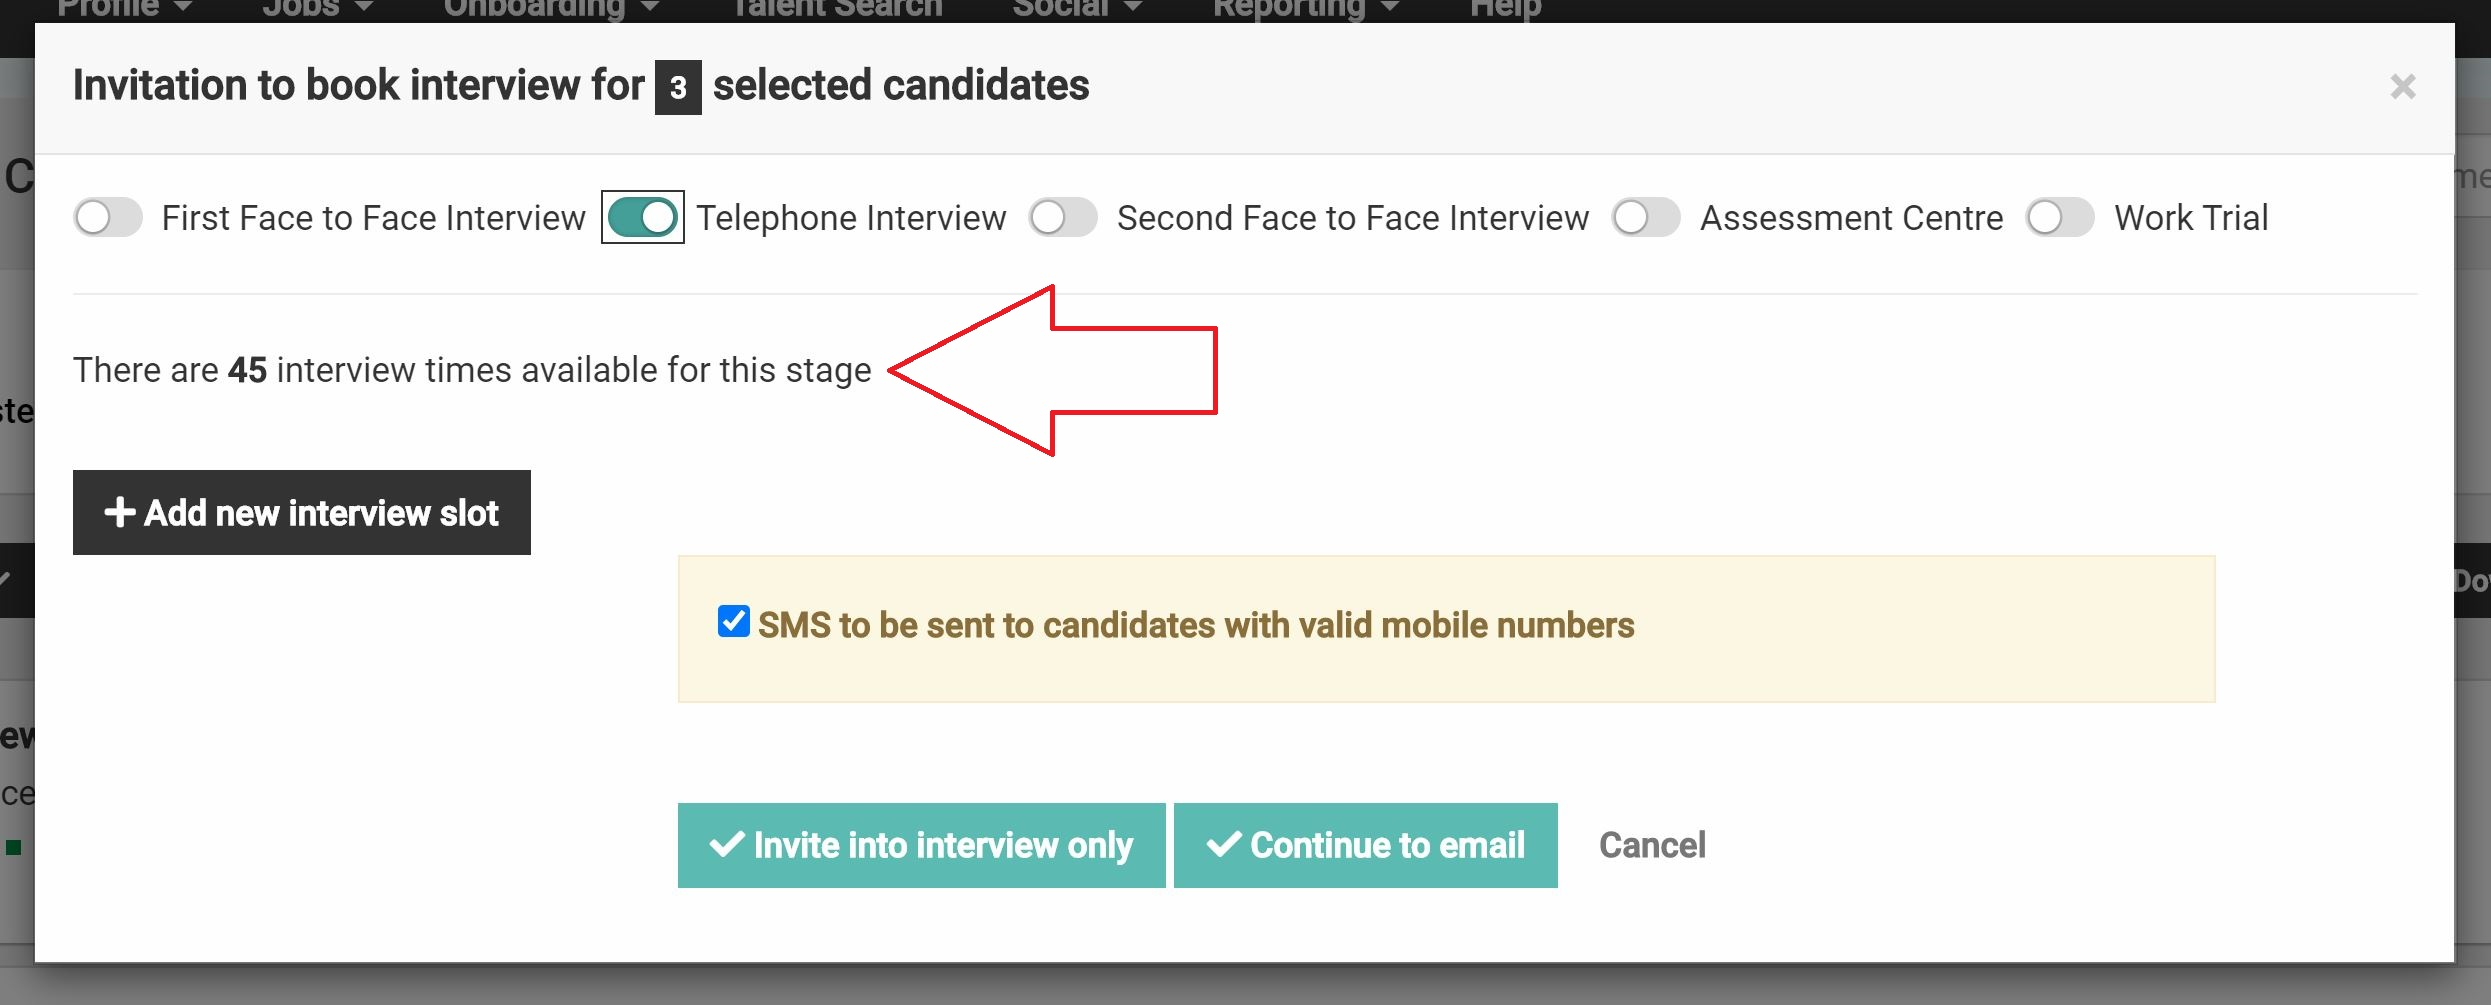
If you would like to schedule more interview slots;
-
- Select '+ Add new interview slot'.
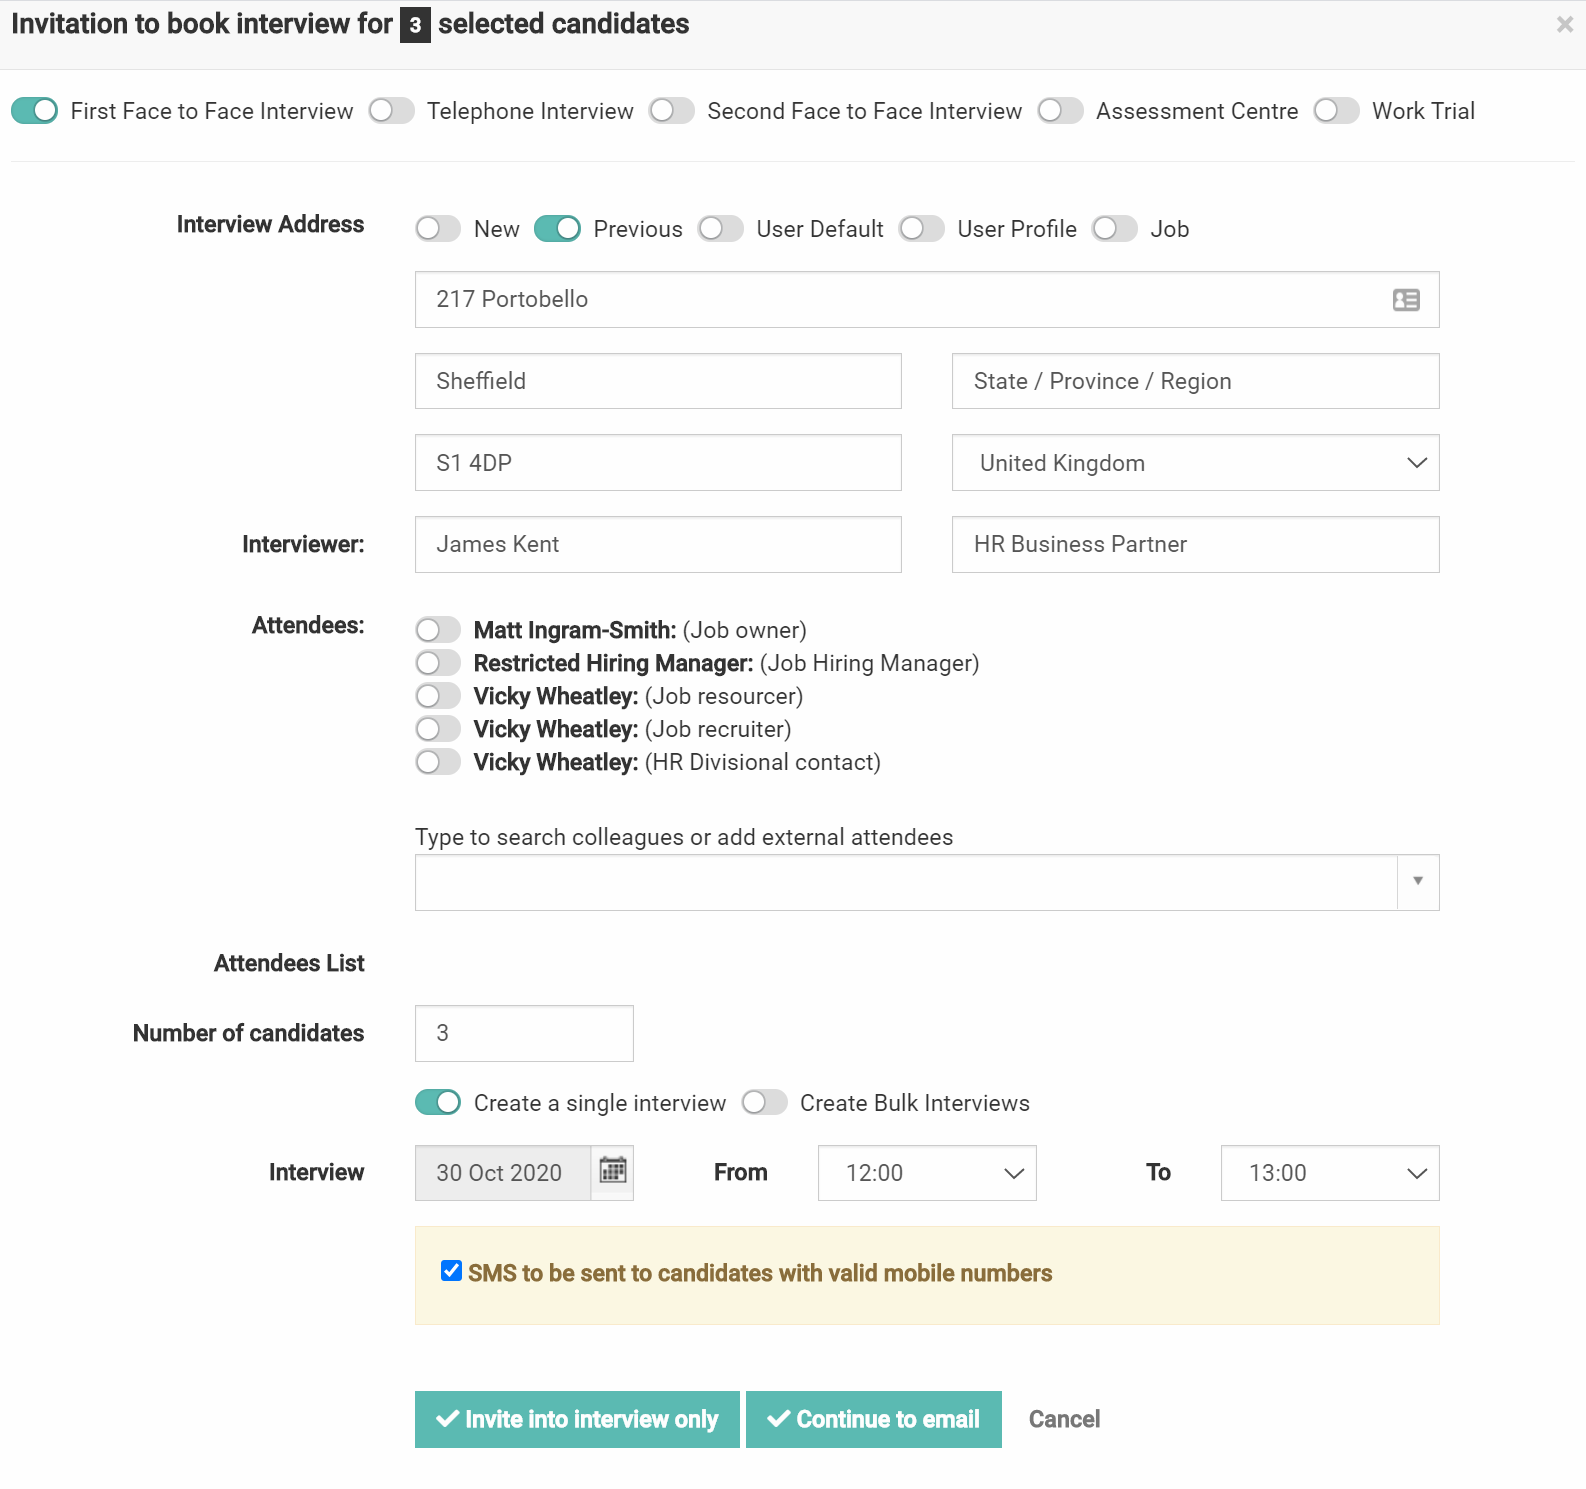
You will be presented with a pop up;
If you have chosen an interview workflow that requires an address (i.e face to face rather than a telephone interview). You can select the relevant toggle to;
-
- Automatically populate the interview address or;
- Add it manually.
-
- Interviewer:
Add the name and job title of the interviewer. - Attendees:
These are the names of any users that have been assigned to the job during the job creation process. Select the toggle next to the relevant attendees if applicable and search for other colleagues in the search bar or type in an external email address. - Number of Candidates:
This should always be 1 when confirming an interview. - Interview:
Select the date of the interview, then add the start and finish time. - SMS:
If your contract with Tribepad includes the use of SMS, you can select the SMS check box.
- Interviewer:
You may now select to;
-
- Invite into interview only.
This will not generate an invitation. - Continue to email.
You will be presented with a pop up which is the email that will be sent to the candidate.
- Invite into interview only.
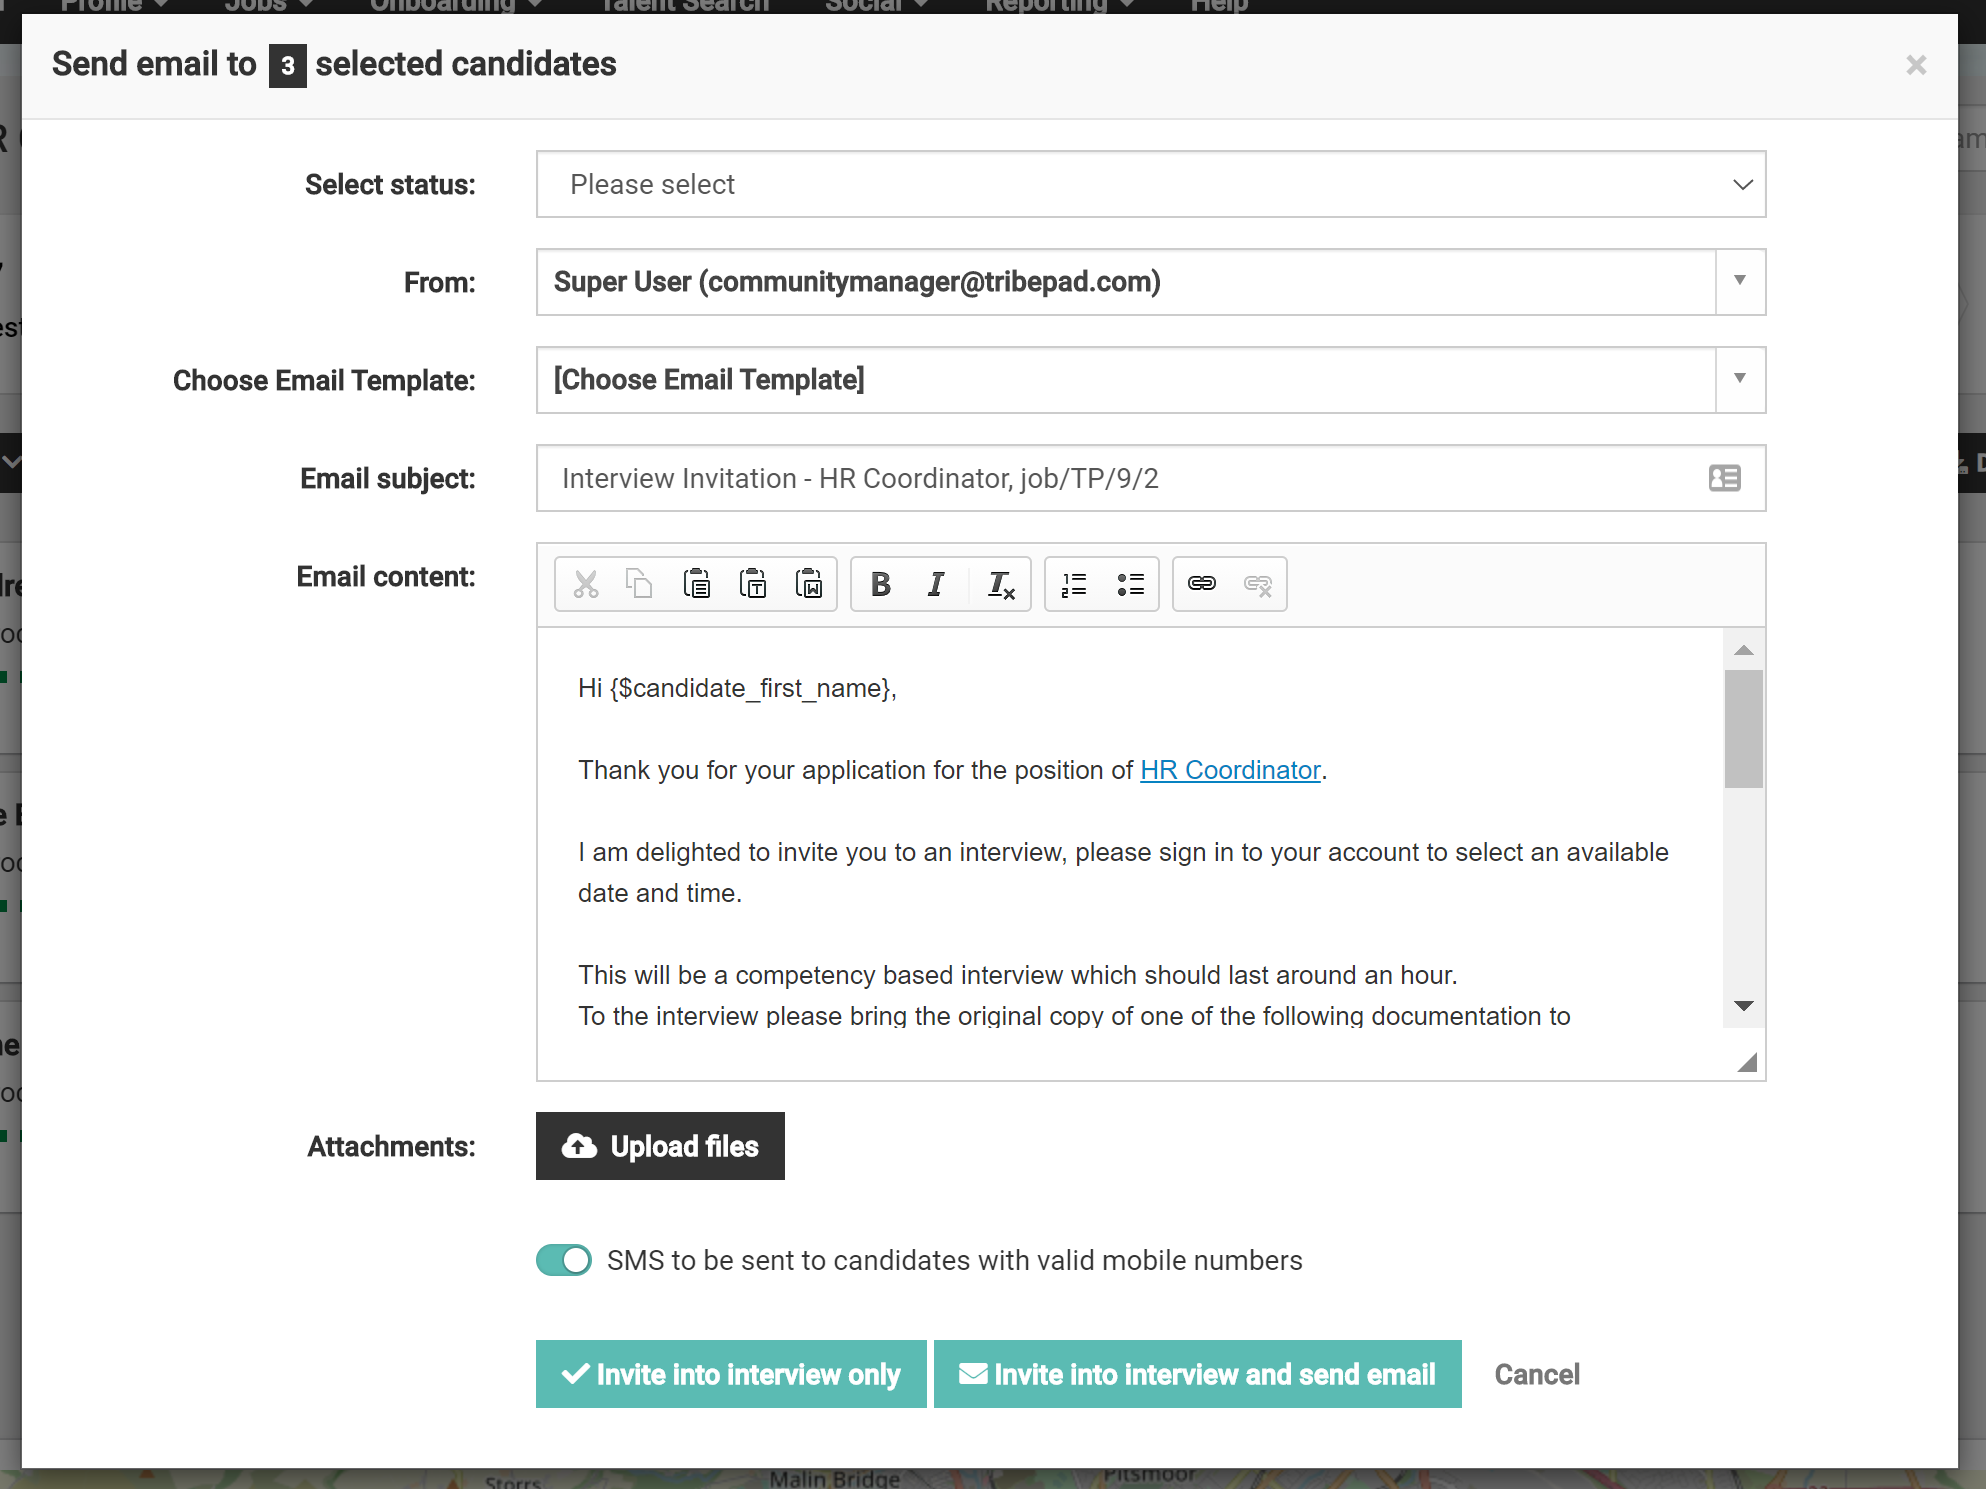
- From
You may have access to this drop down menu, if you do you will be able to choose who the candidate will see as the sender of the email. - Choose Email Template
You may have access to select an template from the drop down menu, this will change the email content shown below. - Email Subject
The content will already be populated, you can delete it to add your own if you would like to. - Email content
This content will already be populated, if you would like to edit it, simply select the box to make your changes. You can also use the icons across the top of the content box to format the text. - Attachments
If you would like to attach a document to send to the candidate, perhaps some interview preparation for example. Select the 'Upload files' button and choose the file you would like to attach from your computer. - SMS
You may have the option to send an SMS, if you would like to send an SMS version of the email, select the toggle to show as green.
Once you are happy with all of the content select;
-
- Invite Into Interview only.
This will not generate an email or SMS.
- Invite Into Interview only.
-
- Invite into interview and send email.
This will generate an email and send an SMS.
An SMS will only be sent if a valid mobile number is present on the candidates profile.
- Invite into interview and send email.
What happens next?
At this point the candidate will receive an email and a text message asking that they log into their profile and select an interview slot from the dates and times available.
Below is an example of a candidates profile and the candidates job applications.
From here the candidate can select to;
- Book or;
- Rebook an interview.
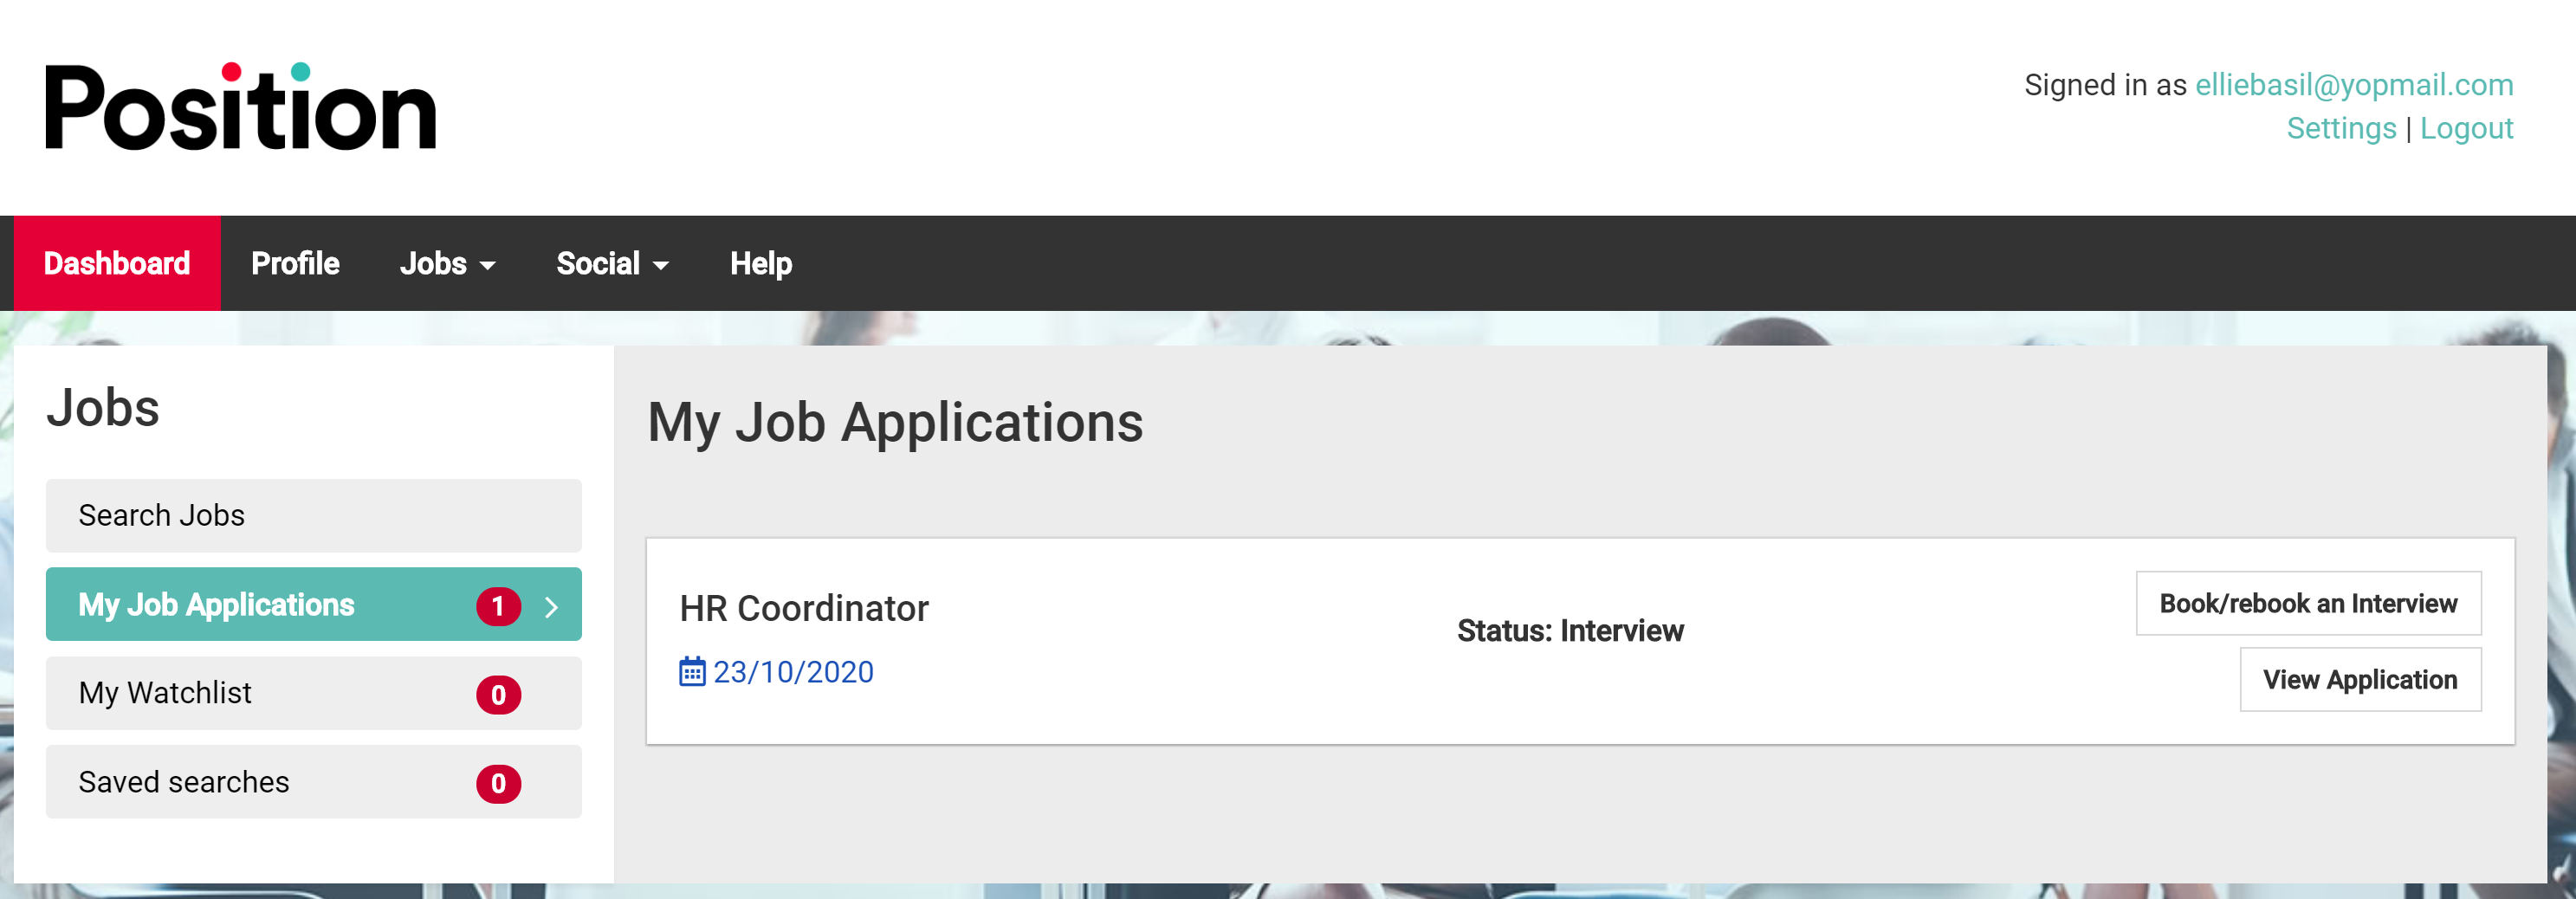
The candidate will then be presented with a list of available dates and times from which they can select what is most suitable.
As soon as the candidate has chosen and confirmed their booking, all attendees' will receive a notification via email detailing the interview details.
🎓Feature
Automatic Interview Reminders
When a candidate is invited to book an interview, sometimes they may take some time to carry out that action.
This feature allows you to set up automatic reminders which can be sent via email and SMS (if you use SMS) to the candidate at a time period and frequency specified by you.
To understand more about this feature select:
Once you have sent the invitation, the candidate will move into 'Interview' status;
From here you can see that the candidate has been invited to a First Face to Face Interview.

-
- Select Dashboard from the top navigation bar.
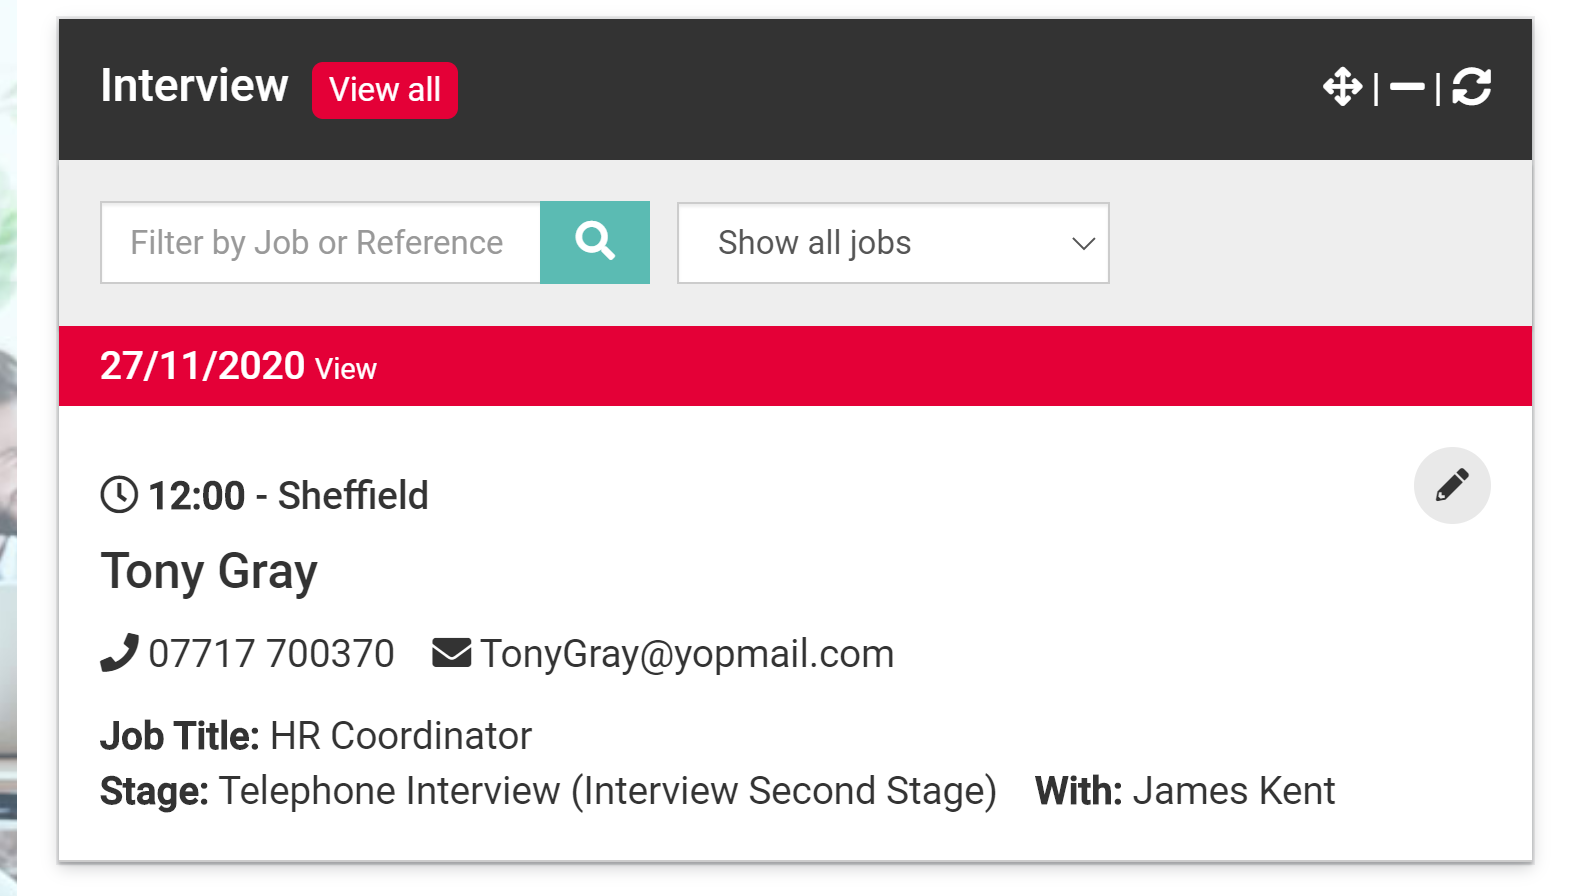
- Navigate to the Interviews widget.
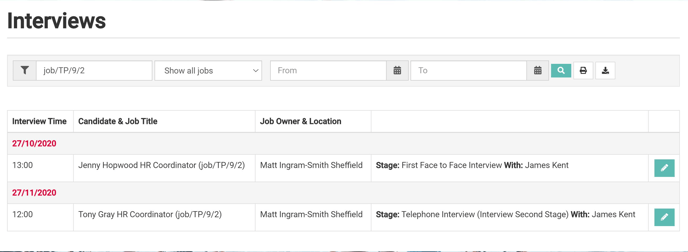
From here you can see details about interviews that are due to take place.

You can also view interview bookings from the 'Interview Slots' page within the 'Job Editor'.
-
- Select the number against the text 'Booked'.
Highlighted in green below.
- Select the number against the text 'Booked'.

You will be presented with a screen similar to the example below, from here you can;
- Use the filters to search for specific roles.
- Print and or download the page.
- View the interview date and time.
- View the candidate name and the job title of the role they are being interviewed for.
- View the type of interview they are scheduled to attend.
