What can this report do for you?
This report provides everything that you may need to know about a job and its performance, in terms of the end-to-end recruitment process versus time taken.
This is one of Tribepad's largest pre-built reports, and so a lot of information can be gathered from it.
Quick-date ranges are not able to be used on this report - to gather the information you require, you will need to use the 'Custom filters' here.
Date filters available to be used are:
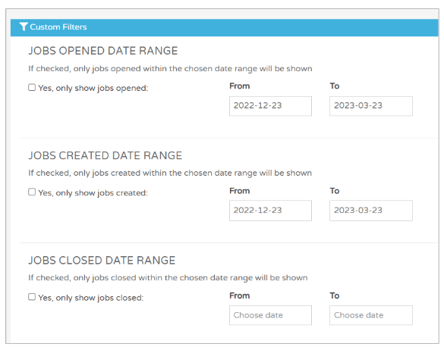
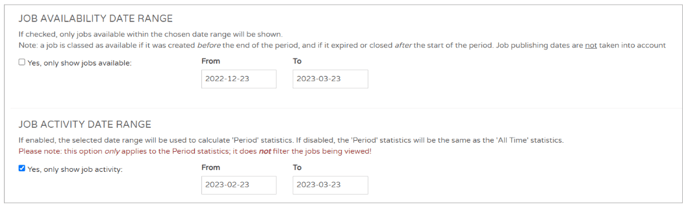
Within each of these date ranges, you have the option to show only that date range in the report.
For example, in the last date range, you could select that Only 'Job Activity' information is shown:

Other Customer filters for this report include the standard ones like these:
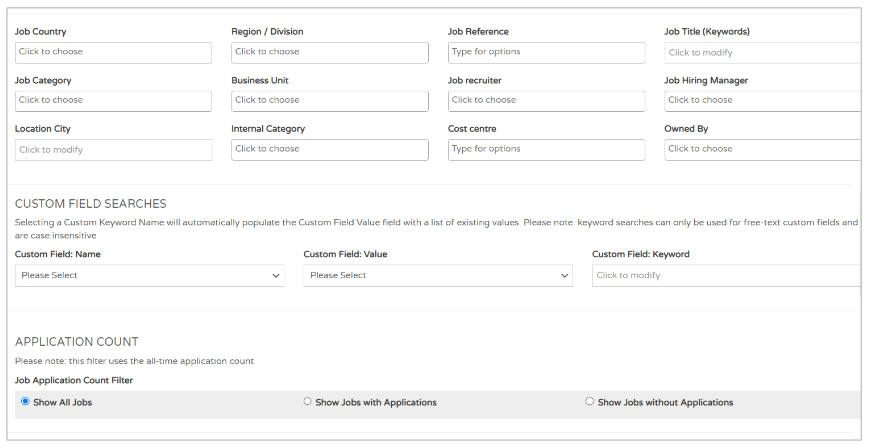
And also these additional ones:

One filter that might be of most use to you, is the 'Job State filter':
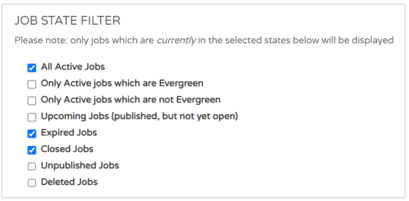
The Job Efficiency report tells you how certain jobs are performing, in terms of applications, hires etc. However, you may only wish to see Active jobs rather than Expired or Closed jobs.
You can take out the relevant jobs using this filter.
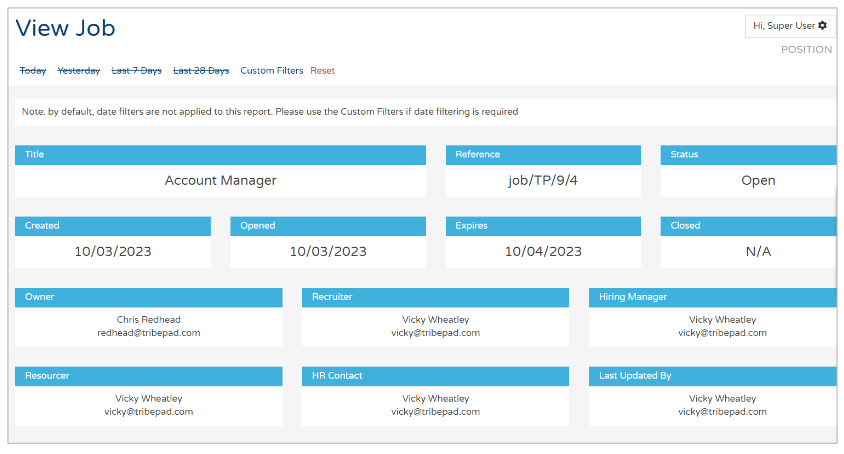
Once you have added in your date filters and anything else you require, you will be presented with a screen like this:
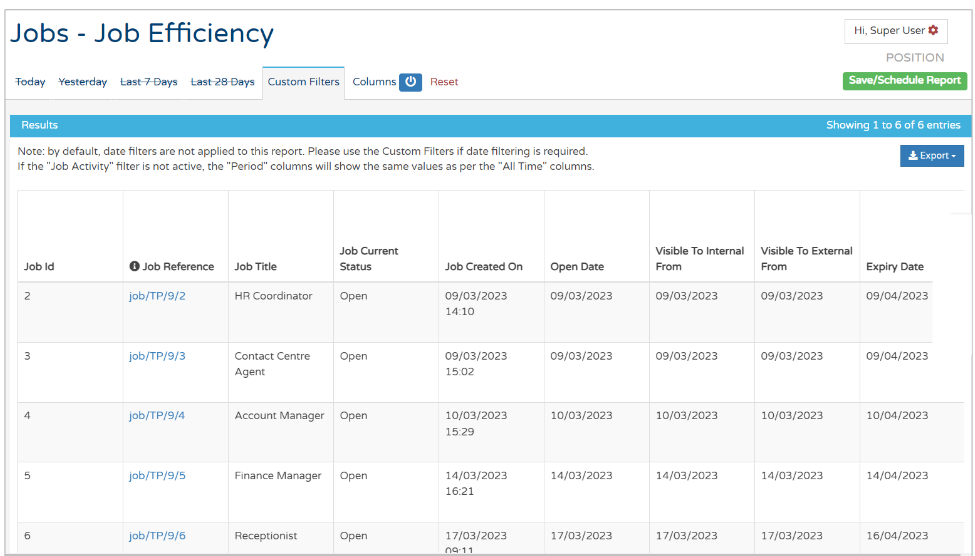
Here you can see
- Details of the job title and reference
- Job opening and expiry dates.
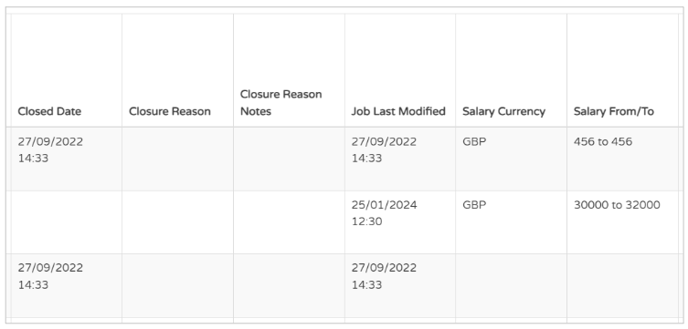
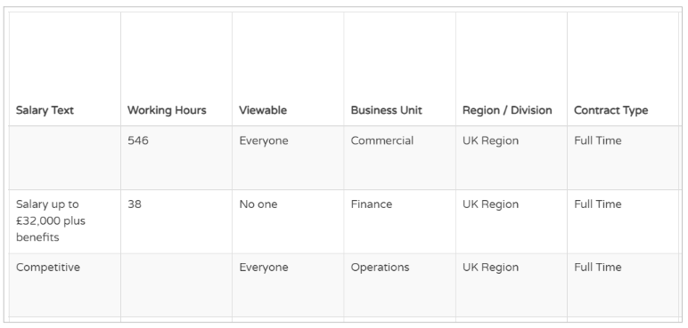
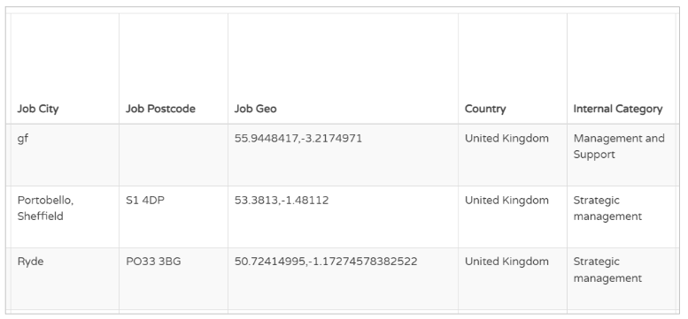
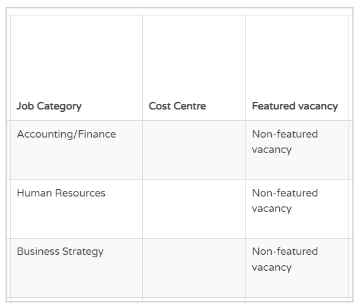
If you scroll to the right you will see a lot more information relating to the jobs:
- Specifications of the job (Salary, Working Hours, Business Unit etc.)
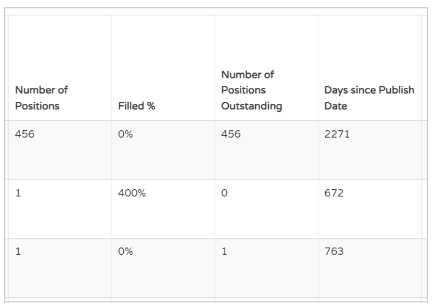
Scrolling further over to the right, you can also see details relating to the number of positions available, what percentage (%) of the positions have been filled, number of positions outstanding, days since the job was published:
Again, further over to the right, you will see further details relating to the job:
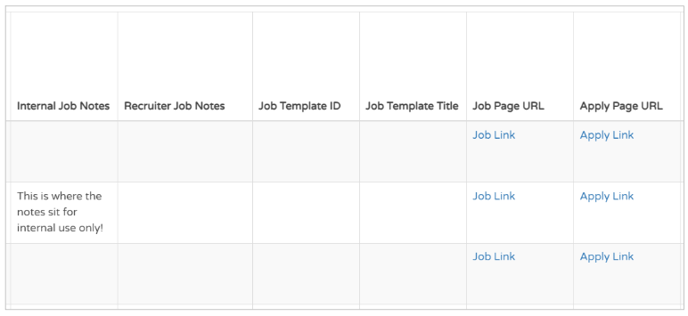
- Any notes that have been added by recruiters
- Templates that may have been used to create the job
- The Appply and Job Site URL links.
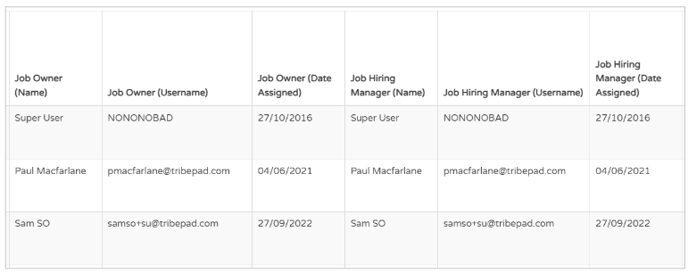
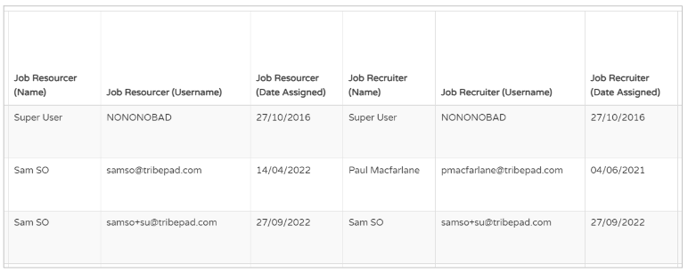
Again, further to the right, you can see details of any internal users who have been assigned to the job:
Further over again, you can see details on how many applications have been received against the job, how many complete and incomplete applications are in your platform, and how many candidates are sitting at each stage of the process,:
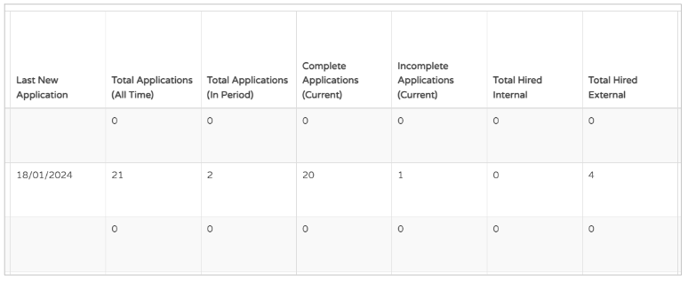
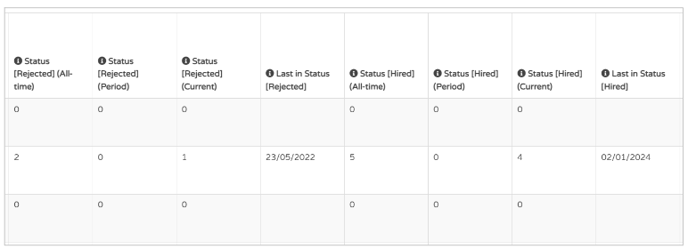
We haven't included screenshots of every column here as these columns are all very similar.
You will see summaries of all stages in the standard application process:
- New Applicants
- Submitted
- In-Review
- Shortlisted
- Interview
- Offered
- Accepted
- Hired
- Rejected
- Withdrawn
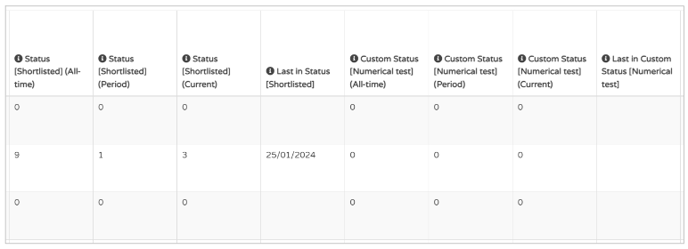
You may notice that some of the totals are further refined by
- All Time - the period between the job opening and now
- In Period - the job activity date range you have selected to run your report on
- Current - as of Now.
If you have also got any 'Custom Statuses' in your platform (you might also know these as a 'sub-status'), these will also be shown here.
Further over to the right, you can also see details relating to the interview stages.
You can see a summary section with your totals (as above), and also the date when a candidate was moved into the most recent of your interview stages:

Please note - If you have multiple job stages set up within your platform, you can also see details of how many candidates are in the different stages.
We have not detailed all of these columns again, as they are very similar to the ones shown above.
Further over again in the report, you can see details of any Custom Fields that have been attached to the job: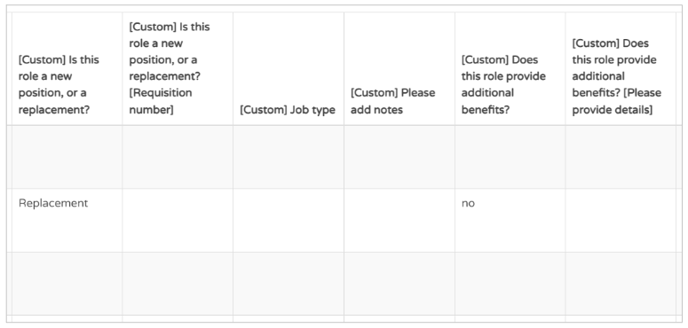
Please note - A Custom Field is a field that is created specifically by your organisation for your internal requirements. They are determined by your teams and Tribepad does not control these.
For more information on creating and editing Custom Fields in Manage, click here.
Further over to the right, youwill see information relating to the Job and Interview workflows that have been applied to this job:
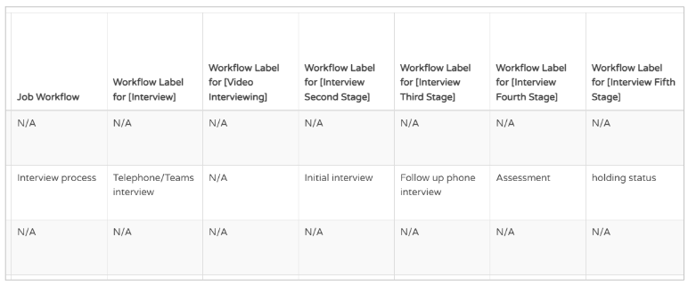
- A 'Job workflow' relates to your stages of your Application process
- An 'Interview workflow' relates to the different stages you have set up in your platform for your candidates to go through, in relation to Interviews.
Both of these workflows can be managed by you internally, and are saved in our Manage tool.
For more information on editing and amending workflows, please click here.
The final columns in this report refer to your Time to Hire and Time to Fill totals, and also Hierarchy:
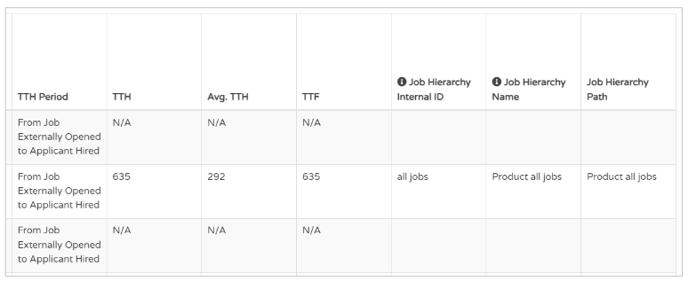
- Time To Hire (TTH) Period - Relates to the date range that you have selected to report on within the custom filters
- Time to Fill (TTF) - Time to Fill uses the same configuration details as TTH, but will only be calculated if all positions for the job were filled in the given period
The 'Totals per Recruitment status' and the 'TTH totals' rely upon ATS users moving candidates through the recruitment process appropriately.
If candidates are not moved through the process in a timely fashion (i.e. at the time the candidate is going through that stage in the process), your data will only reflect what the platform can see.
For example, if you choose to move all of your candidates to 'Offered' or 'Hired' at the same time, rather than as they reach that point in the process, the TTH data presented for your job roles, will be incorrect.
Finally, if you are using Hierarchy in your platform, you can see which nodes of the Hierarchy have been used in relation to the job.
Amending your TTH and TTF settings
If you find that your TTH and TTF periods need to be calculated in a specific way, you can amend these by using the Settings page within Insights:
Click on the  icon in the top right-hand corner of your page:
Select 'Settings' from the drop-down menu: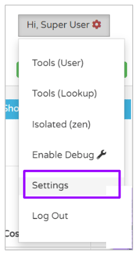
Scroll down the page to your Time to Hire and Time to Fill settings:
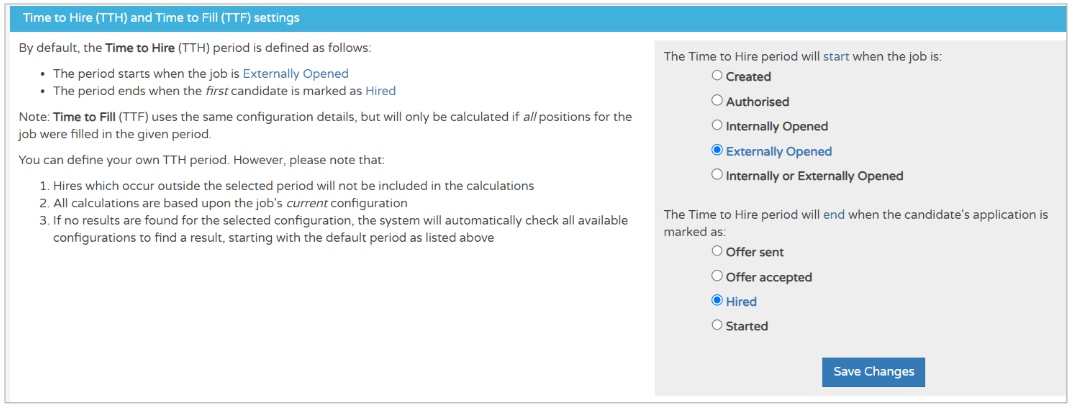
From here you can change the period that is defined for TTH or TTF.
Make sure you select ![]() when you have made your amendments.
when you have made your amendments.
Editing columns before viewing or exporting this report
As you have seen, this report is pretty big.
Because of this, there may be lots of columns shown that might not be that useful to you.
As a result, as well as the 'Custom Filters' tab at the top of the report, there is also a 'Columns' tab:
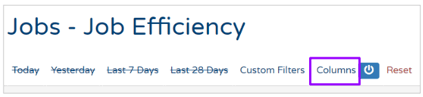
Clicking on this tab will show you something like this: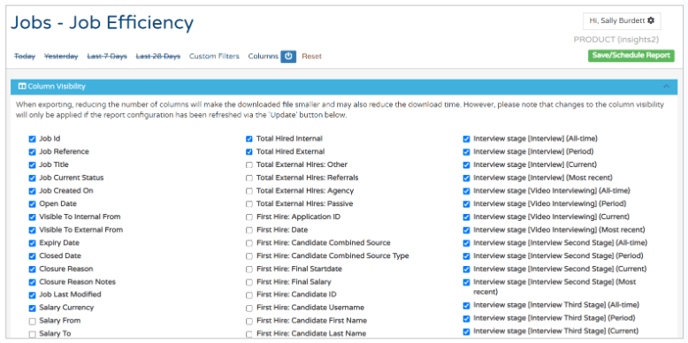
- From here, you can select which columns you would like to see in the report.
Alternatively, if you scroll down the page, you have the options to Disable or Enable all columns, according to your preference: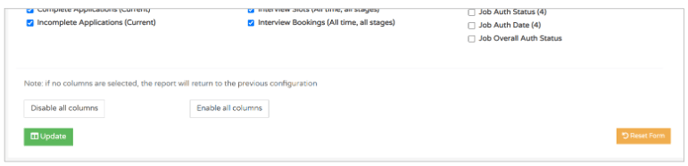
- If you Disable all columns, you can then go in and select only the relevant ones to you.
Getting more information on reports
Something else you can do in this report, is get more information on any report that has a blue hyperlink.
In the example above you can see the Job Reference section that it is highlighted in blue:
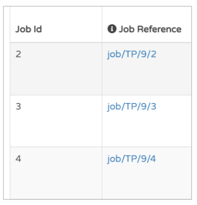
If you click on this it will provide a more in-depth look at the job's statistics: