Find out how to sync your Google or Office365 calendar with Tribepad
You are now able to integrate your Office365 or Google calendar with Tribepad. This allows you to set your availability for the purpose of scheduling and/or attending interviews.
This integration is a paid feature within Tribepad.
If this is something you are interested in, please speak to your main ATS lead within your organisation or your Tribepad Account Manager.
Check out this video or read on for a step-by-step guide:
Connecting Office 365 / Google Calendar
Once activated within your platform, both you and other ATS users in your organisation can sync your calendars with Tribepad to enable efficient scheduling of interviews.
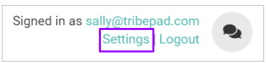
To access the calendar settings, select ‘Settings’ (top right hand corner of the ATS)
Then select the ‘Calendar’ tab: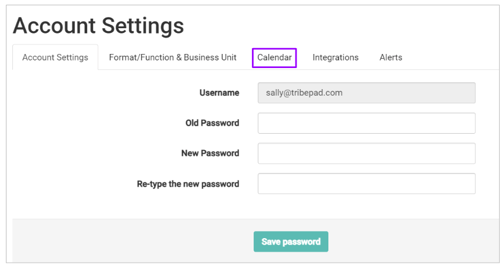
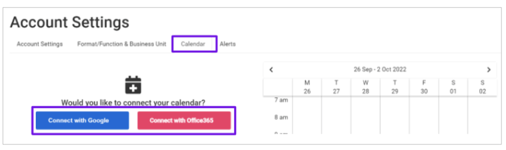
You will have 2 options presented, in order to connect your calendar:
- ‘Connect with Google’
- ‘Connect with Outlook365’:
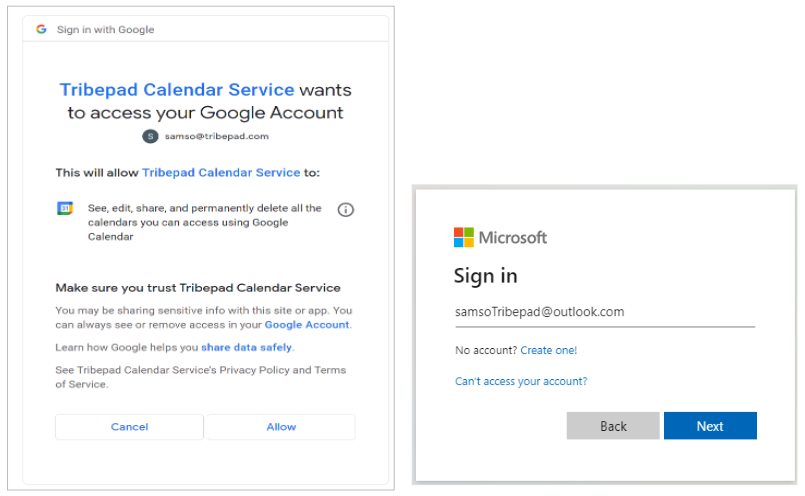
To connect either your Google Calendar or Office 365 Calendar, you should log in to your chosen account
- Fill in your credentials and provide access to your calendar
If you use Azure Active Directory, you must give admin consent to Tribepad so the user doesn’t get asked for permission when they set up the calendar connection.
Setting Availability
Once the calendar has been connected, you can set your availability.
The screen will refresh and you will be presented with a screen that looks like this:
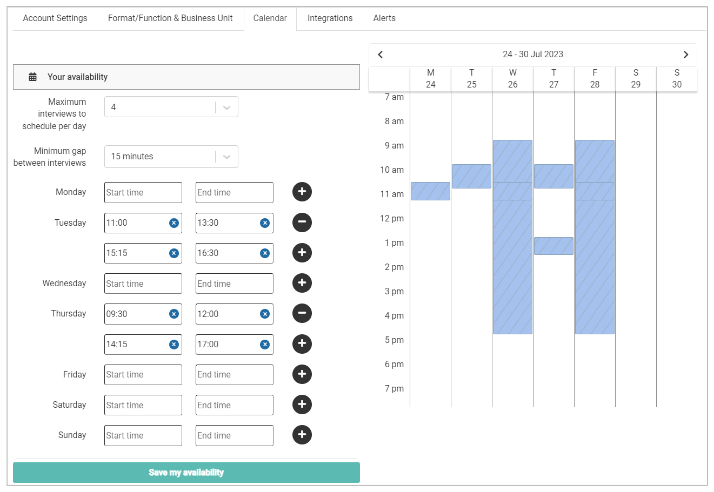
Here you can fill in your availability for multiple days in the calendar. You can also determine:
- The maximum amount of interviews permitted in a day
- The minimum (time) gap between two interviews
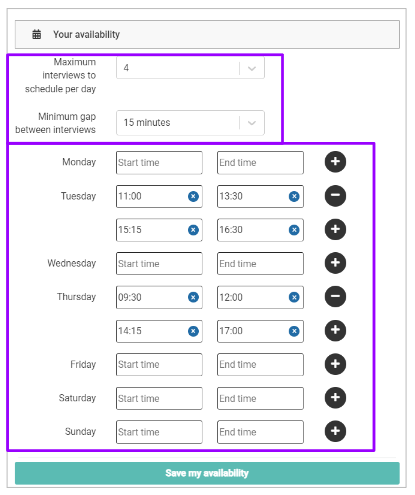
- On setting your maximum number of interviews in a day from the dropdown, you or any other team member will not be able to schedule more interviews in a day
- On setting the minimum gap between the interviews, you or any other member of your team will not be able to book consecutive interviews.
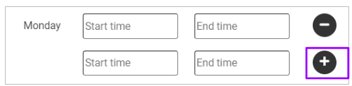
You will be able to set multiple slots for days between Monday and Sunday through the calendar. Click on the plus icon to add another slot for that particular day.
Click 'Save my Availability' once your preferences have been saved:
![]()
If you have not set availability for a particular day, you will be treated as unavailable on that day.
Accessing the calendar through the Options menu
From the Options menu (when selecting a job and a specific candidate[s]), you now have the option to ‘Arrange an Interview’:
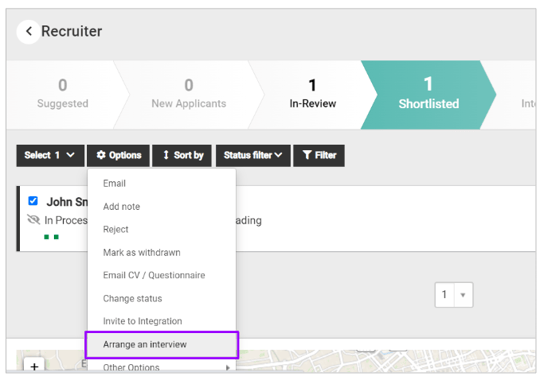
- This now replaces the ‘Confirmation of interview’ and ‘Invitation to book interview’ options that you will be used to seeing
You are then given the option to either
- ‘Book an interview’ (inviting a candidate to a slot you have chosen)
or
- ‘Invite to interview’ (asking the candidate to book from a range of slots):

Book an interview
You can invite single/multiple people at a time for a specific interview slot:
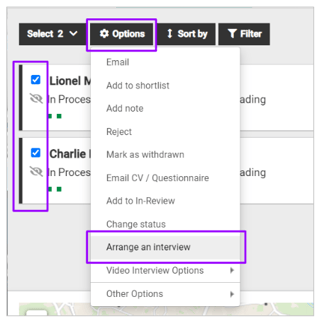
- Click on the individual candidate(s) to highlight the tickbox next to their name:
- Select ‘Options’ menu
- Select ‘Arrange an interview’
Select ‘Book an Interview’ with the ‘Confirm Details’ button:

Select which interview stage the booking is for:
- Interview sub stage can also be added if these are set up
Please note - The titles of these interview stages can be amended if required, in the Manage tool, via the ‘Workflow Editor’ page:

Only certain members of your organisation will have access to Manage. If you think you would benefit from access to this, please speak to the main ATS lead within your organisation.
For more information on amending your interview stages, please click here.
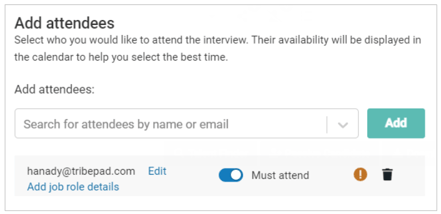
When the correct interview stage has been identified and selected, you can add attendees for the interview by entering their email address:

- If attendees do not already have their calendars linked, this will be displayed by the exclamation mark icon next to their name
- You can send an invitation if you wish (only if they are an ATS user), or remove the attendee from the list
- Attendees can be made mandatory or optional.
You can also choose to send any documents to the attendees in the list:
- This can include questionnaire responses and portfolio information if gathered.
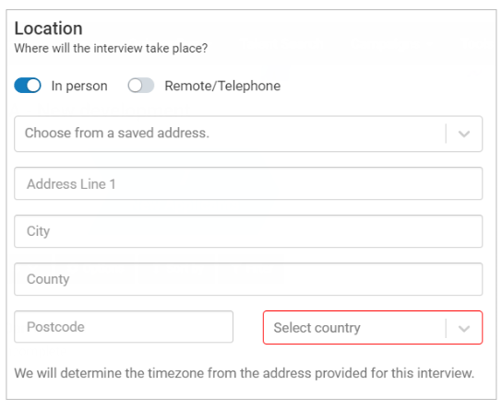
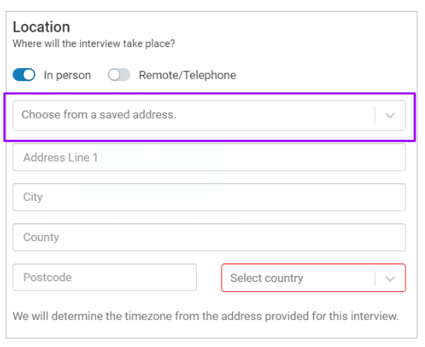
Next, choose the location for the interview
- If this is in person, then an address should be provided:
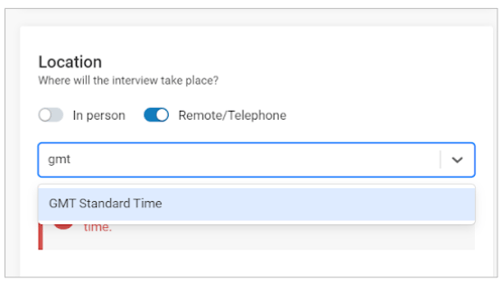
- If this is a remote interview then you will need to confirm the timezone for the interview:
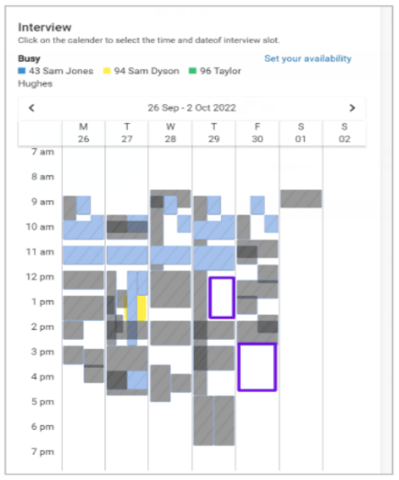
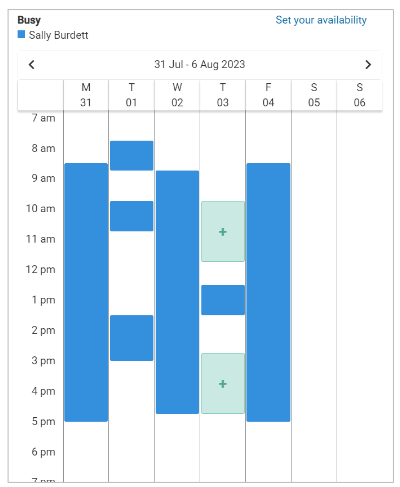
The last step is to choose the slots for each candidate.
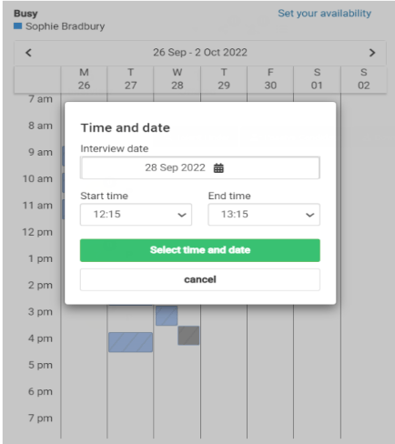
Select on the calendar where there is a blank gap - this indicates a free time slot:
A box will pop-up to confirm the time selected:
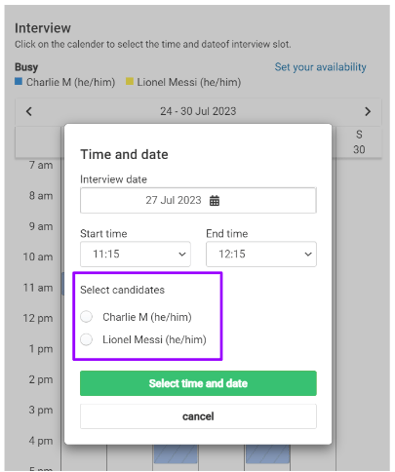
If the interview is being booked for multiple candidates at the same time, you will be presented with the list of candidates previously selected, and will need to determine which time slot is for each candidate:
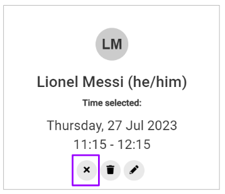
Once selected for an individual, you can simply select the ‘X’ button to close the pop-up, in order to select a slot for the next candidate:
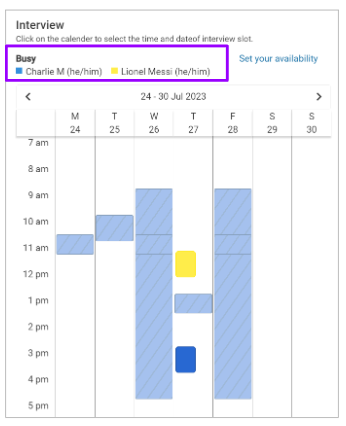
The candidates are each given a colour in the calendar so you can see when each has been booked in for:
Once you have booked in the candidates, there will be the usual options to ‘Invite to Interview only’ and ‘Continue to email’:

You will see, if multiple candidates are being invited to interview at the same time, that the number invited will appear in the top left-hand corner:

- Variables will be added into the email as appropriate, and any Onboarding workflows that the candidate(s) can be invited to complete, will be displayed at the bottom of the email.
Invite to Interview
If you wish for the candidate to select their own interview slot rather than being sent a specific one, select ‘Invite to Interview’ after selecting ‘Arrange an interview’ on the Options menu:

Select the interview stage and any sub stage that may be set up for interviews: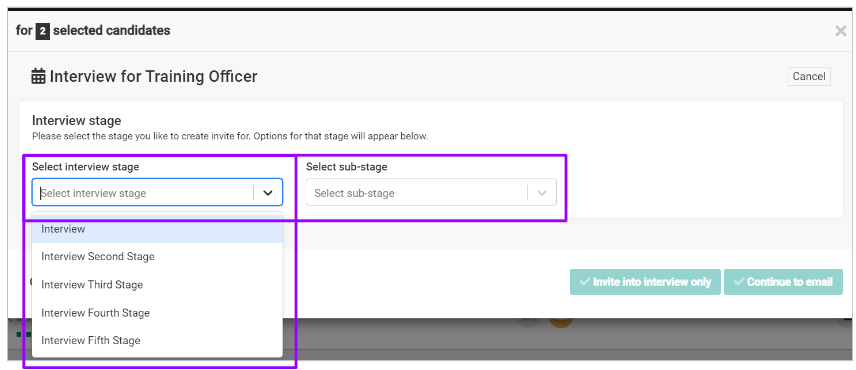
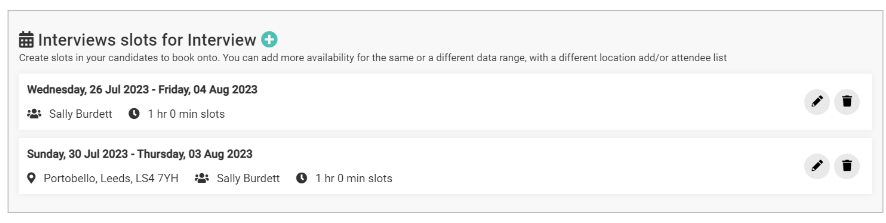
Any slots already created for this interview stage will be displayed and can be used for the candidate(s)
- If not appropriate, you can click on the to add interview slots:

When creating new interview slots, you need to complete the following:
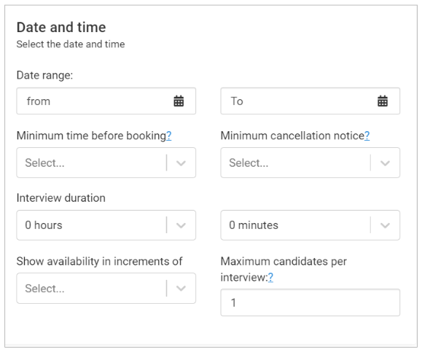
- A date range
- A minimum time before booking
- This is how long before the interview is due to start, that the candidate can book
- For example, you may not wish any interviews to be booked without having 1 day’s notice. In this case, select ‘1 day’ from this field
- Minimum cancellation notice
- This prevents candidates cancelling through the system at the last minute
- Interview duration
- Availability in increments of…
- This allows the candidate to set their own interview time
- For example, if set to 5 minutes, this would allow the candidate to choose 9.05 or 9.10
- If set to 30 minutes, then they would have the option of 9.00 or 9.30
If this is set to say 5 or 10 minutes, this would impact the times that other candidates could start their interviews if an hour interview was started at 5 past the hour.
- Maximum candidates per interview
- This should be set to 1 if offering traditional 1:1 interviews
- If offering an assessment centre or group interview, multiple slots can be set.
Any addresses used previously will be saved and can be auto populated for subsequent interviews:
If any documents or attendees are to be added to the invitation, they can be included here: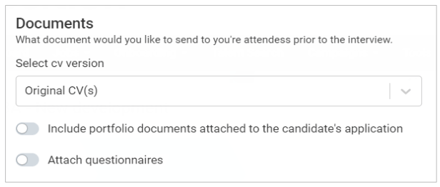
The right-hand side of the screen will refresh and show any slots that are being created:
Once the interview block is set up with the relevant attendees and details, select ‘Save Interview Block’:
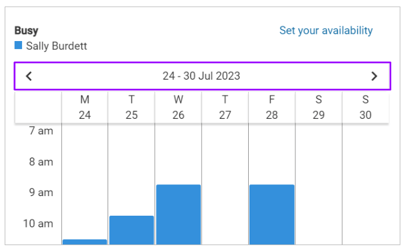
You can add multiple interview blocks for different days or locations etc, that the candidate will be able to choose from
- The date range should be changed using the arrows on the calendar:
The slots will then show on-screen before you send the confirmation of the interview:
Cancelling interviews in the ATS
There are 2 ways to cancel an interview, either in the ATS or in your calendar.
If required, you can update the interview block and cancel all of the currently booked interviews against this block.
This is done by accessing the ‘Invite to Interview’ section again: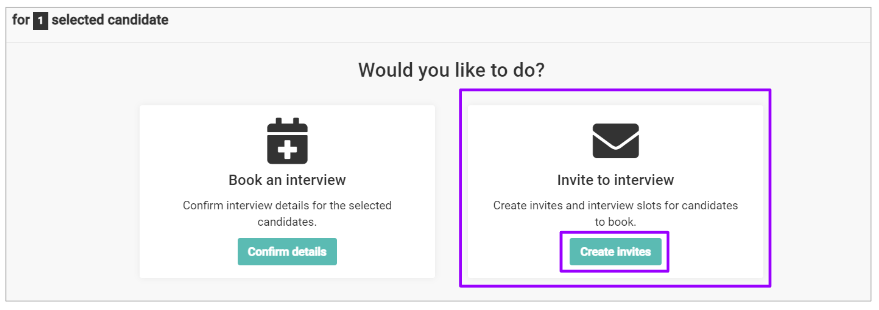
Edit the interview block using the ‘edit’ icon on the right hand side: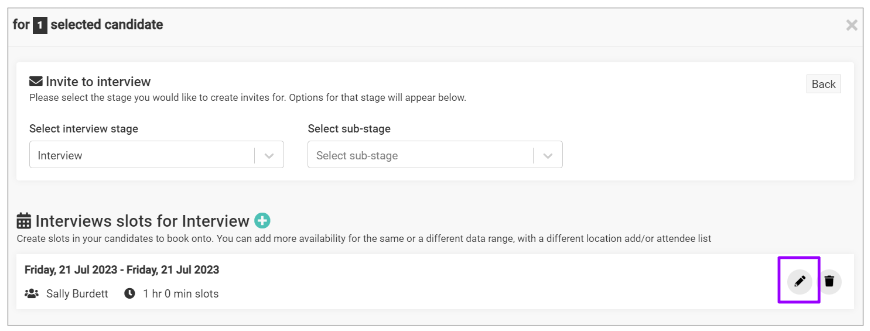
Update your availability using the link:

The candidate and the attendees will receive an email informing them that the interview has been cancelled.
- The candidate will be informed that they should use the booking page to rebook.
You can also delete an interview block entirely.
When you attempt to delete an interview block you will see a pop-up asking you to confirm the action:
Where interviews have been booked using the block you will see a warning message stating the number of interviews that have been booked and asking you to confirm.
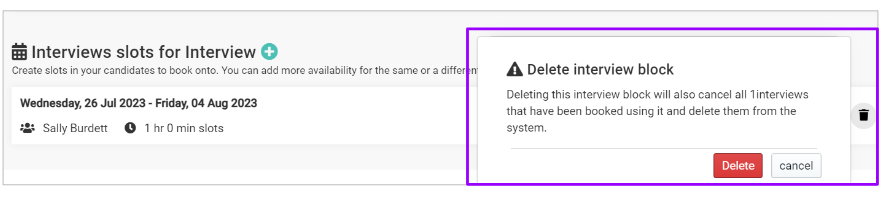
- These interviews will then be removed from the ATS and calendars.
Emails will be sent to all attendees and candidates informing them that the interview was cancelled.
Cancelling Interviews from Google or Office365 calendar
This can be carried out by simply deleting the event in your local (i.e. non ATS / Office365) calendar.
Attendees refusing a calendar event
If all of the required attendees (those marked with the green icon on the interview block) click the ‘No’ or 'Decline’ button in Google or Office365 calendar, then the ATS will cancel the interview.
Editing emails sent to candidates/attendees
There are several emails in Email Manager that apply to this integration.
You may want to consider editing them in Manage if they are not quite to your requirements.
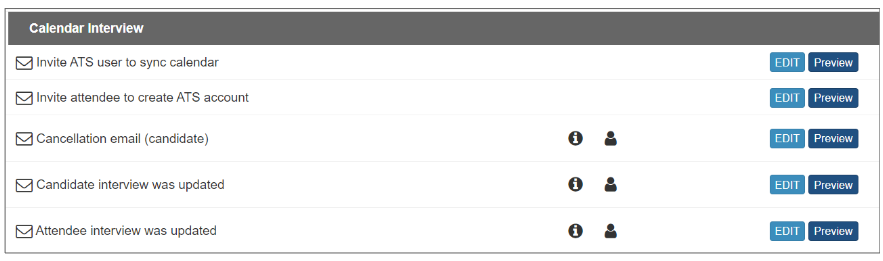
The emails affected are:
- Invite ATS user to sync calendar
- Invite attendee to create ATS account
- Cancellation email (candidate)
- Candidate interview was updated
- Attendee interview was updated
These can all be amended through Manage, via the 'Emails Manager' section:
For more information on amending emails in Manage, please click here.
Important things to note
- If an interview is updated locally by you, so directly in your Office365 calendar for example, it will not update the interview in the ATS