


✏️Introduction
Authorisation Policies streamline the approval process for key recruitment actions, ensuring jobs, job requisitions, and contracts receive the necessary sign-off before progressing.
This guide will walk you through creating, managing, and using Authorisation Policies within your platform.

📝 Creating A Policy
Authorisation Policies can be used for 3 reasons:
- Approving a Job before it is published
- Approving a Job Requisition (i.e. a request for a Job Advert to be created)
- Approving a Contract before it is sent out to a candidate
To create an Authorisation Policy, go to your “Tools” menu and select “Authorisation Policies”:


You will now be presented with the following screen:

On the left-hand side of the page, you will see the different types of authorisation policies split into sections.

To create a policy, click on the '+' symbol at the top of the page:

The page will refresh and you will see something that looks like this:

Start by giving your Authorisation Policy a title.
Then choose which type of policy you would like to create:


Next, choose if you would like your approvers to be contacted all at the same time, or in order:

If you only wish to have 1 approver on your policy, you can leave this as “All at the same time”.
Next, enter the email address of the Approver:


- You can also choose if you would like a “Fallback Approver” on the policy, i.e. someone who will be contacted after the original Approver, if they have not responded in a specific number of days
- Choose how many days you would like as a Fallback period (e.g. 3)
- Enter the email address of your Fallback Approver

If you wish to add additional approvers to your policy, simply select the “Add another approver” box and populate the additional fields that appear:

You also have the ability to add in email addresses that will receive notifications once the approval has been given:

- Simply add in as many email addresses as you wish, in this bottom field
- If you are entering multiple addresses, simply separate them with a comma (,).

Finally, once you are happy with all of the above, click “Create”:

The screen will refresh and you will see your policy list, to view your newly created policy simply scroll to the bottom of the page:

📜 Utilising A Policy
Now that you have created a policy, you can attach it to a job.

If you would like more information on how to utilise a 🖱️ Job Requisition Policy or 🖱️ Contract Authorisation Policy, click the links to view our other guides.
Navigate to your Jobs menu and select “Add New Job”:

Complete each of the stages of the job creation process, as you would do normally:
To read further information on how to complete the Job Creation process 🖱️click here.

Further down the page you will see a “Candidate Processing” section:

Click on the “Job Authorisation Policy” drop-down menu:

You will now see your new Authorisation Policy in the list:

Select the relevant policy and complete the rest of the relevant fields in your Job Advert.
Once you have completed the details for your Job Description, select 'Next' at the bottom of the screen:

You will then be taken to the job description page, to find out more about how to complete that 🖱️click here.
Once you have completed your job description, the screen will refresh and you will be presented with a page that looks like this:

This shows the details of the policy you created previously:
- The Approver
- The Fallback Approver
- The Number Of Fallback Days
Once you are happy, click “Request Approval” to send off the approval request:

The screen will refresh when approval is requested, and if you are logged in as a Super User, you will see the following:
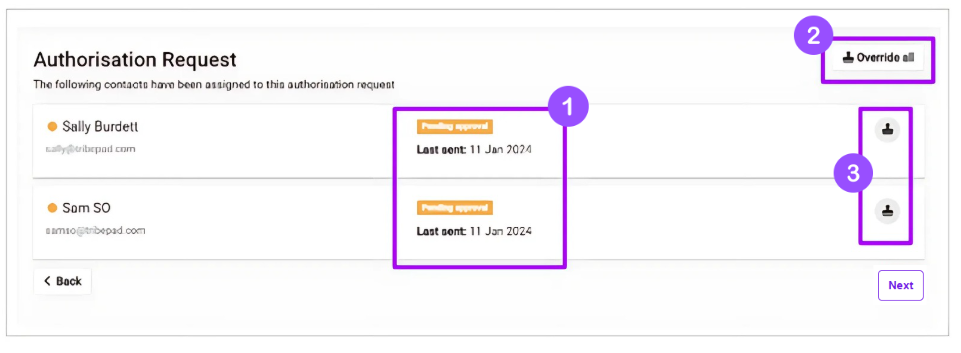
- You can see that approval is pending for both approvers (1)
- As a Super User, you will have the ability to override the authorisation request once it has been requested (top right-hand corner) (2)
- If you have multiple approvers details (as above), you can override all requests if you wish by choosing the 'Override all' option at the top of the page (2)
- If you only need to override one individual approver, for example if they are on holiday or off sick, you can select the
icon on the right-hand side of the page (3)

If you are logged in as a Hiring Manager or Talent Team / Recruiter, you will see the following:


If you go to your Jobs List page, you will see that the job will be sitting in the “Unfinished Jobs” section on the left-hand side (1), and your job will have an orange padlock icon next to the job header (2):

Once the job has been approved, you will need to refresh your “Jobs List” where you will now see that the padlock next to your job has turned green.

You will now need to click on the pencil icon to “edit the job”

If you are happy with your “Job Details” and “Package Description” scroll to the end of each page and click on next:

You will now be taken to the Job Authorisation page again, and will see confirmation of authorisation, click next to publish to external job boards and complete the job creation process:

For further information on the full Job Creation process 🖱️click here.
✅ Approving An Authorisation
Authorisation Policies can be used for 3 reasons:
- Approving a Job before it is published
- Approving a Job Requisition (i.e. a request for a Job Advert to be created)
- Approving a Contract before it is sent out to a candidate

When an Authorisation Policy is used, an Approver and/or FallBack Approver is assigned.
For more information on how to create an Authorisation Policy, see our content further up this page 🖱️ here.
At the point of creating the policy, the Approver or Fallback Approver does not need to be contacted.
However, once it is assigned either to a Job, a Job Requisition or Contract Authorisation request, the Approver or Fallback Approver will be contacted.
When approval is requested, the user will see the following screen:
This screen is the same, whatever policy type is being used (e.g. Job Authorisation, Job Requisition or Contract Authorisation).
An Approver (or Fallback) will receive an email notification of the authorisation request, and, if they are an ATS user, they will also receive a notification on their “Auth Requests” widget on their Dashboard.
The email will look something like this:

The “Auth Requests” widget will display something that looks like this:

- You will notice that the request in question is showing as amber and “Pending”
- A colour-coded scheme exists here
- Once approved, the request will show as green
- If it is pending, the request will show as amber
- If rejected, the request will show as red.
In order to authorise the Job, Job Requisition or Contract you have the option to either click the link in the email (the link text will apply to the type of authorisation required):

OR by clicking the arrow on the right-hand side of the authorisation request on the widget (1):

Regardless of which method you choose, you will be taken as the approver to this page next:

On this page, the approver can see
- In the top left-hand corner, the type of authorisation request it is:

- Who the request has come from and how long the approver has to approve it

- The “Approve By” date indicates when the request will go to a Fallback Approver if no action is taken
- If this date is blank, no Fallback Approver has been designated
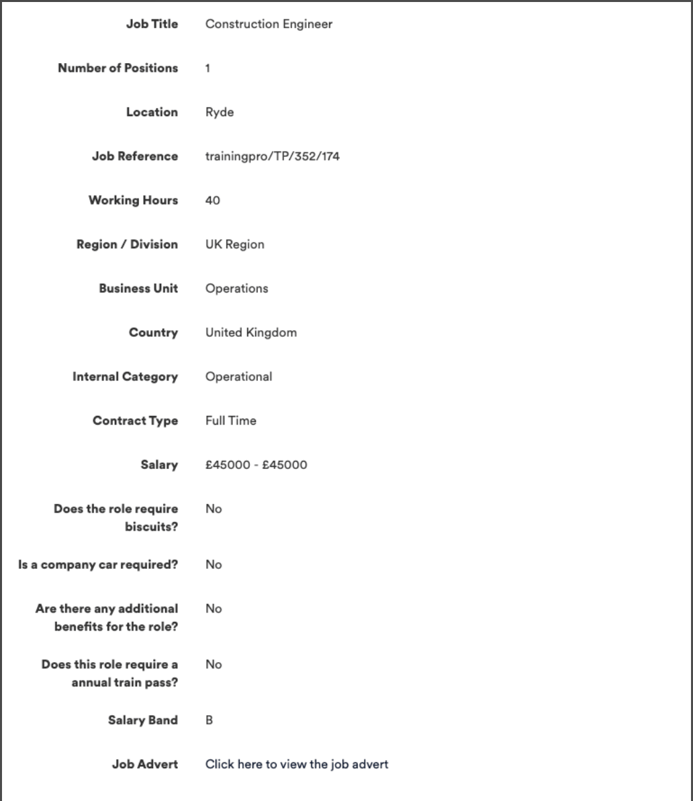
Further down the page the approver can see details of either the Job or the Job Requisition:

For contract authorisation the approver will be presented with a link on the screen. This link needs to be copied into a browser window, in order to view the contract that needs to be reviewed:

At the bottom of the page, the approver will see the option to provide Authorisation or to Reject the request:

At this stage, if the approver chooses to reject the request, they can select a reason from the drop-down list and add notes:


For more information on “Lists of Values” 🖱️ see this page here.
Once they have either approved or rejected, the screen will refresh to reflect their decision:

You will also be able to see the decision reflected by clicking on your Auth Requests widget on the Dashboard, this will take you to the following screen:

- Once approved, the request will show as green
- If rejected, the request will show as red.
The original requester will also receive an email to confirm the decision of the approver. It will look something like this:


To find out more information about editing email content in Manage, 🖱️ click here.