Find out how to approve an Authorisation Request that has been sent to you.
Authorisation Policies can be used for 3 reasons:
- Approving a Job before it is published
- Approving a Job Requisition (i.e. a request for a Job Advert to be created)
- Approving a Contract before it is sent out to a candidate
Authorisation Policies are an additional feature. If you would like these turning on in your platform, please speak to either your ATS Organisational Lead or your Tribepad Account Manager.
When an Authorisation Policy is used, an Approver and/or FallBack Approver is assigned.
For more information on how to create an Authorisation Policy, click here.
At the point of creating the policy, the Approver or Fallback Approver does not need to be contacted.
However, when it is assigned either to a Job, a Job Requisition or Contract Authorisation request, the Approver or Fallback Approver will be contacted.
When approval is requested, the user will see the following screen:
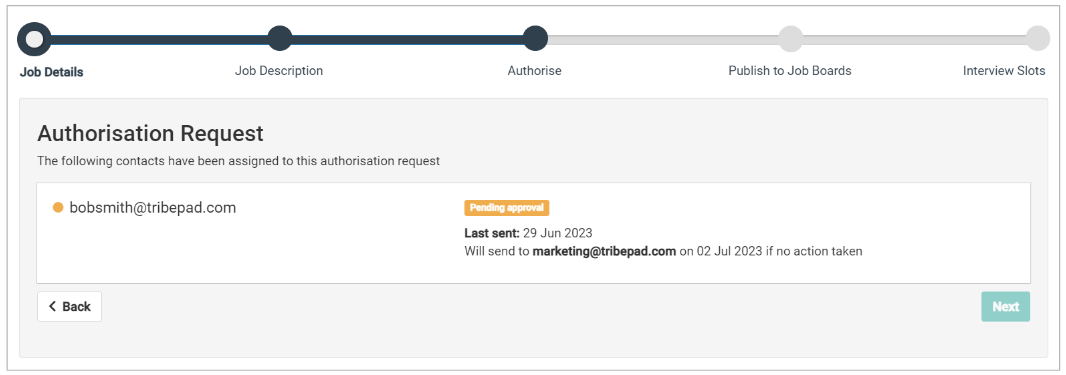
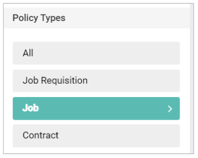
This screen is the same, whatever policy type is being used (e.g. Job Authorisation, Job Requisition or Contract Authorisation).
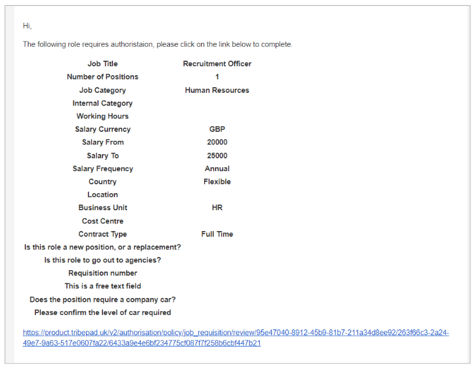
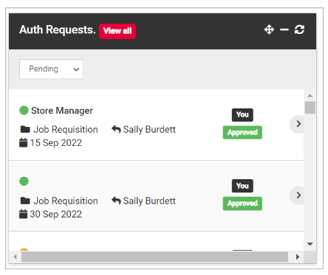
An Approver (or Fallback) will receive an email notification of the authorisation request, and, if they are an ATS user, they will also receive a notification on their 'Auth Requests' widget on their Dashboard.
- The email would look something like this:
- The 'Auth Requests' widget will display something that looks like this:
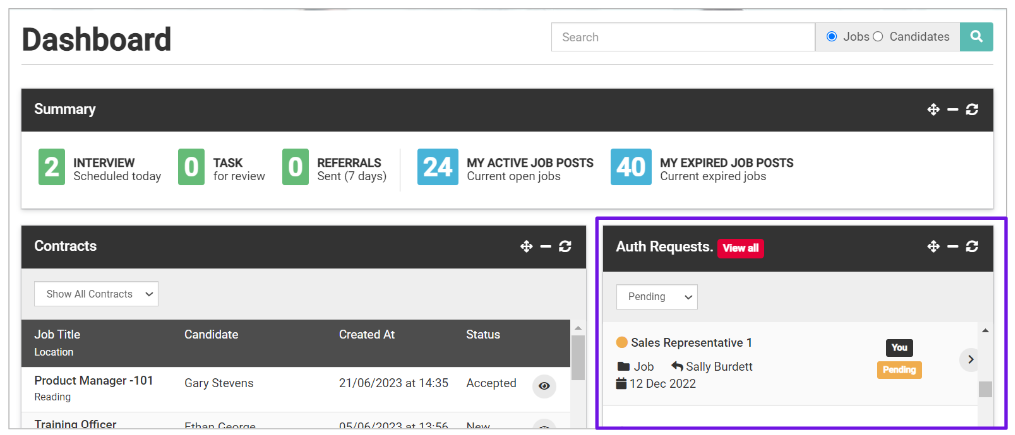
- You will notice that the request in question is showing as amber and 'Pending'
- A colour-coded scheme exists here- Once approved, the request will show as green
- If it is pending, the request will show as amber
- If rejected, the request will show as red.
Clicking the link in the email 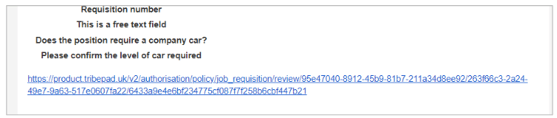
and clicking the arrow on the right-hand side of the authorisation request on the widget, 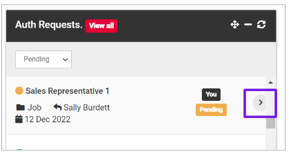
will both take the approver to this page:
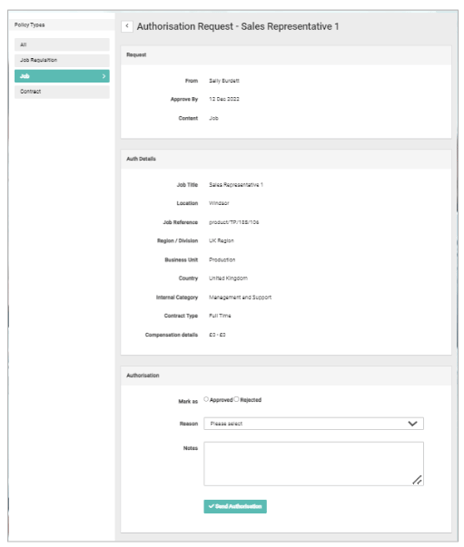
On this page, the approver can see
- In the top left-hand corner, the type of authorisation request it is:
- Who the request has come from and how long the approver has to approve it
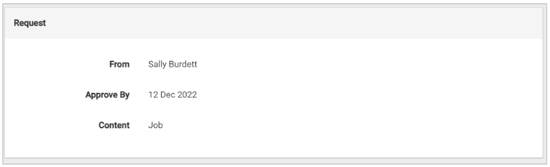
- The 'Approve By' date indicates when the request will go to a Fallback Approver if no action is taken
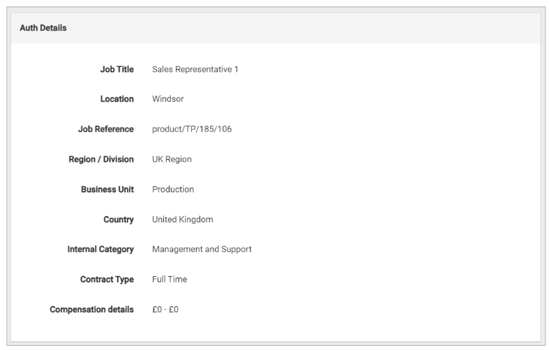
- If this date is blank, no Fallback Approver has been designated - Further down the page the approver can see details of either the Job or the Job Requisition:
The way a Contract Authorisation request is displayed is slightly different.
The approver would be presented with a link on the screen. This link needs to be copied into a browser window, in order to view the Contract that needs to be reviewed:

- At the bottom of the page, the approver will see the space to provide Authorisation or to Reject the request:
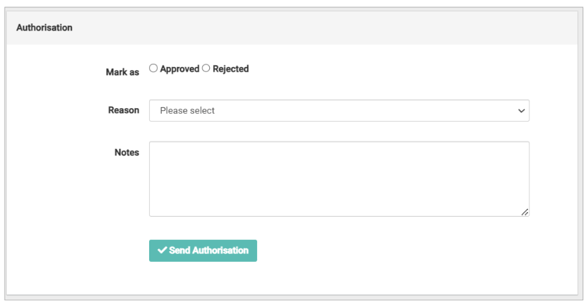
- At this stage, if they choose to reject the request, they can select a reason from the drop-down list and add notes: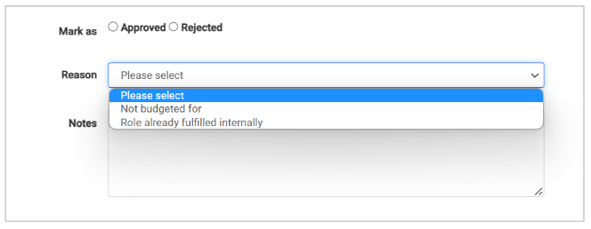
These Rejection reasons can be amended and updated within the 'Lists of Values' in Manage. For more information on how to do this, click here.
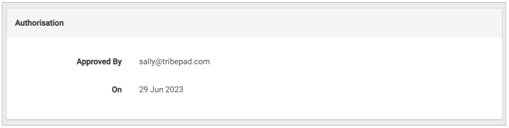
Once they have either approved or rejected, the screen will refresh to reflect their decision:
They will also be able to see the decision reflected on their Auth Requests widget on their Dashboard:
- Once approved, the request will show as green
- If rejected, the request will show as red.
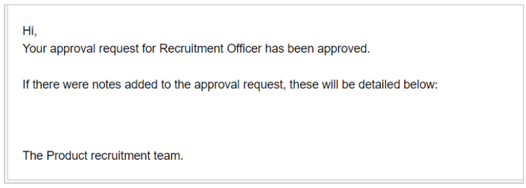
The original requester will also receive an email to confirm the decision of the approver. It will look something like this:
The content of these emails can be edited if required. This is done through the Emails Manager in Manage. Click here to find out more.