

📂 How To Add Policies & Files
To get started, head to “Onboarding” followed by “Managing Packages”:

There are 2 ways to add policies from the filter menu found on the left hand side:
- Policies
- This filter allows you to create a policy by adding text or copying text and pasting it into the content box available.
- Files
- This filter allows you to upload policies which is generally our customers' preferred method as it's much more efficient.
➡️ To Add A Policy Using The “Policies” Option
From the filters on the left-hand side of the page, select, Policies (1) followed by the plus icon (2) to create a new Policy:

Once you have clicked on the + icon, you will see the following pop-up where you are able to name and type or paste your policy into the open field to create:

If needed, there are also further options to format your text, align, add links and images etc (1):

Once you are happy with your Policy you have the option to either “Save & Preview” or “Save”:

After saving, you will be taken back to the main “Policies” page on Onboarding, where you will see your new Policy sitting at the top:

➡️ To Add A Policy Using The “Files” Option
From the filters on the left-hand side of the page, select, Files (1) followed by the plus icon (2) to create a new File:

Once you have clicked on the + icon, you will see the following pop-up where you are able to add a name, title and add your policy document:
- Name
- Add the name of the policy - this will not be displayed to the candidate.
- Title
- Add a title - this will be displayed to the candidate.
- File
- At this point, you can choose to drag and drop the relevant policy into the area shown or you can select to upload the file instead.

Once you have added your policy document, you will see it as shown in the image below:

Once you are happy with your policy upload, select “Save Details”:

Once you have saved the content, your new policy doc will be listed under the Files filter.
You can repeat this same process for all of the policies that you may wish to add.

❓ How To Add A Questionnaire
To get started, head to “Onboarding” followed by “Managing Packages”:

From the filters on the left-hand side of the page, select, Questionnaires (1) followed by the plus icon (2) to create a new Questionnaire:

If you choose to create a new Onboarding questionnaire using the + icon (1) you will see the option to create either a “Standard” or “Branching” questionnaire (2).
From here you simply need to follow the standard process for creating a questionnaire (making sure to select “Onboarding”).
For further information on how to do this, 🖱️ see this guidance here.

For further information on how to do this, 🖱️ see this guidance here.
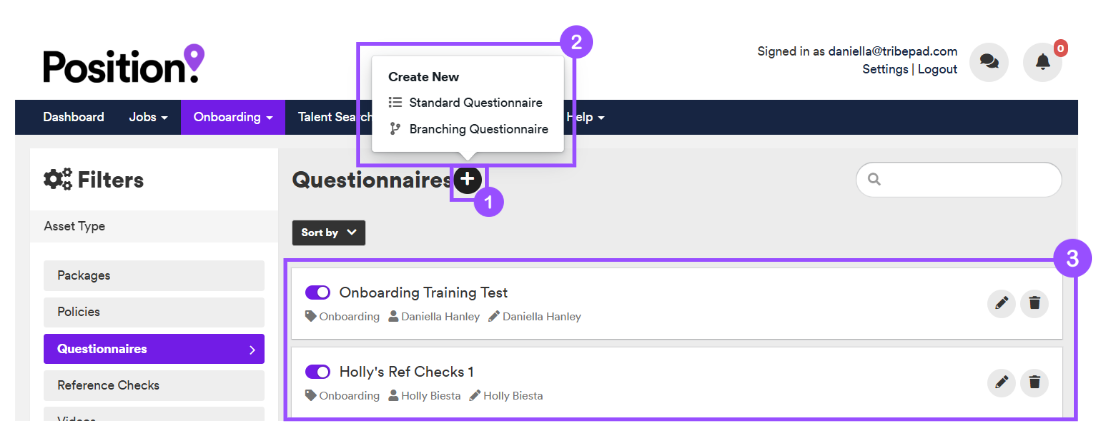
Once you have created an Onboarding questionnaire you will see it in the list, as shown in the image above (3).

☑️ How To Create & Add A Reference Check Questionnaire
Reference checks are a key part of the hiring process, helping to validate a candidate's background and suitability for the role. With just a bit of planning, you can streamline this step by automating reference requests and collecting feedback directly from referees.
The following steps provide you with the structure for creating a reference check questionnaire.
1 - Think about the type of reference check you would like to create, for example:
- Professional
- Academic
- Personal
2 - Create questions that match the type of reference check (professional, academic, or personal). These will be sent to the referee to confirm details about the candidate and must be created via the “Tools” menu under “Questions” in the ATS.

3 - Create a questionnaire to house your questions via “Onboarding” or the “Tools” menu in the ATS. Be sure to select “Onboarding” as the questionnaire type, when creating.

4 - Creating the reference check questionnaire will involve bringing all of the above steps together to create a reference check template.
For further information about Questions & Questionnaires 🖱️ see this guidance here.
For further information about Reference Checks 🖱️ see this guidance here.
🔑 How To Add A Reference Check
To get started, head to “Onboarding” followed by “Managing Packages”:
From the filters on the left-hand side of the page, select, Reference Checks (1) followed by the plus icon (2) to create a new Reference Check template:

You will now be presented with the following pop-up:
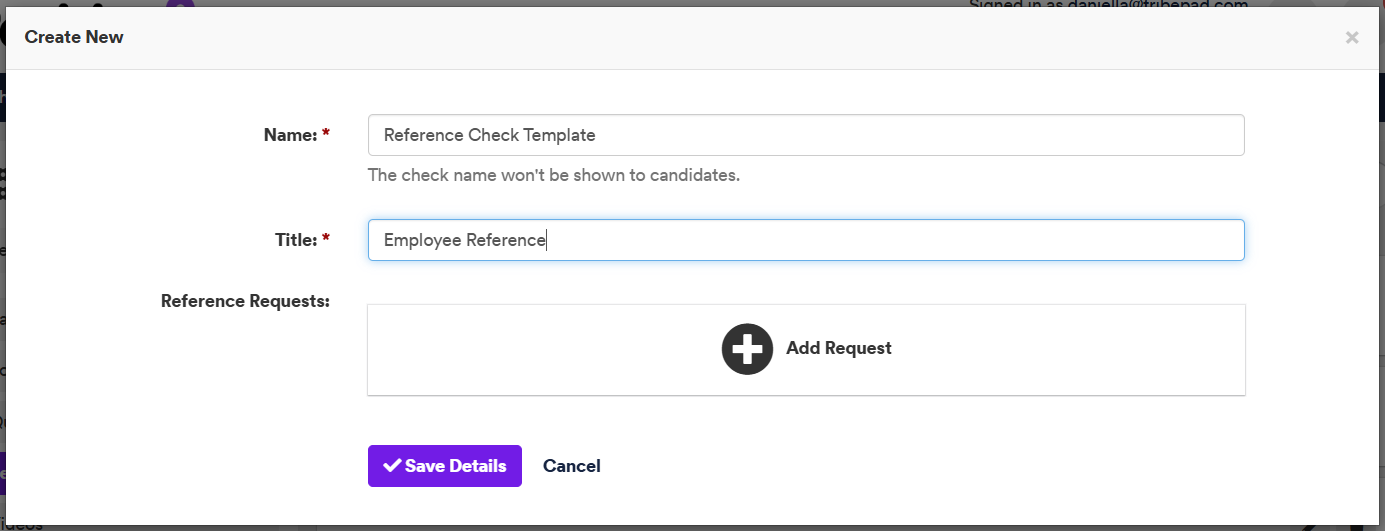
- Name
- Give your reference check a name, this will not be visible to the candidate.
- Title
- Give your reference check a title.
- Reference Requests
- Select “Add Request” and the pop-up will expand.
➡️ Choosing The Reference Type
After clicking on “Add Request” you need to select the type of reference you want to request from the options provided (1):
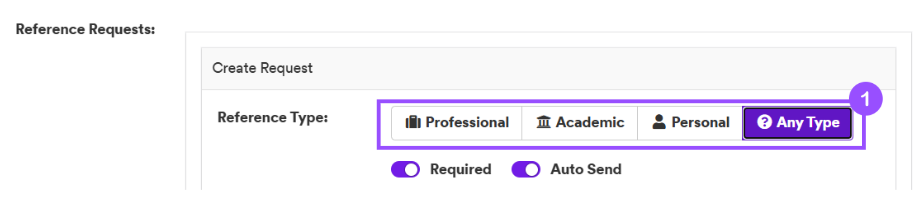
The next step is to choose whether to enable the toggles available.

- Required
- If this toggle is selected, it means the referrer must complete the referee's information before they can submit their form.
- Auto Send
- If this toggle is selected, an email will be sent automatically to the referee once the form has been completed by the referrer.
➡️ Choosing Your Questionnaire
Select the drop-down menu and choose the questionnaire you have created.

➡️Referee Reminder
You can send reminder emails directly to a candidate’s referees as part of the onboarding process. This helps ensure that reference requests are completed promptly and reduces delays in progressing candidates.
To do this, simply toggle “Referee Reminder” on, followed by selecting the amount of time that you would like these reminders to trigger:

➡️ Choosing the form fields
The fields chosen here will be presented to the referrer to complete (the candidate).
- Enabled
- If you enable the toggle it means the information will be requested when presented in the form to the referrer.
- Required
- If you enable the toggle it means the referrer will be required to complete the information before they can submit their form.

In the above example, the toggles against the Referee email are not available to select.
This is because the 'Any Type Reference' check has been selected so by default this information will be requested from the referrer (this will also be the same for Professional Type References).
Once you are happy with your selections, select “Save”.
At this point, you can choose to create another reference request, if needed - useful if you would like to choose a different type of reference check.
The new check can be created by selecting “Add Request” (1).

To complete the creation steps, select “Save Details”.
After saving, you will navigate back to the “Reference Checks" page, where you will see your new check listed at the top of the list (1).

For further information about Reference Checks 🖱️ see this guidance here.
📹 How To Add Videos
To get started, head to “Onboarding” followed by “Managing Packages”:
From the filters on the left-hand side of the page, select, Videos (1) followed by the plus icon (2) to add a new Video:

You will be presented with a pop-up where you need to enter a name and the URL for your video.


Once you are happy with your entries, select “Save Details”.
Once you have pressed “Save Details”, you will navigate back to the main video page where your new video will now be visible.

📅 How To Add DateGap
To get started, head to “Onboarding” followed by “Managing Packages”:
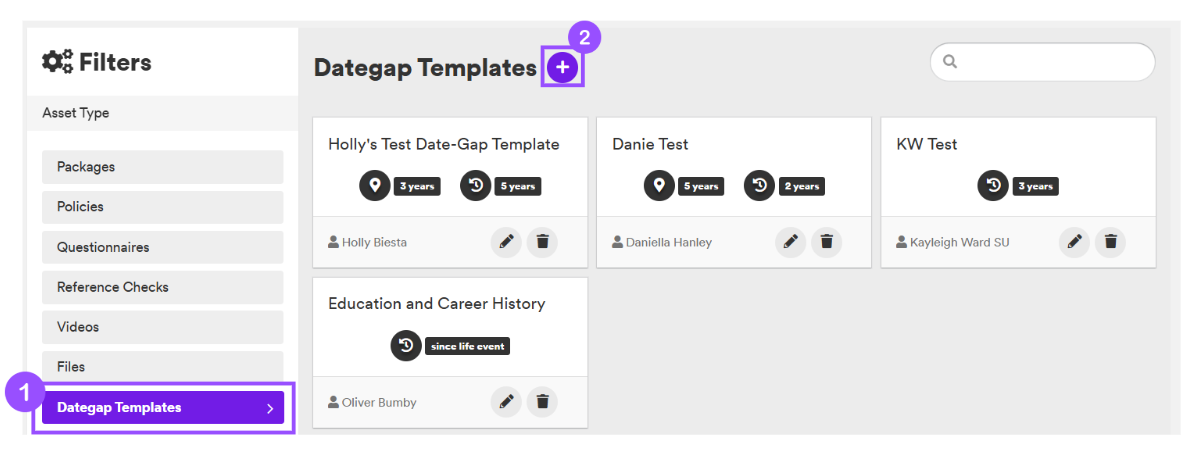
From the filters on the left-hand side of the page, select, Dategap Templates (1) followed by the plus icon (2) to add a new Dategap Template:
You will be presented with a pop-up where you need to enter a name (this is visible internally), a title (this is visible to candidates), and then your requirements for address history and employment & education history:

Once you are happy with the above select “Save Details”.
After saving your Dategap template, you will be taken back to the Dategap Templates landing page, where you will see your new template at the top of the page:

For further information about DateGap 🖱️ see this guidance here.