What can this report can do for you?
The Application Data Capture Full report (catchy title hey?!) is one of our biggest reports within Insights, and can provide you with a wealth of information.
It focuses on the information provided by a candidate when they have
- Created a profile
- Applied for a role
- Moved through the application process
- Completed questionnaires
- Essentially, any information relating to a candidate and the job(s) they have applied for, can be taken from this report.
Because of the versatility of this report, many of our customers find it their 'go-to' for information based on applications.
Be warned though - it is made up of 171 default columns so is not for the faint-hearted!
With the use of filters and column selections, you can really make a niche personal report to fulfill your reporting needs.
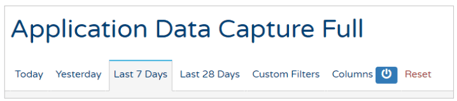
When you first load up this report, you will see the usual Quick-Date range filters and Custom filters at the top of the page:
The Custom filters that can be applied to this report are quite lengthy:
- Use a specific date range
- Candidate creation date range - use a 'from' and 'to' date range to select specific candidates and when they were created within the ATS platform:

Please note the additional text with this option
"If checked, only applications for candidates who signed up during the selected period will be shown".
- Application modification date range - again, use a 'from' and 'to' date range to select specific applications:

Again, please note the additional text:
"Please note if enabled, this overrides the standard 'Application Created' date filter".
Scrolling further down the page shows you more filters:
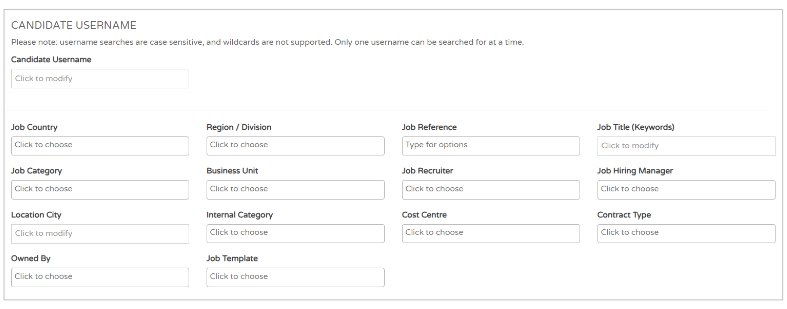
- Candidate username - here you can choose a specific candidate's user name to pull data into the report
Please note - username searches are case sensitive, and wildcards are not supported. Only one username can be searched for at a time.
- Standard report filters
- These filters are used on the vast majority of reports and allow you to filter job-specific criteria with ease
Further down the page, you will see:
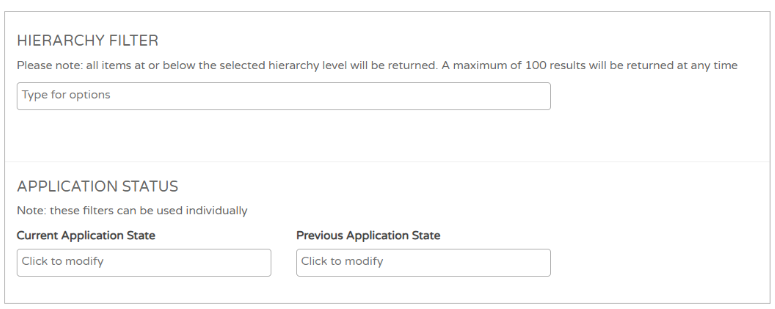
- Hierarchy filter - if you use our Hierarchy feature in your ATS, you will be able to enter the name of a hierarchy level and you will see all candidates relating to jobs from that level downwards
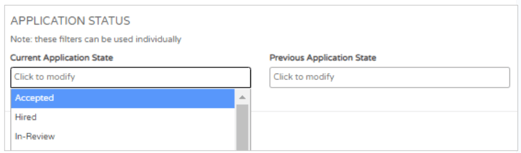
- Application Status - click to select a 'Current Application State' (e.g. Hired, Accepted) or a 'Previous Application State' to filter down your report:
Again, further down the page you will have these filters:
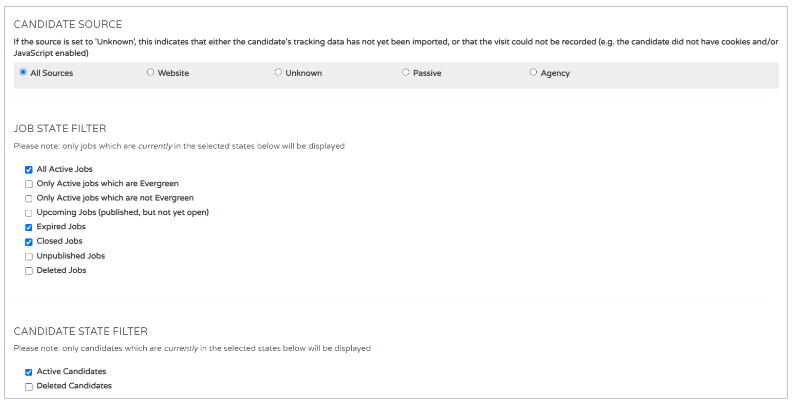
- Candidate source - with this filter, you can choose a specific candidate source using the check boxes.
Please note the additional text with this filter:
"If the source is set to 'Unknown', this indicates that either the candidate's tracking data has not yet been imported, or that the visit could not be recorded (e.g. the candidate did not have cookies and/or JavaScript enabled)."
- Job state filter - with this filter, you can choose to select multiple job states that you wish to display in your report.
Again, please note the additional text:
"Only jobs which are currently in the selected states below will be displayed."
- I.e. if the job has previously been in one of these states but is not currently, the data from that job will not be displayed.
- Candidate State Filter - here, you can use the check-boxes to select 'Active Candidates' or 'Deleted Candidates to filter these options in your report.
Again, please note the additional text:
"Only candidates which are currently in the selected states below will be displayed."
The final filters that you are able to use to manipulate the data in this report are:
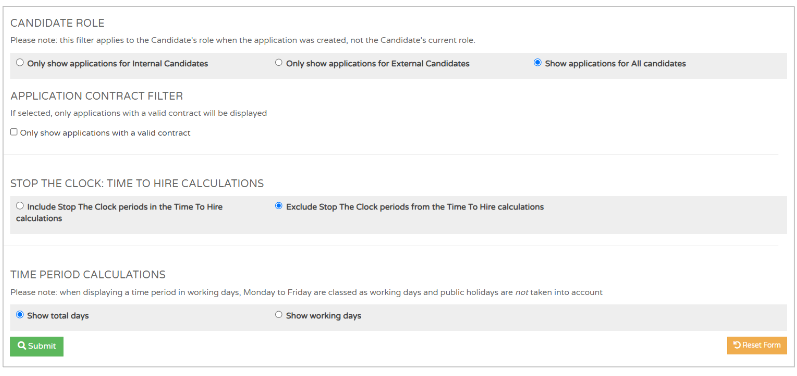
- Candidate role - with this filter, you can use these check-boxes to select to show
- Applications for internal candidates
- Applications for external candidates
- Applications for all candidates.
Please note - this filter applies to the Candidate's role when the application was created, not the Candidate's current role
- Application contract filter - here you can apply a filter to show only applications with a valid contract
- Stop the clock filters - here, you can use the check-boxes to 'include' or 'exclude' stop the clock information in your reports.
'Stop the Clock' is an additional feature which can be turned on in your ATS.
You can find out more here.
If you would like any more information on this, please speak to your Account Manager.
- Time period calculations - this final filter allows you to 'Show total days' and 'Show working days' in your time periods.
Please note - when displaying a time period in working days, Monday to Friday are classed as working days and public holidays are not taken into account
Once you have made the selections using the filters above you can now 'Submit' to run the report with these now added.
You will be presented with a screen that looks a little like this:
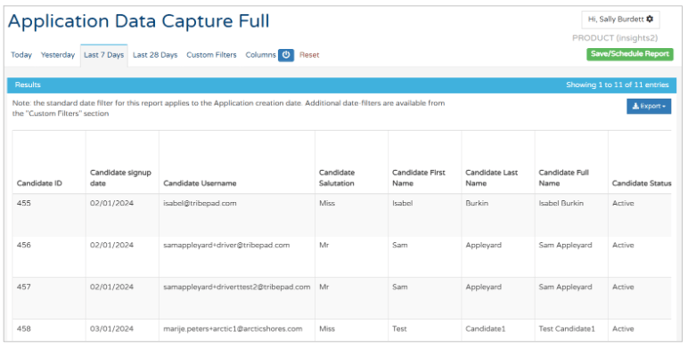
Looking further at the columns which are presented to you, you have the initial Standard candidate columns:

Each row indicates a different candidate and/or application. If you see the same candidate details multiple times, this indicates that they have applied for multiple roles.
Further over to the right you can see details the candidate has entered about their current employment status, e.g. what industry they are currently working in, how much of a notice period they currently have to give, expected salary etc.: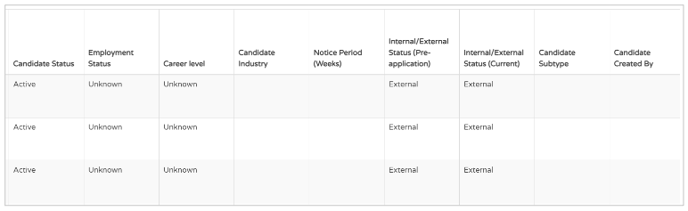
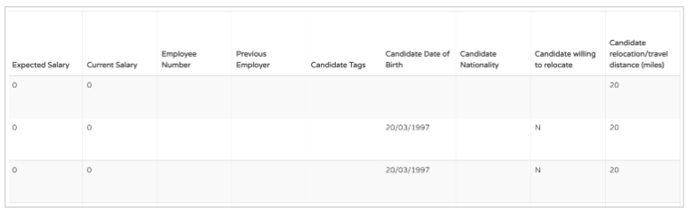
Please note - a candidate does not have to enter any of this information into the profile if they do not want to. These fields are all optional to be filled in.
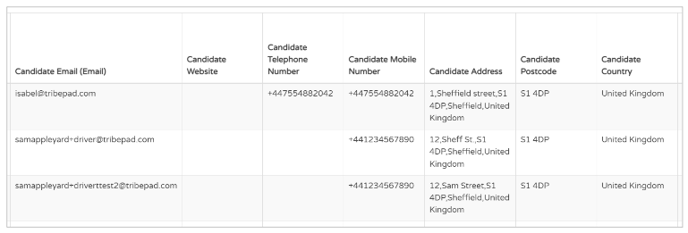
Further over on the page you will see more standard candidate details:
These are followed by details of the specific roles that candidates have applied for:
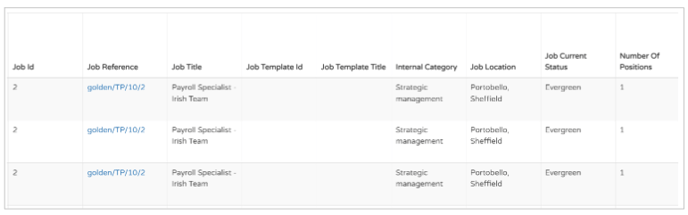
Remember, each row relates to a specific candidate or application. This report does not show information in summary.
Following that, you will see more details about the job:
Two columns you might want to pay attention to here are the 'Job Total Under Consideration' and the 'Job Total Applied':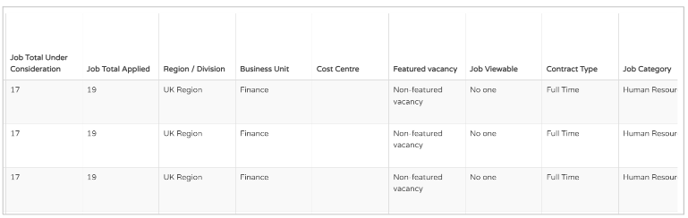
- 'Job Total Under Consideration' - how many applicants are still being considered for the role
- 'Job Total Applied' - if this number shows more than the previous column, this indicates that some candidates have been rejected from the application process for this particular role.
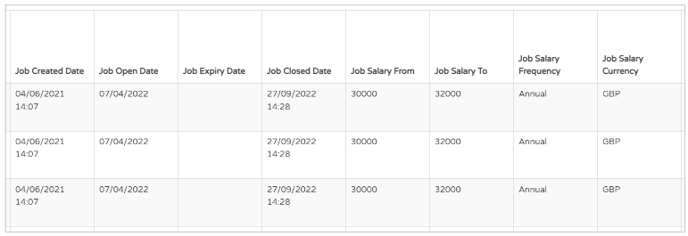
Again, further over on the page you will see more details relating to the job, i.e. salary, when it was opened etc.:
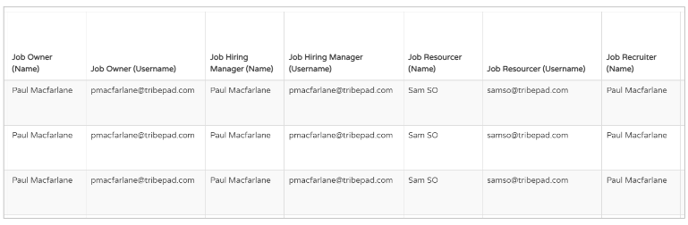
and then also details relating to the internal users who are linked to (i.e. have been assigned to) the job:
If the job has been been linked to Hierarchy (if this is something you use within your organisation), you will see those details next:
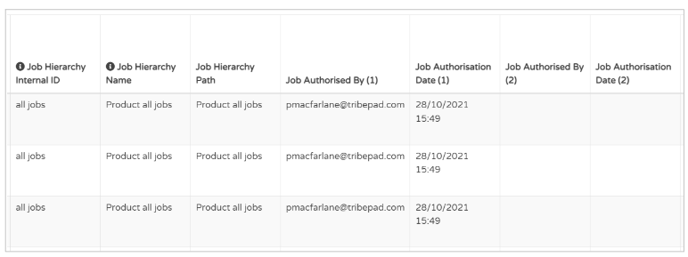
- Here you can also see if the job has been authorised, by whom and when.
Hierarchy is a payable additional feature that can be added into your ATS if required. If this is something you are interested in, please speak to your Account Manager.
Scrolling further to the right of the page, you can see details on the application in particular:
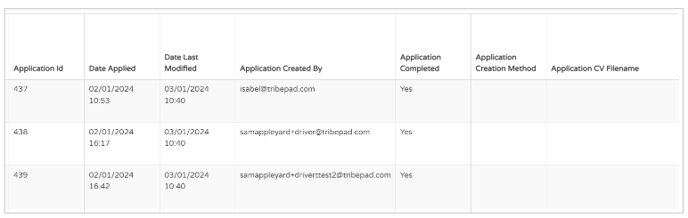
- Here you can see when the candidate applied to the role and if they have completed their application.
Again further over, you will see details of the application:
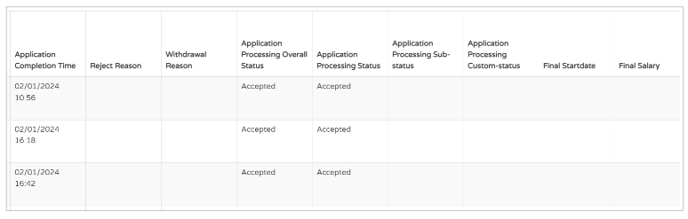
- If the candidate has been rejected or has withdrawn from the process you will see a reason detailed
- The 'Application Processing Status' columns indicate which stage in the application process the candidate has got to (e.g. 'Interview', 'Accepted' Hired' etc.)
- If the candidate has been presented with a final salary and/or start date in their contract, these will also be detailed here.
Scrolling again further will show you details of the different application stages and when the candidate was moved to specific stages:

- This report only shows you the latest stage that the candidate is in and when they were moved there.
If you require more information on the different dates that candidates were in each individual stage of the process, have a look at the Job Efficiency report.
Further over again, you can see details of Time to Hire (TTH):
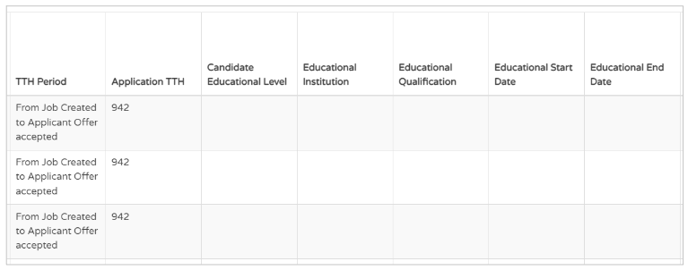
- The TTH Period can be changed via your Settings on Insights
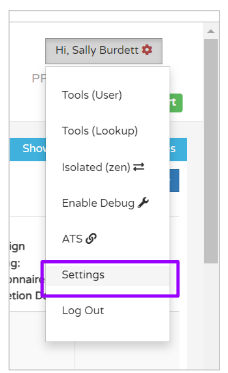
- This is found in the top right-hand corner of the screen:
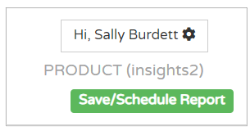
- Click on the Cog icon, then click on 'Settings:
- Scroll down slightly to the 'Time to Hire (TTH) and Time to Fill (TTF) settings:
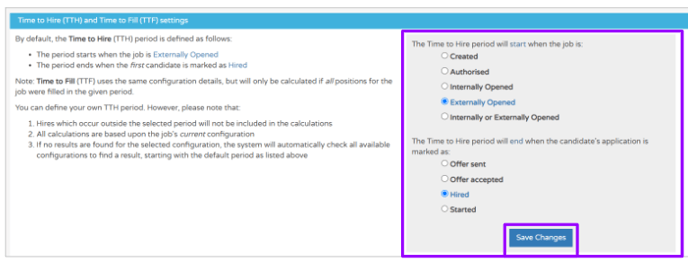
- Select which period you would like your TTH period to reflect on the right-hand side, and don't forget to save your changes.
Back to the report data.
Further over to the right, you can see columns relating to questionnaires:

- These columns all relate to Process (or 'internal') questionnaires that your internal users will complete (if required)
- This report will show you dates when these questionnaires are completed and by whom, but will not show you the answers from these questionnaires.
If you would like to report on the answers given on these questionnaires, you will need to create a Custom Report and add in the questions as a Custom Column Set.
For more information on how to do this, take a look here.
Again over to the right, you will see details relating to Sources.
- A Source is where a candidate has originated from (speaking in digital not geographical terms!)
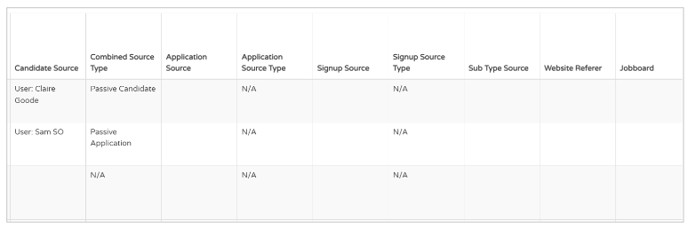
- If you do not see information in these columns, this is usually due to the candidate having originated from a source that Tribepad cannot track
- Examples of this might include if the candidate has blocked pop-ups on their device or if they are applying using an incognito or private browser.
For more information on Source reporting, click here.
The final columns in this report that default to be visible, show information on workflow labels:
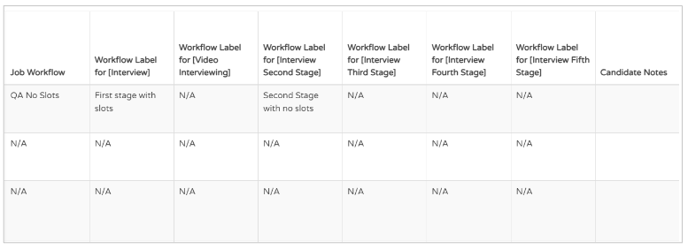
- The workflows that are applied relate to the job workflow that is applied in the background, i.e the different stages of the application journey that the candidate will be processed through
- There are also interview workflows, and these relate to the interview stages that a candidate might be invited to attend
- Both of these workflows can be amended in Manage, your self-serve tool.
For more information on amending and customising workflows in Manage, take a look at this article.
Finally, any Candidate notes that have been added by an internal user, will show in the final column.
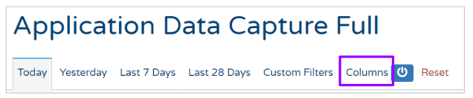
Editing columns before viewing or exporting this report
As you have seen, this report is pretty big.
Because of this, there may be lots of columns shown that might not be that useful to you.
As a result, as well as the 'Custom Filters' tab at the top of the report, there is also a 'Columns' tab:
Clicking on this tab will show you something like this: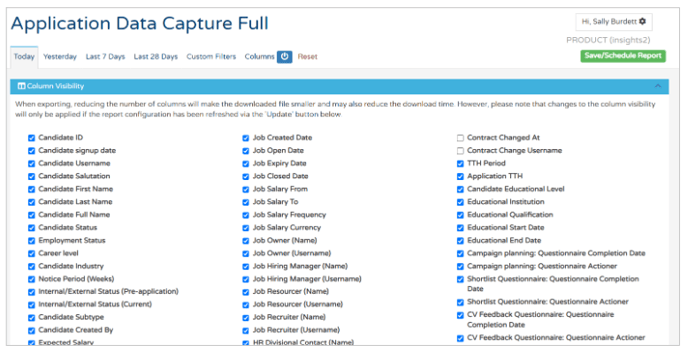
- From here, you can select which columns you would like to see in the report.
Alternatively, if you scroll down the page, you have the options to Disable or Enable all columns, according to your preference: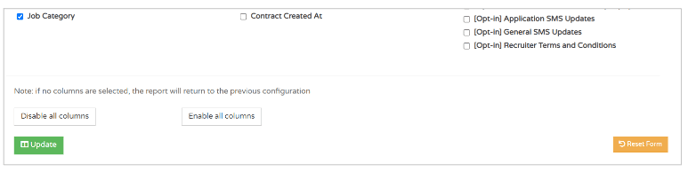
- If you Disable all columns, you can then go in and select only the relevant ones to you.