


📑Create A Job - Getting Started
To get started, login and head over to “Jobs” and then “Add New Job” from the top navigation bar:

You will then be presented with the very first page in the job creation process.
🟣 Job Editor Progress Bar
Whilst on the first job creation page, at the top of the page you will see a Progress Bar, this will show you where you are in your job creation journey, right up to the job being published.

You will see the current status of your job, just below the progress bar.
💼 Job Set Up
This section will show you how to run through the initial set up process when creating a job role. Including using job templates, notifications and the application flow.
🟣 Using Job Templates
When creating a job you have the option to use previously created Job Templates. Job templates are a great way to ensure that the teams involved in publishing roles are always using a consistent format.
If you would like more information about Creating Job Templates 🖱️ click here.
To use a previously created template click on the “Choose Job Template” drop down list and select the required job template.

If needed, you also have the option to filter Job Templates, to make finding the relevant one easier though you do not need to use this.

Once you have selected the relevant job template, you also have the option to preview it:

From here you can double check all of the job details, to make sure that you have selected the correct one. Once you’re happy click “Use This Template”.
Once you have selected the relevant template, all job details will be auto-populated for you (1):

🟣 Hierarchy Visibility
If you have Hierarchy enabled for your organisation you will also see this option:

Select the drop down menu to assign an organisation to your job.
For more information about what HIerarchy is and how it works, 🖱️ see this page here.
🟣 Job Details
If you are wanting to create a job from scratch without a template, you will need to manually complete the Job Details section.
Firstly you will need to enter the job title (1) for the role that you are recruiting for. You will also notice that the job reference field (2) is automatically populated for you.
The job reference will be pre-populated for you, but can be amended to whatever naming convention or format you would like, but you should check what your internal processes for naming this field are before making any changes.

You now need to enter the number of positions (1) you are recruiting for or if preferred the amount of hours (2) you would like to recruit for.
To find out more about recruiting in hours 🖱️ click here.

Next, select the relevant job category from the drop-down menu.


Job Category examples:

Continue to fill in each section on the Job Creation page as follows:
- Enter the contractual working hours.
- Select the contract type from the available options.
- Select the contract template.
- This is only relevant if you use our Contract Management functionality.
- Enter the contract details.
- The text you enter here will not be visible on the job advert but could be useful for internal notes.
- Select the salary currency from the available options.
- Enter the minimum & maximum salary.
- If you do not want your salary to be visible on the job advert you will need to enter some text, in the ‘Salary text’ field.
- Select the salary frequency from the available options.
- Enter some text such as ‘Competitive salary’.
- This field, if completed will be visible on the job advert, it will also mean that the salary range will not be visible on the job advert.

- Select the Country where the role will be based from the list of available options.
- Enter the job location.
- Please enter the full & correct location to ensure that candidates can search for the role based on their search criteria.

- Enter the postcode (zip code) for the job location.


➡️ How To Add Multiple Locations
There may be times when you need to advertise a role across multiple locations. Our Multi Location feature allows you to do just that.

Once enabled, this function can be applied to job templates, existing jobs or new jobs created in the ATS.
Under the ‘Location’ section of the template / Job Create, you will see an additional option to add a secondary location:


To go ahead and add an additional location, click on ‘+ Add secondary location’.
- This will add in an additional field where you can enter the town and postcode:
- The town and postcode for the additional location are used for job searching.

You can add further multiple locations by selecting the ‘Add secondary location’ button again (1) and if needed delete any no longer needed locations by pressing the bin icon on the right-hand side (2):


After adding your location(s) follow the next steps:
- Select a region or division from the list available.
- Select a business unit from the list available.
- Select an internal category from the list available.
- Add a cost centre.
- Not all organisations will use a cost centre so this may not be a visible option to you or you may be required to select from a static list.

🟣 Assigning Users To A Role
Assigning specific users to a role allows you to share the job with the user(s) you have assigned to it.
One example where you may like to assign a user is if you are going on annual leave and you would like a colleague to manage the role while you are away.
The user(s) that you assign will still be restricted in accordance with their user type (i.e they may not have the same visibility and not be able to carry out the same actions in the ATS as you).
How does it work?
As soon as you publish the role, the assigned user(s) will receive an email notification. The email will contain a link, once selected, the user will be able to log in and navigate to the job.
By default the Hiring Manager role is set to the user that is creating the job, meaning you will normally see the name of the user rather than ‘Super User’.
Click on the button to the right of the role with the current users name in it (1).

A pop up will now appear.
- Start by clicking on the "X" icon next to the selected user to remove them (1).

- Then type in a different user's name and select the search icon (magnifying glass) to filter users (2).

- When the user’s name appears in the left-hand box below, select the arrow pointing to the right (show against each user’s name).

- The user’s name will now appear in the ‘selected’ box on the right-hand side.
- Select save (4).
- Repeat the process if required.


If you need to share a role with multiple people, for example multiple Hiring Managers, once you have published your job, you can share a role with several users by selecting this option within Job Flow:

🟣 Job Activity Options
Job activity options is an additional feature that allows you to automate withdrawing or rejecting candidates at a specific recruitment stage of your choice.
Activity relates to the candidate and the user processing the role (i.e. both users have to have been inactive for your chosen number of days).


To help support you the Job Activities Options allows for:
- Auto Processing Candidates

If you would like more information about Pre-Screening Questionnaires and how to auto process candidates using this method, 🖱️ see this page here.
📌 Auto Process Candidates
Only 1 of the 2 options above can be selected to take place after a period of inactivity (the period is chosen by the job creator during the job creation process).
The automated process can only take place once a candidate has been moved to a particular stage in the recruitment process (the stage is chosen by the job creator during the job creation process).

➡️ How to use the feature:
On the first page of the job creation process scroll mid way to “Job Activity Options”, where you will see the following.

“Auto Process Candidates”
- Reject Candidates
Select this radio button if you want to automatically reject candidates after a period of inactivity.
Once you have made your selection (if using the feature) enter the number of days you wish to apply as the period of inactivity also selecting the stage from the drop-down menu.
When you are happy with your selections you may continue with the job creation process as normal.
🟣 Job Notifications
There are two types of Job notifications that you may see.
1. This first option sends a Job Notification to the email address(es) that you have entered here, each time a candidate applies for the job you are recruiting for. This is useful if a user doesn’t need to log in to the ATS on a regular basis.

2. This second option sends a Job Notification to the Job Owner when a specified number of completed applications has been reached. It's up to you to set the specified number of applications.
For example you may be struggling to hire for a certain role and need to know every single time someone applies, but if you're being inundated with applications you may only want a notification after every 25 instead.

🟣 Job Application Settings
The Job Application Settings section allows you to control how candidates apply for a role. Here, you can manage key application options such as preventing ATS applications, setting application restriction groups, accessing legacy Tribepad video interview settings (where still enabled), and defining the main application flow. These settings help ensure each job is configured in line with your recruitment process.
🟣 Prevent ATS Applications
You can prevent candidates from applying through the ATS by selecting the relevant checkbox. This is useful when advertising a role on behalf of another organisation and you are not managing the hiring process directly.
Once selected, a field will appear allowing you to paste an external application URL, directing candidates to complete their application outside of the ATS.

🟣 Application Restriction Groups
Application Restriction Groups can be enabled to limit how many active applications a candidate can have at one time. This is selected via a drop-down field during job creation.
For example, you may choose to limit candidates to 4 applications within a 365-day period.


🟣 Legacy Video Interviewing
Our legacy Video interviewing feature is no longer available, but if you are an existing customer will still be accessible. If you would like further information about our new Video Interviewing functionality, 🖱️ see this page here.
If this legacy functionality is still part of your contract, you can select from a list of available video interviews that you or your colleague(s) will have already created.


If your user type permits you will also be able to;
- Select ‘create a new video interview’.
This action will take you straight to the video interviewing platform.
- Select the check-box to include the selected video interview as part of the candidate’s application process.
The candidate will need to complete the video interview as part of their initial application for the role you are recruiting for.

If you need further information about our Legacy Video Interviewing feature 🖱️click here.
🟣 Application Flow
These are the steps that you require any candidate to complete when they apply for this particular role.

Expand the options by selecting the "Expand/collapse options" button.
The application flow is split into the following steps;
➡️The Registration Page (Step 1)
When a candidate selects to apply for the role, they will first be presented with requests for information in order to register their profile.
- An email address.
- A password.
This step is pre-set and cannot be amended.

➡️ Profile Builder (Step 2)
The Profile Builder contains everything that you may need to know about the candidate, for example their address and date of birth.
You will also see information about their career history and skills along with details about their job activity, such as information about job applications they have made.
The information that you choose to include here (by making fields not required, optional or required) is entirely your decision.
The profile builder allows you to select the toggles to make certain information optional, required or not requested.
When you are toggling fields on and off, you may wish to consider how long the application process should be.
For example, if you require candidates to upload a CV, consider whether it is also necessary to make completing the career history section mandatory.


Also included in the Profile Builder section, is an optional toggle for 'Additional optional fields'.
Toggling the Additional Fields option on, in the application flow allows you to enable or disable extra fields for candidates.

By enabling Additional Fields, you can collect key information such as:
- Notice period
- Willingness to relocate
- Required salary
- Other relevant candidate details
This information helps hiring managers better understand candidate preferences and identify or suggest suitable alternative roles in the future.

Wherever you see this arrow with 3 lines symbol, you can change the position of the field.
In the example below, you may wish to move the mobile number and address for the candidate (1). These can be moved either up or down in the workflow.

To do this simply select the icon and drag and drop the field into the position you would like.
➡️ Questionnaires
At the bottom of the Profile Builder, is a section where you can add in pre-made Questionnaires to your application.
For more information about how to create Questionnaires 🖱️click here.


To find out further information on agency questionnaires 🖱️ see our further guidance here.
Select the questionnaires button and you will be presented with a pop-up.

- Select "Type "from the first drop-down menu followed by "Questionnaire".
As an example, Pre-screening questionnaires are generally used as part of the candidate’s application journey to help you streamline your candidates right from the start of the recruitment process.
If you have already set up a pre-screening questionnaire, you will be able to select it from the "Questionnaire" drop-down list.
If you need more guidance on how to create a Questionnaire 🖱️click here.


- Now select "Candidate Type".
Select whom you would like to complete the questionnaire e.g. just external candidates.

When the questionnaire is inserted into the Application Flow, it will show as something like this:

You will also see that there is the option to allow an Agency user to complete a questionnaire if needed, to do this, simply click the check box next to "Agency".
For further information on Agency Questionnaires, 🖱️ please see this page here.
- Once you have completed the above, If needed, you can use the arrow with 3 lines
symbol to move the questionnaire into whatever position you choose.
Something you can also do, is add a questionnaire to the Registration page of your Application Flow.
- To do this, you can simply add another questionnaire then use the
symbol to move it all the way up the page.
You may see a red line as you move it through the 'Profile Builder' section - this indicates that you cannot move the questionnaire to this section:

- Keep moving your questionnaire up until you are above the Profile Builder section:


- Please only use a standard questionnaire type when performing this action
- If you use a branching questionnaire on this Registration page, you will experience errors and your candidates will not be able to apply to your role.
If required, you are also able to add in Integrations to the application process at this point. To do this, simply select the “Type” drop-down and select “Integrations”.


➡️ How To Add New Video Interviewing To A Job Via Questionnaires Option
To get started, click on the “Questionnaires” button (1):
You will then see a pop-up. First click on the “Type” drop down and select integrations (1), you will then need to click on the “Integrations” drop down and select your Video Interviewing integration (2) (this will be called whatever you chose to name this when setting up the integration) and finally click on the “Candidate Type” drop down (3) to select whether you want Video Interviews to be completed by External, Internal or all types of candidates:

Once you have clicked “add” you will see that your Video Interview Integration has now been added to your application flow:

This will automatically add your integration to the bottom of your application flow, but if needed you are able to move this using the 3 lines and arrow icon.
To move this to post application, drag the box to the bottom (just below personal statement) (1):

You now also have the option to automatically trigger a Video Interviewing at different stages if needed. To do this, simply click on the toggle to select “Auto” (1) and then select at what stage you want an interview to auto-trigger to the candidate.

To complete the process of adding Video Interviewing to your job, scroll to the bottom of the page and click on “finish/save and continue later” or “next” depending on whether you are editing a previously created job or creating a new one.

For further information on how to set up this integration & how to create your video interview questions 🖱️ click here.
➡️ Fair Contact Policy
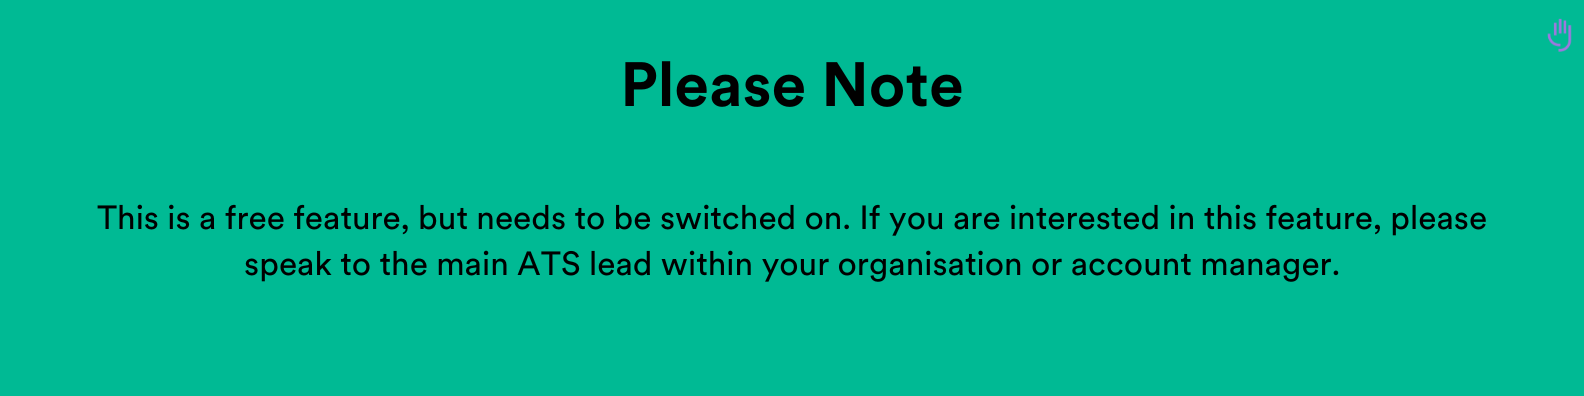
The Fair Contact Policy helps you stay on top of candidate communication by notifying you when it's time to respond - reducing ghosting and improving the candidate experience. This free feature ensures a fair and timely follow-up.

For further information on how to set up the Fair Contact Policy & what this looks like once on a job and candidate, 🖱️see our further guidance here.
➡️ Ask For CV
You have the option to ask candidates to upload their CV as part of their application. If you have already asked them to enter in personal information that may be replicated on their CV, think about whether you would like them to duplicate this and whether uploading a CV is necessary.
You can make this option required, optional or not required.
- You can choose to add some text in the field to the right of ‘optional’ - to provide guidance.


➡️ Ask For Portfolio
Depending on the role you are recruiting for you may want to ask the candidate to provide a portfolio. The candidate may provide a link to their current website or even a video showing their journalism skills for example.

➡️ Ask For Additional Documents
Think about whether you need to see evidence of qualifications the candidate may have gained, you could ask them to include that type of information - when the candidate reaches this step in the application they will need to upload documents.

➡️ Date Gap Job
Some organisations need to account for a candidate's previous job and or address history spanning X number of years.
Date gap allows you to collect this information and also allows the candidate to account for a Life Event (perhaps a candidate has just left further education and cannot provide any career history).

For further information about Date Gap 🖱️click here.
➡️ Diversity Questionnaire
The final step in the candidate's application process is to choose if and at what point you would like to provide your diversity questionnaire (if applicable).
Toggling the Diversity questionnaire on means that the candidate can complete the questionnaire at this point if they wish.

However, if you would like to make your Diversity Questionnaire a mandatory part of the application process, you can use the arrow with 3 lines symbol to move the questionnaire up into the main part of the application flow:


The application progress bar toggle can be selected so it shows as ‘Yes’ and if you would like to provide the candidate with the extended version, move the toggle to show ‘Extended On’.

This will provide the candidate with a progress bar during their application so that they know what they have completed and what actions are remaining.
Once you have finished setting up the candidate's Application Flow you can minimise the menu.
👫 Candidate Processing
This section will show you the candidate processing side of the process when creating a job. Including setting up email packs, adding onboarding workflows and anonymous applications to name a few.
🟣 Email Pack
Every email that is generated by the ATS is part of what we call an email pack.
Your organisation has the tools to customise the email pack so that you can communicate with your candidates in a way that is appropriate.

In order to edit an email pack, head to 🖱️ Manage, and click on the “Platform Configuration” option from the top menu, and then select “Emails Manager” from the drop-down list:


We also offer the option to use a feature called “Custom Email Packs”, this is in addition to the default email pack.
A custom email pack is a copy of the default email pack and can be customised so that you may align the customised pack to a specific role. You could have one or even multiple customised email packs if you wanted to.
The menu below allows you to choose from the default email pack or any customised email packs that have been created.


🟣Onboarding
If you use our Onboarding feature as part of your contract with Tribepad, this menu will be available.
Onboarding packages are created to house various onboarding materials, for example, policies that you would like a hired candidate to read and acknowledge, Welcome videos or the ability to provide bank details.
- To add this, select the relevant Onboarding Package (or 'Template') from the available list shown in the drop-down menu.

🟣Animations (Confetti)
The Animations permission enables you to celebrate those candidates that are being moved to Hired! A pop of confetti will explode on your screen once a candidate is moved to the Hired bucket.
When creating your Job Role or Template you will see the following option and simply need to make sure that the “Enable Animation” box is ticked:


To activate the Confetti explosion, simply move your candidate to Hired through the normal process
The confetti will fire when you send the relevant email to the candidate or when you click “Hire only”:

For further information about Hiring A Candidate 🖱️click here.
🟣 Candidate 3rd Party Checks
Tribepad allows integration with TrustID so that you may implement any right to work and background checks as part of your recruitment process within the ATS.
The set up for this feature varies for each organisation so please follow your internal process for requesting right to work and/or background checks.


If you would like further information about Tribepad Checks, 🖱️ please see this page here.
🟣 Anonymising Candidates
Anonymous applications are an additional feature that can be enabled to help you ensure that candidates are being screened fairly and without any unconscious bias, right up to the interview stage.
➡️ How does it work?
If the “Enable Anonymous CV Sending” checkbox is selected, when you send a CV to a hiring manager, their details will be anonymised. In order for the CV to be anonymised, a Tribepad one is generated, rather than the candidate's own being sent over.
With that in mind, it is best to ensure that you ask the candidate to complete all of their profile as part of the application process.

If the first checkbox is selected, the second checkbox will then become available.
If the second check box is selected the candidate's profile and application will be anonymised right up to ‘Interview Stage’.

For more information about Anonymous Candidates please 🖱️ see our further guidance here.
🟣 Internal Feedback Forms
Internal feedback forms allow you to add a Shortlist Questionnaire and/or CV Feedback Questionnaire. These are intended for internal use, and will not be candidate facing.
To add one or both, simply click on the drop down menu, and select the required pre-made questionnaires.

To find out more about creating Questionnaires 🖱️click here.
🟣 Interview Stage
Interview workflows are useful if you have different interview requirements for specific roles.
You can create up to 5 separate interview workflows any of which can be selected at this point in the job creation journey.
Under the interview stage, you may see an option called “Interview Workflow” - This workflow relates to the different stages of the interview process.

To select the required pre-made Interview Workflow, simply click the drop-down menu (1):

In the example below, you can see what your Interview Workflow looks like from the “Booking Interview” stage once your job is live and you have a pool of applicants. The drop-down list shows all of the interview stages available with “Face to face interview” being the 3rd stage in this particular interview workflow.


If you would like to learn more about how to add Process Questionnaires to your interview workflow, see this guidance here. You can also find out how to add multiple process questionnaires for each interview stage.
➡️ How To Add SMS To Your Job
From this part of the process you also have the ability to add SMS to your job by simply clicking on the "Enable SMS Notifications" checkbox.

🟣 Offer Stage
The offer stage allows you to add in any pre-made “Offers Questionnaires”. To do this, simply click on the drop down menu and select the required questionnaire.

To find out more about creating Questionnaires 🖱️click here.
📩 Custom Notifications
This is an additional feature that allows you to automatically notify specific users about an action that has been taken.
This allows you to:
- Turn the notification on for that stage.
- Edit the email content for that specific job or instance.
- Make one-off adjustments before the email is sent.
This approach works well when you need a tailored message for a particular campaign, role, or situation.
However, if you want the same messaging to be sent consistently across multiple jobs, the content should be managed within the 🔗 Email Pack.
Managing the content in the Email Pack ensures:
- Consistency in tone and messaging.
- Standardised communication across the business.
- Easier long-term maintenance and updates.

In the below example a notification has been set up to let the candidate know when they have been shortlisted.

- Select the stage at which a notification should be generated:
- Select the notification method:


- Select who the notification should be sent to:

- Add your content (the message that the user will receive).
- Format the content using the different icons at the top of the content box. You can also add links and images.

Your notification is shown beneath the content box, you can select the ‘remove’ button at any time and you can continue to add more notifications if required.

.png?width=753&height=188&name=Insights%20-%20Callouts%20(5).png)
‼️Important: Only one version of an email per stage can exist (with the option for an internal and an external version).
Because of this, the content may need to remain relatively generic if it is being used across multiple roles or scenarios. Where highly tailored messaging is required, consider carefully whether a custom one-off notification is more appropriate.
✒️Custom Fields
Custom fields allow you to capture additional information about the role you are recruiting for. These can be used to capture information such as; the reason for recruitment (i.e. new employee or contractor etc).
If your organisation uses custom fields, they may be a required or optional field depending upon your internal process.


To find out further information about how to set up and manage custom fields, 🖱️ see this page here.
📆 Job Dates
This section allows you to choose the dates that you would like to make the role visible for applications.

To do this, simple:
- Choose who the role should be visible to
- If you would like it to be visible to internal employees and external candidates, choose ‘everyone’ - If you would like to make the role visible to internal candidates initially and then everyone from a later date, use the ‘then from’ option
- Evergreen jobs
- If selected, this means that your role will never expire - You can also choose to set a Grace Period for candidates who may need to complete their application after the closing date
- To find out more information about Evergreen Jobs 🖱️ click here.
-To find out more information about Application Grace Periods 🖱️ click here.
- Enter an expiry date (if the role isn't Evergreen)

You still need to publish the job in the system. Once published, it will remain hidden from the careers site, job boards, and platforms like Indeed until the open date is reached, at which point it will appear automatically.
Select “Next” to continue or if you would like to save your content and complete it later select “Finish/Save And Continue Later”.
Cancel will close the page and you will lose all of your content.

If you select “Finish/Save And Continue Later” your role will be saved in the “Unfinished Jobs” filter found on the “Job List’” page.

✍️ Adding The Job Description
Once you have created your job it’s time to move onto the “package description”. The Job Description allows you to create your own Job Description within the Job Create and Job Template processes. It allows you to define your own headings, your own formatting and your own layout and gives you full autonomy over the look and feel of a job advert.
Bear in mind, when thinking about adding your job descriptions, you may not need to complete every single element on this page.
🟣 Single Job Description

➡️ Updating a Single Job Description
This functionality works in either the Job Create process or the Job Template process.
Once on this page you will be presented with the following sections:
- Logo Upload
- Single Description (internal)
- Single Description (external)
- Upload Documents
- Internal Job Notes
- Related Job Search Terms
To get started you have the option to upload your own company logo if needed, by clicking the “Upload Files” button:


You will also see the following pop-up relating to Tribepad’s Ad Assistant, as detailed this function only provides suggestions on how you could improve your job descriptions, but ultimately it is up to you what you include :

Below this you will see a box for Single Description Internal and Single Description External (more on this second one below).
In the Single Description (Internal) box you have the option to either type or paste a job description in (1).


When typing or pasting your job description in you do however have the following formatting options if needed:
You can add headers, format your text, add paragraphs and bullet points and align as required, using the icons at the top of each section:


- Clicking on this icon
brings up options to amend your text size by selecting the appropriate "heading":

- Clicking on this icon
brings up options for inserting a link, insert an image, insert a video or uploading a file


Once you have filled this in with your job description you then have the option to select the purple scales icon 
When checking for bias and looking at your results, these are simply helpful suggestions to make your advert as accessible as possible.
To make sense of your bias results you can hover over the question mark icon to see what your score means in more detail.

If you would like further guidance on writing accessible content you can click the link at the bottom of the right hand column:

This will open the following pop-up:

To find out more about our Ad Assistant feature 🖱️click here.
Once you have completed the above, if you scroll down you will see the following box, Single Description (External):

This section is to be used if you have a different job description for external candidates to internal ones, and follows the same steps of completion as listed above for Single Description (Internal).
If your job description for Internal & External candidates is the same, you can leave this section blank.
Your next steps in the process, are to upload any documents to the job description (if needed), you can also add any internal job notes and any relevant job search terms to help people to find your role:

Once you have completed all of the above you have the option to preview your job as either an internal candidate or internal candidate by pressing the relevant button:

You will then see a pop-up that allows you to preview your job:

Once you are happy with your job description, click either finish/save and continue later or next to continue with the job create process:

🟣 Job Description - Old Version

This old version of the Job Description is separated into multiple sections for you to edit:
➡️ Uploading files
If your organisation uses multiple logos perhaps for different areas of the business, this button will allow you to upload a file containing a specific logo if you would like to.
- To do this select the arrow pointing up & select the relevant file from your computer.
➡️ Package details
The package description will be visible on the job advert so it’s important to add some engaging content about what the candidate will receive if they are hired.
- Select the content box and start to type or;
- If you have a Word/Google document already, you can copy your content and select the 'Paste from Word' icon, shown above the content box.
- Then select to paste in your copied content and select 'OK'.


Below is an example of what your job advert may look like, once you have added your package content:

➡️ Internal job introduction
If you would like to display a job introduction that is internal candidate specific (for example; you would like a different communication style to external candidates), add text to this content box.
You can add text in exactly the same way as you have for the Package details.
➡️ External job introduction
If you would like to display a job introduction that is external candidate specific you can do it here.
Think about how you can add engaging job introductory content so that candidates want to apply and work for your organisation.
An example might be to add a video instead of or as well as written content.

Here is what your video will look like on the job advert:

- Select the video play icon above the content box.
- You will see the below pop up, add the URL to the required video.
- Select OK.

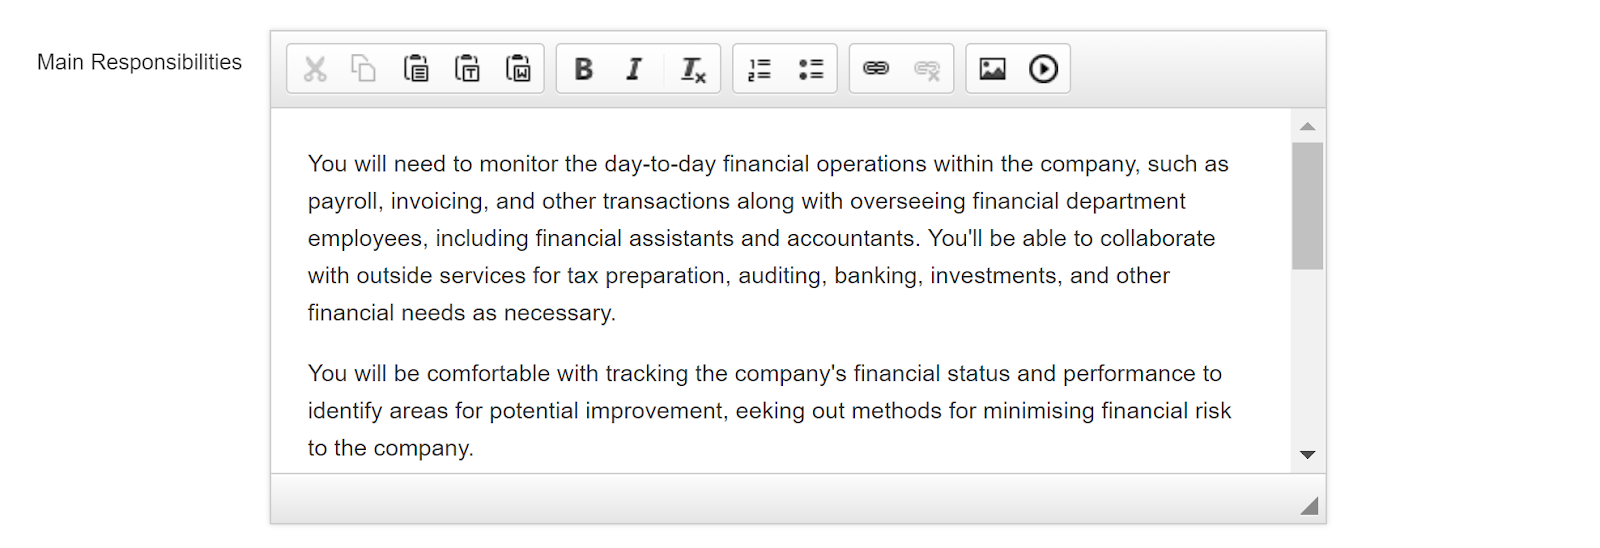
➡️ Main responsibilities
This section allows you to let the candidate know what their main responsibilities will be so they are 100% clear before they apply for the role.
➡️ The ideal candidate
Let the candidate know what you are looking for, think about your organisation's culture, talk about who you are and how you see a potential employee fitting into that dynamic. Perhaps specific qualifications or experience are a must-have.

➡️ Internal job notes
Adding internal job notes can help you and or your colleagues understand a bit more about the role, these notes are not required and they will not be visible on the advert.

➡️ Tag cloud
Help candidates to find your advert by adding tags, when a candidate uses any of those words whilst searching for a role, your advert will be much more likely to appear.
- Ensure the tags are separated with a semicolon (not a space).

➡️ Preview
Interested to see what the advert will look like? Select a preview;
- As an internal employee.
- As an external candidate.

➡️ Important things to note
If you use this Old Version of Job Description and want to begin using Single Job Description, any Jobs created using this format will not be updated to the new Single description
- Templates using the original job description format will also not be automatically updated
- You will need to update templates manually and transfer your formatting over.

To continue with the Job Creation process 🖱️click here to see how to Authorise & Publish your job.